Enter the code USA15 at checkout to apply your discount. Discount will be applied at checkout when the code is entered & applies to all parts. Cannot be combined with any other coupon or special offer & cannot be applied to a previously placed order. Not valid toward tax or shipping & handling. Discount has no cash value. Discount expires on July 1 at 11:59pm EST.
You've Got 10% Off Your First Order!Save 10% with code at checkout *click to copy coupon code
Make Your Dryer More Efficient and Safe With These Dryer Vent Cleaning Steps!
Post
Pin It
Share
Subscribe
Keeping your dryer vent clean is important for a couple of reasons. The cleaner your vent is the more efficient your dryer will work, saving you money
and the environment. It is also important from a safety perspective. Lint build-up in your dryer vents also cause lint build-up inside the dryer, which is
a serious fire hazard. You will want to inspect and clean your vents about once a year, however, if your dryer gets used more often than normal, you may
want to clean it every six months. Follow along to our steps outlined below and be sure to check out the video for a visual of all these steps in action!
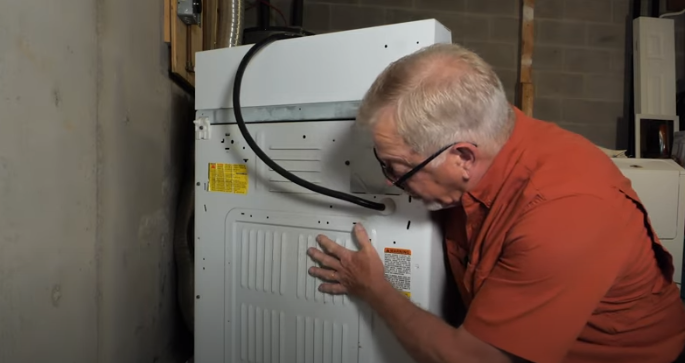
Step 1: Disconnect Power and Move Dryer Forward
Before you attempt to move the dryer, you will need to disconnect the power. Now that the power is disconnected, you will want to look at the venting and
make sure that as you move the dryer forward, you won’t do any damage to the venting.
Step 2: Pull the Vent off the Dryer
Now that the dryer is pulled forward, you will be able to access the vent at the back of the dryer. Pull the vent off with your hands and inspect it to
see if there’s any build-up of lint or debris in the area. You will also want to investigate the inside of the opening in the back of the dryer. Again,
make sure there is no buildup up of lint or debris.
Step 3: Inspect the Inlet Grills
If you notice quite a bit of lint build-up on the inlet grills, you will want to disassemble the dryer because chances are a fair bit of lint has been pulled back into that area and somewhere near the heating source, and this could become a fire hazard. You’ll need to remove the grate and vacuum all that
lint out.
Step 4: Turn the Dryer on
Next, you will want to use the dryer air to force out any lint that we may loosen up when we come in from outside to clean up the ductwork. Depending
on the type of equipment used to clean the ductwork, you may wish to add a device that prevents the brush from coming inside of the dryer. It attaches to
the outlet duct on the back of the dryer, and then the duct gets reattached to it.
To expel the loosened-up lint that we will create, you will need to turn the dryer on and force the lint out to the side of the home.
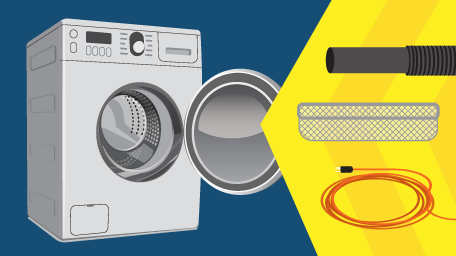
Step 5: Assemble the Rotary Brush
One of the most common methods for cleaning a dryer duct is to use some type of rotary brush. These are very easy to access, either through a rental
company or a local hardware store. It is a 4-inch brush that fits inside of the ductwork and can be driven with a portable drill. Depending on the method
being used, you may want to vacuum while you are cleaning, in which case you will need to attach an adapter to the brush, vent, and vacuum. It could become
quite dusty, so we recommend wearing a mask and eye protection.
Step 6: Remove the Vent Cap
Before feeding the brush into the vent cap, if you have a louvered style (like the one in the video), you will need to remove that first. If you have
a single flap, you will just need to simply lift it up and slide the brush in. If you are using a vacuum cleaner, you will need to remove the cap altogether. This is also a great opportunity to inspect the condition of the vent cap in case it needs replacing or repair. If it’s broken it could be
causing cold air from making its way into the home or an easy avenue for a rodent to enter the home.
Step 7: Clean the Ductwork
Now that the cap is removed, insert the brush into the ductwork. If you know the approximate length of the ductwork, you may want to attach an extension
to create a longer brush. When connecting an attachment make sure that it is nice and secure because you do not want it coming apart while in the vent.
You’ll want to use a set of pliers and electrical tape to ensure it is on nice and snug. Now you can attach the wand to your portable drill in a clockwise
direction.
Step 8: Reinstall the Vent Cap and Caulk
Once you have completed cleaning out the ductwork with your rotary brush, you can reinstall the vent cap. If you are installing a new vent cap or if
yours requires some maintenance, you may want to do some caulking around the perimeter to prevent any moisture infiltration.
There you have it; those are the steps to follow for cleaning out your dryer vent. It's such a simple job and will help keep your dryer running smoothly and prevent a common fire hazard. If you need any replacement dryer parts, be sure to check out our extensive library of OEM parts, and for more maintenance tips around the home, check out our YouTube channel!
The PartSelect Content Team has a passion for DIY and we pride ourselves on being a resource for quality, expert content to help you accomplish any DIY project. Alongside our expert repair technicians, our team of experienced technical writers works to provide safe and reliable information on all tasks and jobs around your home. We spend time learning about the problems and projects that our customers are working on, and we make it our job to answer key questions and provide resources for every step along the way. Repairs and DIY projects are what we do, and the PartSelect Content Team wants to help you do them, too.
With the Fix app, you can quickly and easily find information on your appliance, along with videos and articles to help you fix it.
"Like magic. I took a picture of the model number on my refrigerator, and the app identified it right away … Very convenient. I'm impressed." - Clever Jeff ★★★★★
You added 1 item to your cart
✖
$
Qty:
Total item(s) in cart:
Order Subtotal
$
*Taxes and shipping will be applied during checkout