This oven rack is chrome in color and is approximately 24.76 inches wide by 15.78 inches deep. If your old oven rack is damaged, you should consider replacing it. Many of our customers have determined...
This is a multi-use and multi-appliance screw. It can be used on a microwave, refrigerator, range/oven, air conditioner, dehumidifier, washer, or dryer. The measurements of this screw are 8 x 1/2 inch...
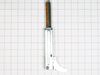
The temperature sensor measures the temperature inside the oven. If your oven is too hot, not heating evenly, is not heating enough when baking, or simply will not start, you could have a faulty tempe...
This broil element is found on the roof of the oven. The broil element is at the top of the oven and supplies the heat to broiling. 14" x 15" with 1-3/8" inserts.
This part works with the following...
This touch-up paint can be used on a wide variety of household appliances. It is most often used on washers, dryer, refrigerators, dishwashers, ranges, freezers, trash compactors, or microwaves. It is...
This thermostat is also known as a thermal cut-off fuse and is used in conjunction with your range. This part establishes and maintains the internal temperature of the oven cavity. When the temperatur...
This part is a light bulb that is 120-130 volts and 15 watts, and is used in conjunction with your range or wall oven. The function of this bulb is to illuminate the interior of the oven.Before making...
This part is the replacement door gasket for your oven. It is made of gray rubber and is sold individually. The door gasket runs along the circumference of the oven door and creates a seal that insula...
$31.61
In Stock
Questions And Answers for YKESS908SS00
We're sorry, but our Q&A experts are temporarily unavailable.
Please check back later if you still haven't found the answer you need.
1 question answered by our experts.
Sort by:
< Prev
1
Next >
Search filter:
Clear Filter
Your search term must have 3 or more characters.
Keep searches simple. Use keywords, e.g. "leaking", "pump", "broken" or "fit".
Sorry, we couldn't find any existing answers that matched.Try using some different or simpler keywords, or submit your new question by using the "Ask a Question" button above!
Dale
December 9, 2022
Broil element not working. Have replaced both element and high limit thermostat with no success. Bake element functions and cycles normally. No error codes appearing. What part should I look for?
Dale
For model number YKESS908SS00
Hi Dale, thank you for reaching out. You need to check the temperature probe, part number PS11747165, and the electronic control board, part number PS11749720, to fix the issue. We hope this information helps! If you need help placing an order, customer service is open 7 days a week. Thanks again for your great question.
Something Kitchen Aid wont tell you but running a self clean on this model stove blows the fuse located on the back of the stove.
First I slid the stove out and removed the back of the stove held in place by 8 Phillips screws. The thermostat fuse is located near the top middle on the back of the stove. Remove the 2 screws hold
... Read moreing it in place. Disconnect the wires, plug in the new part. Put it all back together. Job done in less than 30 minutes.
This repair would have cost $164 through A&E factory service.
My wife used the self cleaning function for the first time after 1.5 years of owning, of course out of warranty. A quick google search identified the problem. Called Kitchenaid, they said of course it can't be that simple, they had never heard of this problem, need to schedule a service call. Googled and found this site, Ordered the part
... Read more, came in, only took a screwdriver and about 20 minutes, just like all the other posts.
shame on Kitchenaid for not owning up to the problem. I even e-mailed them all the links, they did not acknowledge them.
This was easy and I'm glad I didn't go to the trouble and expense of hiring an appliance repair person. I'm reasonably handy, but I really have no experience in this kind of repair. I'd like to mention that the part I ordered arrived in just two days and it was exactly the right part, so I was very pleased in that regard.
Aft
... Read moreer turning off the circuit to the wall oven and confirming that the power was off, I had to remove the oven from the wall in order to access the wires and connections in the back. Normally, this wouldn't have been necessary because usually the broiler element can be disconnected from the clasps that connect it to the electric source by simply unscrewing the defective element from the roof of the oven, pulling gently on the connection ends from inside the oven cavity in order to "pull out" an inch or two of the electric source wires and the metal clasps that accept the "male" connecting ends of the broiler element. Once the a bit of the wire and the metal connecting clasps are exposed and able to be held with pliers, the element can be disconnected from the connector clasps by simply pulling on the prongs of the element (hard).
But in my case, one of the metal connecting clasp for one of the wires had melted, presumably when the element burned out, and that clasp could only be accessed and replaced from the back of the oven. Also, I would imagine that the wires and clasps could "slip" back behind the unit when they're disconnected if that's not done carefully. However, removing the wall oven was pretty easy for me -- even as a one-person job. I just put a tall table in front of it and slid it out so that it rested on the table.
If you have to replace a metal connector clasp, they're inexpensive and available in the electrical departments of hardware/home stores.
In my case, there's a metal panel at the back of the oven that had to be unscrewed and removed so that I could access the areas where the electrical source wires connect through the back wall of the oven to the broiler element. This was just a matter of removing a few screws and then removing the metal panel.
Once the metal panel at the back of the oven was removed, I was able to replace the melted connection clasp by using a wire cutter/stripper and then pliers to secure the clasp on the end of the exposed wired by deforming the clamp with the pliers. Once that was done, I simply removed the screws that held the broiler element to the top of the oven cavity, disconnected the remaining three clasps that connect the element to the source wires (the fourth clasp was the one that had melted and that I'd replaced), removed the defective element, inserted the four "male" prongs of the broiler into the four clasps that connect them to the source wires, replaced the metal panel at the back of the oven, screwed the new element back into the top of the oven, slid the oven back into the wall cavity, turned the circuit back on, crossed my fingers, and everything worked like a charm.
I saved a money, but more importantly (for me) I saved a lot of time that I would have had to have spent waiting around for a repair person.