Enter the code USA15 at checkout to apply your discount. Discount will be applied at checkout when the code is entered & applies to all parts. Cannot be combined with any other coupon or special offer & cannot be applied to a previously placed order. Not valid toward tax or shipping & handling. Discount has no cash value. Discount expires on July 4 at 11:59pm EST.
You've Got 10% Off Your First Order!Save 10% with code at checkout *click to copy coupon code
This broil igniter assembly comes with its own metallic mounting bracket and a 7-inch-long dual wire lead with a plastic plug. This part will need to be repaired if your oven element is giving off no ...
$93.22
In Stock
Order within the next 5 hrs and your part ships today!
This is a surface burner igniter, also known as a top burner ignitor and stove top spark electrode. It is used to generate the spark that lights the surface burner. If your stove will not start, eleme...
$41.08
In Stock
Order within the next 5 hrs and your part ships today!
This is a leveling leg for your oven, range, or stove. The leveling legs on your oven allow your appliance to sit perfectly flat. The new one may be longer in length than your original, but will work...
$21.16
In Stock
Order within the next 5 hrs and your part ships today!
This burner cap assembly is sold with the spark electrode igniter and has a 7-inch outer diameter. This manufacturer-approved surface burner is for gas ranges. The surface burner supplies the heat to ...
$71.47
In Stock
Order within the next 5 hrs and your part ships today!
This is a replacement screw and washer for your oven/range. It is a Phillips-head screw approximately half an inch long, and the washer is approximately 1 inch in diameter. The screw attaches the oven...
$7.95
In Stock
Order within the next 5 hrs and your part ships today!
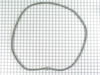
The oven door gasket on your range functions as a seal between the warm interior of your oven, and the outside. It prevents heat from fleeing your oven when the door is closed. Before making any repai...
$87.15
In Stock
Order within the next 5 hrs and your part ships today!
This orifice tube assembly is a genuine OEM replacement part for your gas range. This is a very easy repair. Start by removing the grates and use a strap wrench to loosen the burner heads. Disconnect ...
My oven has two igniters so I needed to determine which one was the problem.
Using the amp/multi meter I tested the connection between the igniters and the valve, with the oven turned on, to find the bad igniter. Depending on the model of stove you have, the amp reading you need for a properly functioning igniter will vary. My
... Read more lower igniter read 2.7 amps with a rated amp between 3.3 and 3.6. So that was the culprit.
Replacing the igniter was easy. Two screws and a wire connected with a plug. I was able to do the diagnosis and unplug the wire without pulling the oven out. I pulled the drawer out and removed the two screws in a cover behind where the drawer was. You may not be so lucky…I have long arms.
I found removing the oven door made it easier to reach the igniter itself. To remove the door just open it slightly and pull up, it should come off easy…and replace in opposite manner.
Keep track of your screws and put it back together the way you found it except for the igniter that is.
Anyone with moderate technical skill could easily do this repair. The diagnosis is the hard part. I estimate I saved about $200 doing it myself.
Replacement of these burners is very easy. You just twist the burner counterclockwise a quarter turn and pull it out. (You may need a big wrench if the range is very old.) Once out, just pull the two wires off and push them onto the new burner. Crimp them on with pliers if they're loose -- mine were. Twist the burner back on. If the
... Read more gasket under the burner has disintegrated, don't worry about it. They don't offer replacements for them because they're not necessary as a safety feature. They were designed to keep overspills from running under the cooktop, but the ridge around the hole is likely higher than you'd ever need.
Lift out sealed burner assembly rear of stove first while careully sliding to rear to disengage ignitor probes.Remove philips head screws from bottom sheet metal housing to expose bottom of burners Remove gas tube assembly screws and move tube away carefully.Unplug wires from ignitor.Remove screws for ignitor .Remove ignitor, I noticed t
... Read morehat rust and dirt had built up around burner to pan connection.I used my oil filter wrench to turn slightly the burner to remove it from the pan to clean.Reassembled in reverse order.