Models > WED6120HW3

WED6120HW3 Whirlpool Dryer - Overview

Sections of the WED6120HW3

[Viewing 1 of 1]
Keep searches simple, eg. "belt" or "pump".
High Limit Thermostat and Thermal Cut-Off Kit – Part Number: 279973
High Limit Thermostat and Thermal Cut-Off Kit
★★★★★
★★★★★
(21)
PartSelect #: PS334387
Manufacturer #: 279973
Also known as Thermal Cut-Off kit. The thermostat acts as a safety mechanism that keeps the dryer from overheating and the fuse is like a backup system - it's set to trip at a higher temperature than...
$53.23
  In Stock
Outlet Screen Door Grille – Part Number: W11086603
Outlet Screen Door Grille
★★★★★
★★★★★
(18)
PartSelect #: PS12070617
Manufacturer #: W11086603
Top cover for lint filter.
$27.87
  In Stock
Motor Pulley – Part Number: W10837625
Motor Pulley
★★★★★
★★★★★
(4)
PartSelect #: PS11727942
Manufacturer #: W10837625
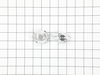
This part is the replacement motor pulley for your dryer. The motor pulley allows the dryer belt to run straight while the dryer is operating. If your motor pulley is damaged, your dryer may not tumbl...
$65.81
  In Stock
Terminal Block Screw Kit – Part Number: 279393
Terminal Block Screw Kit
★★★★★
★★★★★
(2)
PartSelect #: PS334188
Manufacturer #: 279393
This kit includes 3 screws and 3 nuts.
$36.41
  In Stock
Terminal and Wire Kit – Part Number: 279318
Terminal and Wire Kit
PartSelect #: PS334181
Manufacturer #: 279318
$67.90
  In Stock
Retainer-Idler 1/4-20 x 1/16 – Part Number: WP3389420
Retainer-Idler 1/4-20 x 1/16
★★★★★
★★★★★
(1)
PartSelect #: PS11741432
Manufacturer #: WP3389420
Sold individually.
$7.75
  In Stock
HOUSNG-OUT – Part Number: W11129408
HOUSNG-OUT
★★★★★
★★★★★
(1)
PartSelect #: PS12114481
Manufacturer #: W11129408
$57.63
  In Stock
Wiring Harness – Part Number: WPW10298258
Wiring Harness
PartSelect #: PS11752344
Manufacturer #: WPW10298258
$6.49
  In Stock
Screw, 8-18 x 1/2 – Part Number: WP9740848
Screw, 8-18 x 1/2
PartSelect #: PS11747046
Manufacturer #: WP9740848
$5.37
  In Stock
NUT – Part Number: W11213336
NUT
★★★★★
★★★★★
(1)
PartSelect #: PS12349325
Manufacturer #: W11213336
$7.73
  In Stock
Screw, 8-18 x 5/8 – Part Number: WP489463
Screw, 8-18 x 5/8
PartSelect #: PS11742750
Manufacturer #: WP489463
$5.37
  In Stock
SEAL-WINDOW – Part Number: W11676508
SEAL-WINDOW
PartSelect #: PS17216176
Manufacturer #: W11676508
$26.92
  In Stock

Questions And Answers for WED6120HW3

Be the first to ask our experts a question about this model!

Common Symptoms of the WED6120HW3

[Viewing 4 of 4]
Too hot
Fixed by
these parts
Fixing
Show All
Noisy
Fixed by
these parts
Fixing Fixing
Show All
Not Heating
Fixed by
these parts
Fixing
Show All
Marks left on clothes
Fixed by
these parts
Fixing
Show All
Keep searches simple. Use keywords, e.g. "leaking", "pump", "broken" or "fit".
Flashing E1 code for a bad thermistor
I replaced the thermistor earlier, but the code was still flashing. I noticed the heater terminals were charred and pretty well covered in carbon. So, I replaced the heater, the thermostat and thermal fuse and replaced the 3/8" spade terminals on the heater wires. (These are hard to find - most electrical spades terminals are .250. Also, I crimped and soldered these for a connection with the lowest resistance possible). After all that, the code still flashed! I let the explatives fly, calmed down, and ran the control board test. (This is done by pressing "more time" "less time" "more time" "less time" in succession.) The control board was passing all the tests, but the thermistor test, and the only thing is in this circuit is the thermistor, the wires, the connector to the control board, and some circuit on the control board that involves a few resistors and the "brain" chip. So, I checked the terminals at the thermistor, the wires up to the control board and the connector at the board. The control board connector was fairly dust encrusted, so I unplugged it, cleaned the control board terminals and sucked away all the lint and dust. Finally, I carefully removed earch crimp terminal from the Molex connector (the white female connector) and cleaned and bent them to yield a better connection to the terminals on the control board. I put it all back together, and thus far it is working fine.
Parts Used:
High Limit Thermostat and Thermal Cut-Off Kit
  • John from Cedar Rapids, IA
  • Difficulty Level:
    A Bit Difficult
  • Total Repair Time:
    30 - 60 mins
  • Tools:
    Nutdriver, Pliers, Screw drivers
17 of 25 people found this instruction helpful.
Was this instruction helpful to you?
Thank you for voting!
Dryer not heating
Open breaker and ensure power was off. Checked heating components for continuity.Found thermal fuse had an open circuit.Replaced High limit thermostat and thermal fuse.Now is a good time time check for free flowing vent piping.I discovered mine was crimped below the floor and caused lint build up and obstructing the flow which could have led to the thermal fuse blowing.I replaced the vent piping as well.My wife says the dryer works better now than it ever has.
Parts Used:
High Limit Thermostat and Thermal Cut-Off Kit
  • Stephen from Andalusia, AL
  • Difficulty Level:
    Easy
  • Total Repair Time:
    30 - 60 mins
  • Tools:
    Nutdriver, Wrench (Adjustable)
12 of 22 people found this instruction helpful.
Was this instruction helpful to you?
Thank you for voting!
Broken Motor Pulley
Removed back panel of the dryer-reached my hand to the back of the motor shaft, put 7/16 wrench on it to hold the shaft while I removed the broken pulley with pliers. Very easy fix-the tech on Utube took the entire dryer apart totally unnecessary. If that is what the factory tells its tech"s to do its no wonder why the labor charge would be thru the roof.
Parts Used:
Motor Pulley
  • Mark from PELHAM, MA
  • Difficulty Level:
    Easy
  • Total Repair Time:
    1- 2 hours
  • Tools:
    Nutdriver, Pliers, Socket set
7 of 9 people found this instruction helpful.
Was this instruction helpful to you?
Thank you for voting!