This an authentic OEM 40-Watt replacement light bulb, used in a number of household appliances. It is specially designed to withstand extreme temperatures, which is why these replacement bulbs are mos...
This is a multi-use and multi-appliance screw. It can be used on a microwave, refrigerator, range/oven, air conditioner, dehumidifier, washer, or dryer. The measurements of this screw are 8 x 1/2 inch...
This part helps the compressor kick on and off while maintaining a constant temperature to keep things frozen in your freezer. If you are noticing temperature issues with your refrigerator or freezer,...
This hose clamp is used in a wide variety of household appliances. Most often it is found in washers, dishwashers, refrigerators, freezers, dehumidifiers, garbage disposals, or air conditioners. This ...
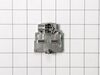
This part is a solenoid-operated switch located at the bottom of the refrigerator. When the water inlet valve is turned on, water is released from the supply line through the water valve and into the ...
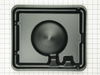
This ice cube tray is located inside your refrigerator and is eleven inches long, with 48 molds. It comes in white and is made entirely from plastic. If your tray is broken, cracked, or damaged, repla...
This set includes two nine and a quarter inch radiant glass defrost heaters joined together with wire. Each heater carries 500 watts and 115 volts. The defrost heater heats the evaporator in the defr...
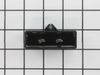
This part is both the start relay and the overload. The start relay boosts the compressor, and then shuts off as soon as the motor gets up to speed and the overload provides extra protection against e...
This is a problem in the defrost cycle. It is one of three items the heater, timer or thermostat.. I removed the screws from the back side of the freezer and romoved the sheet metal from the back which exposes all the elements. Below the evaporaro coils are two small plates which cover the heating elements ( two glass tubes conected to in
... Read moresulated wire), You may be able to look at it and tell if they are bad. Mine was burnt and obviously gone. If you disconnect from conectors you can check for conitinuity to tell if bad. Simply remove the four screws holding these in place and install new one the same way. quite easy. I did check the thermostat for continuity and relaced it also. It simply plugs into a clip on the back wall and two power connectors. If checking themostat for continuity make sure it is cold otherwise it will be open and you won't get a good read. The timer for this model is under \neather behind the grill on the bottom. simply turn the dial and if the motor stops it is probbably good. It runs 8 hr. and then will shut off for defrost heater to come on. Do this before closing up to tell that your new heater is working. It will get red quickly. Saved a lot of money on this one
The ice maker had been slowly dying and one day just stopped making ice. No water was getting to the trays.
I read that this could be caused by a failure of the valve, even though the continuity test indicated that the solenoid was okay.
I ordered the part Friday afternoon. It was delivered Saturday. I did the repai
... Read morer in 10 minutes.
I pulled the fridge away from the wall.
I unplugged the fridge. I closed the water supply valve.
I unscrewed the two mounting screws using a flat head screwdriver.
I pulled the old valve out from refrigerator.
Using an adjustable wrench I detached the water supply from the valve. I detached the hose leading to the ice maker from the valve.
I pulled the electrical connectors from the connectors on the valve.
I attached the hoses to the new valve, attached the electrical connector, screwed the new valve in its place, opened the water supply, plugged the fridge back in, checked for leaks, and waited for a few hours.
My ice maker is working better than it has in at least two years.