Models > MDE4806AYW > Symptoms > Too hot

Parts That Fix Maytag Dryer MDE4806AYW Too hot

Too hot is a commonly reported symptom for the MDE4806AYW Maytag Dryer, and we have put together a full guide on how to fix this. This advice is based on feedback from people who own this exact appliance. We have listed the most common parts for your MDE4806AYW Maytag Dryer that will fix Too hot. We have included repair instructions, and helpful step-by-step video tutorials. If you are experiencing this issue, not to worry, DIYers just like you have fixed this, and shared their experience to help you!

Fixes Symptom 37% of time
★★★★★
★★★★★
5 Reviews

Rated by 36 customers 


Easy 

30 - 60 mins 

Ratings submitted by customers like you who bought this part.   

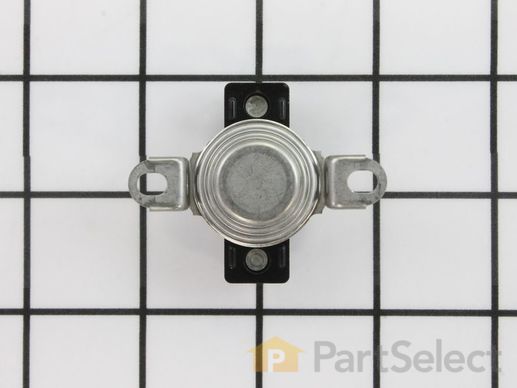
This hi-limit thermostat acts as a safety mechanism that keeps the dryer from overheating. With this thermostat, a dryer's heating element will cut out if the internal temperature reaches 225 degrees Fahrenheit. The element will kick back in when the temperature drops to 185 degrees Fahrenheit - the differential of 40 degrees.

$ 66.26
  In Stock
PartSelect Number PS11748479
Manufacturer Part Number WPW10116735

Replacing your Amana Dryer Limit Thermostat

Replacing your Limit Thermostat

Customer Repair Stories

No heat

I dismantled the dryer and replaced the thermostat and the heating element. The online videos are excellent. Thanks
  • Steve from fremont, NH
  • Difficulty Level:
    Really Easy
  • Total Repair Time:
    15 - 30 mins
  • Tools:
    Nutdriver, Pliers
0 of 1 people found this instruction helpful.
Was this instruction helpful to you?
Thank you for voting!

dryer temperatures appear too hot at all settings

removed lower front panel, two screws on bottom edge. Limit thermostat located on lower portion of vertical panel at rear of dryer. I was able to detach the two wires and removed the two thermostate retention screws with a nut driver. Since I could only operate with one hand, I taped the new thermostat in place lining up the screw holes in order to replace the two hex screws. reattached the two wires and front panel.
  • David from Crossville, TN
  • Difficulty Level:
    Easy
  • Total Repair Time:
    15 - 30 mins
  • Tools:
    Nutdriver
9 of 11 people found this instruction helpful.
Was this instruction helpful to you?
Thank you for voting!
Fixes Symptom 34% of time
★★★★★
★★★★★
8 Reviews

Rated by 16 customers 


Really Easy 

30 - 60 mins 

Ratings submitted by customers like you who bought this part.   

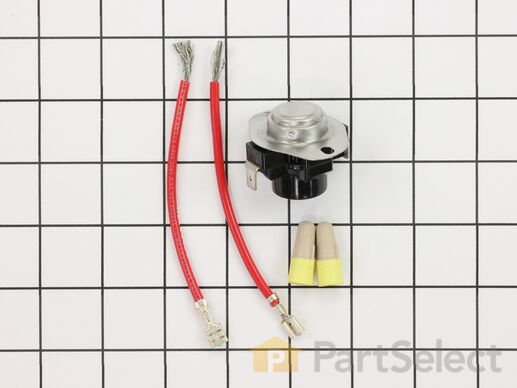
Cycling themostats continually cycle the heating element off and on to maintain a constant inner temperature within the dryer. This particular cycling thermostat can be adjusted between 135 and 155 degrees Fahrenheit. The differential of this thermostat is 20 degrees, meaning that with this thermostat, the heating element will cycle back on once the internal temperature drops by 20 degrees.

$ 57.27
  In Stock
PartSelect Number PS11743793
Manufacturer Part Number WP694674

Replacing your Kenmore Dryer Cycling Thermostat - Limit 135/155

Replacing your Cycling Thermostat - Limit 135/155

Customer Repair Stories

No heat in dryer

Took off the lower front panel, removed duct piece from filter to blower fan, removed two screws and two wires to thermostat in exhaust ducting, then replaced thermostat with new one. Very easy job and everything worked like new when I reassembled it.
  • Noah from Maiden, NC
  • Difficulty Level:
    Really Easy
  • Total Repair Time:
    Less than 15 mins
  • Tools:
    Wrench (Adjustable)
10 of 14 people found this instruction helpful.
Was this instruction helpful to you?
Thank you for voting!

Temperature setting not working

Took off back cover, thermostat was easily identified because of photos I've seen on website. Took 2 connectors off, removed 2 screws and removed old thermostat. That was pretty much it!

NOTE: Replacement thermostat 694674 has an adjustable temperature range setting that MUST be manually set prior to installing! You need to use the enclosed chart to find your original part# and make sure the setting is matched. My original part# 341146 had a "D" setting so I had to change but very easy to do.
  • Robert from Buffalo, NY
  • Difficulty Level:
    Easy
  • Total Repair Time:
    30 - 60 mins
  • Tools:
    Nutdriver, Screw drivers
17 of 20 people found this instruction helpful.
Was this instruction helpful to you?
Thank you for voting!
Fixes Symptom 29% of time
★★★★★
★★★★★
14 Reviews

Rated by 59 customers 


Easy 

30 - 60 mins 

Ratings submitted by customers like you who bought this part.   

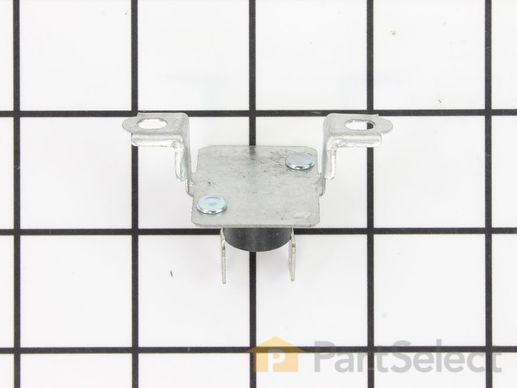
Meant as a backup to a high limit thermostat, this fuse is typically set to trip at a higher temperature than that of a high limit thermostat. This is a one-time use fuse, so when it does trip, you do need to replace it. It's letting you know that something is wrong with your dryer.

$ 12.95
  In Stock
PartSelect Number PS11742274
Manufacturer Part Number WP40113801

Replacing your Amana Dryer High Limit Thermal Fuse

Replacing your High Limit Thermal Fuse

Customer Repair Stories

The power didn't turn on

Follow the instructions on this webside
  • Alla from REGO PARK, NY
  • Difficulty Level:
    A Bit Difficult
  • Total Repair Time:
    30 - 60 mins
  • Tools:
    Screw drivers
1 person found this instruction helpful.
Was this instruction helpful to you?
Thank you for voting!

High limit thermal fuse blew because of lint buildup in discharge vent pipe

Opened things, saw lint buildup, cleaned inside of dryer, then cleaned entire vent discharge system, put new thermal fuse back, turned on dryer and heard metal to metal, opened dryer back up, saw missing glides (both gone). Ordered what I thought were 2 glides, 2 days later 1 showed, called and was told I didn't "update" when I changed order info (parts supplier cautioned to replace 2, should only sell in pairs) so then had to wait again for 2nd glide to show up. Replaced them today and noticed dried clothes are now cooler when finished. Will note in future if clothes are warmer, clean ductwork.
  • Gary from PORTSMOUTH, OH
  • Difficulty Level:
    Easy
  • Total Repair Time:
    1- 2 hours
  • Tools:
    Nutdriver, Socket set
4 of 4 people found this instruction helpful.
Was this instruction helpful to you?
Thank you for voting!