Models > FFEF3011LWD > Symptoms > Little to no heat when baking

Parts That Fix Frigidaire Range FFEF3011LWD Little to no heat when baking

Little to no heat when baking is a commonly reported symptom for the FFEF3011LWD Frigidaire Range, and we have put together a full guide on how to fix this. This advice is based on feedback from people who own this exact appliance. We have listed the most common parts for your FFEF3011LWD Frigidaire Range that will fix Little to no heat when baking. We have included repair instructions, and helpful step-by-step video tutorials. If you are experiencing this issue, not to worry, DIYers just like you have fixed this, and shared their experience to help you!

Fixes Symptom 47% of time
★★★★★
★★★★★
22 Reviews

Rated by 30 customers 


Really Easy 

15 - 30 mins 

Ratings submitted by customers like you who bought this part.   

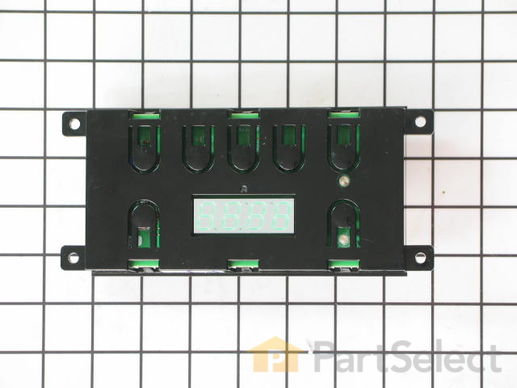
This is the electronic clock timer mechanism only. The overlay or touch pad is NOT included. To get the overlay, please use the model# of your appliance to search.

$ 151.53
  In Stock
PartSelect Number PS12728848
Manufacturer Part Number 5304518660

Replacing your Frigidaire Range Electronic Clock Assembly

Replacing your Electronic Clock Assembly

Customer Repair Stories

Oven and broiler don't work, but everything else does.

One day my wife turned on the oven and it didn't get hot. The heating element was cold even after it was turned on for a few minutes. The same story with the broiler. The stove top and timer worked fine, you could turn the oven on, it just never even started to heat up.
I ordered the new clock assembly and it got to my house in 2 or 3 days.
Once I got the new clock assembly, it was pretty easy to put in. Just take the back panel off (6 screws), unplug 5 or 6 wires, and 2 more screws and the old clock assembly is out. I peeled off the face sticker from my old clock and stuck it on the new one.
Putting it back in was just the reverse of taking the old one out. 2 screws, plugging in the wires, and then putting the back panel on.
Its been working as good as new for over a month.
  • Joshua from Normal, IL
  • Difficulty Level:
    Easy
  • Total Repair Time:
    30 - 60 mins
  • Tools:
    Nutdriver, Screw drivers
58 of 64 people found this instruction helpful.
Was this instruction helpful to you?
Thank you for voting!

Oven elements would not heat

Initially, I tested the temperature sensor and it was OK. I pulled out the range and shut off the circuit breaker to it. I removed the upper back sheet metal panel to expose the clock timer. I removed the 4 screws to it, unplugged the wires to it and plugged them into the new clock timer. I carefully removed the plastic facing stuck to the face of the old clock timer and stuck it on the new clock timer. No new adhesive was necessary. I placed the newly connected clock timer in position and secured it with the 4 screws that secured the old clock timer. I pushed the range back into position and reset the circuit breaker. I turned the oven on and the problem was resolved.
  • earl from seattle, WA
  • Difficulty Level:
    Really Easy
  • Total Repair Time:
    Less than 15 mins
  • Tools:
    Nutdriver, Pliers, Screw drivers
118 of 132 people found this instruction helpful.
Was this instruction helpful to you?
Thank you for voting!
2 PROBE
Fixes Symptom 38% of time
★★★★★
★★★★★
22 Reviews

Rated by 5 customers 


Really Easy 

15 - 30 mins 

Ratings submitted by customers like you who bought this part.   

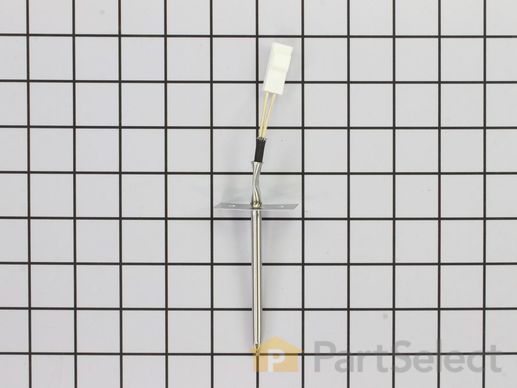
Note: Connector could be different than original. If so cut & splice wires together with porcelain wire nuts.

$ 22.75
  On Order
PartSelect Number PS11731754
Manufacturer Part Number 316233903

Replacing your Frigidaire Range PROBE

Replacing your PROBE

Customer Repair Stories

Error message on display ff30

Slid oven out removed one screw one plug replaced part took 5 minutes.told parts repair the error message and they sent me the correct part in two days will use them again saved me from Repair man wanted 85 dollars just to look at it my cost was 28 for probe and 8 dollars for shipping already helped neighbor with their stove they needed new ignighter 12 dollars repair place want 110 to come look at it this site walks you through repair best service!!!!
  • Roger from CHICAGO, IL
  • Difficulty Level:
    Really Easy
  • Total Repair Time:
    Less than 15 mins
  • Tools:
    Pliers
6 of 7 people found this instruction helpful.
Was this instruction helpful to you?
Thank you for voting!

Range would not come on

Turned off power, took back off stove removed old probe.
I had to splice wires since new probe ends did not match up.
the instructions were to splice the wires. I had the breaker off for about 3 hours. this is not in the instructions, but being a widow, I had to ask a few people why it would not come on after I connected the wires.
After waiting, I turned the breaker on and my range came back on.
  • MaryLou from Monroe, NC
  • Difficulty Level:
    Easy
  • Total Repair Time:
    30 - 60 mins
  • Tools:
    Pliers, Screw drivers
103 of 188 people found this instruction helpful.
Was this instruction helpful to you?
Thank you for voting!
Fixes Symptom 13% of time
★★★★★
★★★★★
6 Reviews

Rated by 4 customers 


Really Easy 

15 - 30 mins 

Ratings submitted by customers like you who bought this part.   

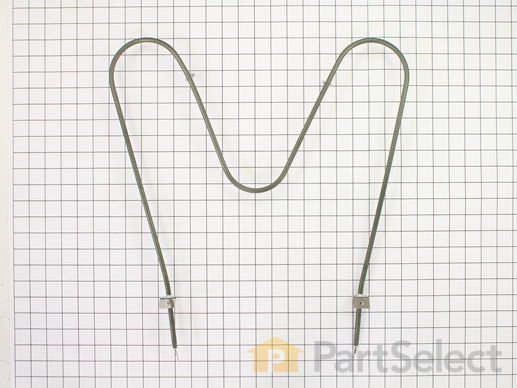
This bake element is found on the bottom of the oven.

$ 136.81
  In Stock
PartSelect Number PS2345209
Manufacturer Part Number 316225001

Replacing your Frigidaire Range Bake Element - 240V

Replacing your Bake Element - 240V

Customer Repair Stories

The stupid baking element died on CHRISTMAS EVE!

My husband removed the old one in a few minutes, the just popped the new one in when it came. Not for nothing, (where we purchased the stove) wanted $67 for the same part you all charged $49.00
  • Minda from Madras, OR
  • Difficulty Level:
    Really Easy
  • Total Repair Time:
    Less than 15 mins
  • Tools:
    Screw drivers, Socket set
12 of 17 people found this instruction helpful.
Was this instruction helpful to you?
Thank you for voting!

Bake element(bottom element) melted through, would not turn off until breaker shut off.

Pulled stove away from wall until I could access behind it. Disconnected power source, used nut driver to remove 7 small hex screws with nut driver, from back cover, slide down and away. Disconnect two wire( 1 from each end of element). Open oven door, remove all shelves, remove two screws inside oven on back wall, pull out old element. Guide in new element(gently guide each end through access holes in back of oven, line unscrew holes with retaining clips, insert screws. Place racks back in oven. Reattach back panelnwith 7 screws, plug power source back in. Slide oven back into place. Done.
  • Timothy from Greensburg, PA
  • Difficulty Level:
    Really Easy
  • Total Repair Time:
    Less than 15 mins
  • Tools:
    Nutdriver
39 of 48 people found this instruction helpful.
Was this instruction helpful to you?
Thank you for voting!
Fixes Symptom 2% of time
★★★★★
★★★★★
10 Reviews

Rated by 4 customers 


Easy 

15 - 30 mins 

Ratings submitted by customers like you who bought this part.   

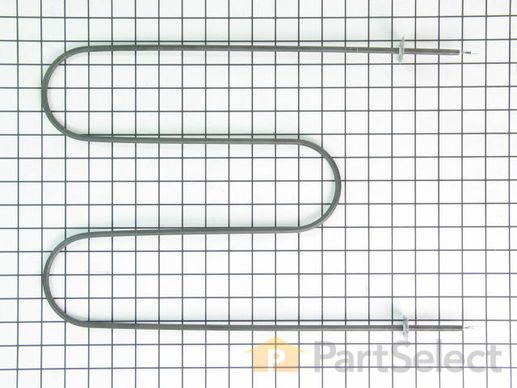
This broil element is located on the top inside the oven.

$ 133.15
  In Stock
PartSelect Number PS439671
Manufacturer Part Number 316203200

Replacing your Frigidaire Range Broil Element

Replacing your Broil Element

Customer Repair Stories

Bottom elerment burnt into

First i removed the two screws that hold the element
in place. I the pulled the element out about 3 inches and disconnect the 2 wires. The new one didn't come with the little holders at the front of the element and were very hard to get loose from the old element .i finally got them back on the new one and put it back in the stove. Pretty simple job though.
  • Danny from Gaffney, SC
  • Difficulty Level:
    Easy
  • Total Repair Time:
    Less than 15 mins
  • Tools:
    Nutdriver, Pliers
8 of 10 people found this instruction helpful.
Was this instruction helpful to you?
Thank you for voting!

Top Broiler element burned out

I disconnected power cord. Removed cooking racks. Removed element mounting screws. Removed back panel and removed wires on both ends. Pulled element out put new one in and bolted down. Reconnected wires. Put rear cover on. Plugged in and checked for correct opreation. OK!
  • Richard from Alexander City, AL
  • Difficulty Level:
    Easy
  • Total Repair Time:
    15 - 30 mins
  • Tools:
    Nutdriver, Socket set
40 of 53 people found this instruction helpful.
Was this instruction helpful to you?
Thank you for voting!