Enter the code USA15 at checkout to apply your discount. Discount will be applied at checkout when the code is entered & applies to all parts. Cannot be combined with any other coupon or special offer & cannot be applied to a previously placed order. Not valid toward tax or shipping & handling. Discount has no cash value. Discount expires on July 1 at 11:59pm EST.
You've Got 10% Off Your First Order!Save 10% with code at checkout *click to copy coupon code
This rear drum bearing kit is designed for use with dryers. It supports the rear of the drum in your appliance as it tumbles your clothes during the drying cycle. If your drum will not tumble, or if i...
$62.48
In Stock
Order within the next 6 hrs and your part ships today!
The upper drum glide is attached to the front panel of your dryer, you can locate it by removing the top portion of your dryer. The drum glide allows the drum to rotate with ease and little sound. The...
$34.87
In Stock
Order within the next 6 hrs and your part ships today!
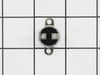
If your dryer does not tumble, will not start, is noisy, or is leaving marks on your clothing, you may need to replace the drum support bearing. The drum is supported at the rear by a bearing, which a...
$6.34
In Stock
Order within the next 6 hrs and your part ships today!
The dryer thermal limiter, also known as a thermal fuse, blows the fuse to cut off power to the dryer when the dryer begins to overheat. Once the dryer reached 220 degrees Fahrenheit, the heat cuts ou...
$27.24
In Stock
Order within the next 6 hrs and your part ships today!
The door catch on your dryer is an important part as it keeps your dryer door closed, in order to ensure no air or clothes can escape. This part works by holding the door strike, which allows the door...
$62.79
In Stock
Order within the next 6 hrs and your part ships today!
The door strike is attached to the door of your dryer and holds the door closed. If your dryer door is not closing, this might be due to the door strike needing to be replaced. This is a simple repair...
$16.16
In Stock
Order within the next 6 hrs and your part ships today!
First and foremost, I read the repair reviews here at parts source and found that a) Other people had the same symptoms, b)following their repair tips made it super easy. What I would add to previous reviews is to pull the front off or the little acces grill in back and check to see what kind of belt you have. According to the model
... Read more #, It showed the wide flat belt when in fact I had the smaller ribbed belt. Glad I checked before ordering. A few things that will make your life easier is once you have the old upper guide/seal removed, put down the glue then use several med sized plastic spring clamps to hold the seal in place while the glue sets up, (@ 20-30 min). Their cheap and you should have some around anyway. When replacing the seals I would go ahead and replace the belt too. It's cheap and if your machine is 5+ yrs old probably is worn. Total cost of repair was about $60 (inc shipping). Took about 1 hr 20 min total time. Most of that time was scrapping the old seal material/ glue off the dryer front. Actual disassembly and repair maybe 1/2 hour. Other little tip is the clips for the lid of dryer is to use a flat screwdriver and gently push straight in until it's compressed enough to release the lid, it will pop up when pushed in far enough. That one took me a while to figure out. Thanks to Part Select for such a helpful site. My dryer is like new again.
I looked in my appliance paperwork, found the model number, keyed it in, located and ordered the knob. It arrived in a few days and voila, pushed new knob on and dryer is back in great working order. Thanks!
1. Unplug dryer from outlet 2. Using Lg. flat screwdriver, pry under the front edge of the top and release two spring tabs 3. Lift up top and tilt back out of your way 4. Unscrew two phillips scews on inside of front panel 5. Lift up and out the front panel. Two spring clips at bottom. 6. Rlease tension on drum be
... Read morelt at the motor. Access panel at rear of dryer. 7.Unscrew 3 screws from inside, center rear of drum. 8. Remove drum through the front of the dryer. You may have to spread the sides apart a little bit for it to fit 9. Lift up on the rear drum bearing to remove it from the bearing retainer. ( U shaped plastic socket) 10. unsrew 2 screws and remove the bearing retainer, ground ball. Ball retainer is on outside of dryer. 11. Vacuum everything--duct, blower, lint trap, ect. 12. Intall new bearing retainer and grounding ball, an assistant is helpful at this time, one to hold ball retainer on rear of dryer, one to screw it in from the inside 13. reassemble remainder of parts in reverse order.