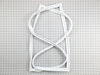
This is the door gasket for your freezer. It is white in color and made of rubber. The door gasket covers the circumference of the freezer door and creates a seal. If the gasket is loose or worn out, ...
This gasket retainer clip kit is for freezers. There are 24 pieces in this kit. The clips are what secure the gasket and liner to the freezer lid. The clips are white in color and made of plastic. If ...
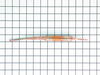
This part could be found underneath a fridge, dryer, or freezer. The original foot may be cracked, broken, or perhaps missing altogether. If you notice the appliance is uneven to the floor or wobbling...
This is a shelf support for freezers. It is used to help hold the inside of the shelf from both sides (left and right.) Please note: right and left side of shelf support are sold separately. If the sh...
This is a shelf support for the left side of a freezer. It is used to help support the inside of the shelf from both sides. *Please note: right and left side of shelf support are sold separately. If t...
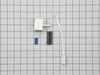
This part is both the start relay and the overload. The start relay boosts the compressor, and then shuts off as soon as the motor gets up to speed and the overload provides extra protection against e...
This is a plastic OEM drain plug that is attached to the drain system of your appliance and is compatible with several different makes and models of refrigerators, freezers, and air conditioners. This...
A filter-drier in a refrigerator has two essential functions. The first is to absorb system contaminants, such as water, which can create acids. The second is to provide physical filtration. This mean...
$12.09
In Stock
Questions And Answers for CFU14M2AW3
We're sorry, but our Q&A experts are temporarily unavailable.
Please check back later if you still haven't found the answer you need.
its best to use power screw driver lot of screws .took out all screws took off door took out side to remove ice from door. just used water to melt ice. took off old gasket and put on new gasket. put door in place and started screws in four coners do not tighten screws at this point.put in rest of screws. work arondclock wise making sure g
... Read moreasket is seated while tighing screws. check gasket for flatness you may have to use hair dryer on gasket to make it flat.
Simply unscrew panel but do not remove it. Remove old gasket. Fit new gasket between panel and door. Fasten screws and no more leaks and better temperature contol. This was so easy and rejuvenated my freezer. Thank you for quick shipment, great service, easy to navigate website, and fast phone help. I highly recommend your company. good l
... Read moreuck with your repairs that you can do, as I have zero mechanical ability and did it !!!!
After building a test box and determining the Controller was bad simply ordered parts and installed. Installation was a little difficult due to locking spades on electrical connections.
Unplug all power from freezer. Remove Bail wire from controller capacitor unit and remove from compressor by pulling STRAIGHT from compre
... Read moressor body to avoid bending contacts.
Use a very small instrumentation screwdriver to release locking spade on yellow and white wires. To unlock slide screwdriver in slot along wire entry to controller body while gently pulling on wire. Note position of wires and replace on new unit in same position/order. Plug new run capacitor into new controller being careful to orient capacitor to proper position (hole matches guide on controller unit). Plug newly installed controller and capacitor into condensor and replace bail wire.
Make sure timer is not in defrost mode - manually advance timer if necessary to ensure timer is in run mode. Turn temperature control to coldest setting. Plug in and hopefully enjoy the humming noise of your newly repaired and operational compressor and freezer.