Enter the code USA15 at checkout to apply your discount. Discount will be applied at checkout when the code is entered & applies to all parts. Cannot be combined with any other coupon or special offer & cannot be applied to a previously placed order. Not valid toward tax or shipping & handling. Discount has no cash value. Discount expires on July 1 at 11:59pm EST.
You've Got 10% Off Your First Order!Save 10% with code at checkout *click to copy coupon code
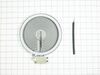
This surface element is made for under glass set-ups and supplies the heat to a cooking area on top of the range. It has an outside diameter of approximately 7 inches (1500 watts), and is a genuine OE...
1. Open the circuit breaker feeding the range. Turn all range control switches ON to establish that there is no power. Remove all knobs. 2. Get under the range and remove the 2 hex-head screws securing the flex conduit to the bottom panel. Then remove the 20 hex-head screws securing the panel to the range. Lower the panel and place a
... Read moreside, and then after checking for no voltage disconnect the red and black incoming wires by pulling on the spade connectors. Make sure you mark which wire went where. 3. From below apply pressure to the range frame to free the top surface gasket from collected food debris, then from above lift our the range and place upside down on a towel. Support the range with wooden blocks so that the unit is not resting on the knob shafts. 4. The control switches are all mounted on a common bracket with two screws for each switch. The first task is to remove two screws on each side holding the bracket to the frame, and then two wire harnesses on each side. Then gently move the bracket and rotate it sidewards so you have access to the screws holding down the switches. 5. Remove the defective switch leaving all the wires still connected. 6. Install the new switch and transfer the wires from the defective switch. 7. You're done, now restore everything in reverse, just make sure all wires move freely and not pinched.
1. Turned off the 240V branch circuit to the cooktop. 2. Removed and inverted the cooktop. 3. Removed the bottom panel, used 1/4-inch nut driver to remove the sheet metal screws. 4. Confirmed the circuit was de-energized. Voltmeter set to AC, measure across the L1, L2 connections, should be 0 VAC or very close. 5. Make
... Read more a diagram of the existing connections to the controls to be replaced, note all control markings (L1, L2, H1, H2, PL) as the replacement controls have connectors in different locations. 6. Remove the AC Mains plate, 2 sheet metal screws. 7. Make a diagram of the primary AC distribution blocks. 8. Remove the AC Mains input leads, Red and Black. 9. Remove the AC distribution to the controls from the primary AC distribution blocks. Needed to free up the control panel. 10. Remove the 4 sheet metal screws holding the control panel. 11. Rotate the control panel to access the screws holding the controls. Caution on the wires to the heating elements, watch for pinching. 12. Remove one control with the wires attached. 13. Install the replacement control. Secure the screws. 14. Transfer the wires, matching the connection marking (L1, L2, H1, H2, PL) exactly. 15. Do the same (12, 13, 14) with the next control. 16. Re-install the control panel. Check all wires for clearance. 17. Re-connect the control wiring to the AC primary distribution blocks. 18. Re-connect the AC mains wiring to the primary AC distribution blocks. 19. Re-install the AC mains plate. 20. Visually check all the connections. Shake out any debris. 21. Replace the bottom cover, installing all screws. 22. Remove the gasket strip from the mounting lip, clean the surface, install new gasket (weather stripping). 23. Re-mount the cook top. 24. Energize the 240VAC branch circuit. 25. Test the controls. Correct any errors. 26. Done! Go have some hot tea! (or a beer)