Models > 36350

36350 Refrigerator - Overview

Models starting with 36350

Exact Part matches for your search term

[Viewing 3 of 3]
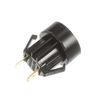
Intake Pipe – Part Number: 36350
Intake Pipe
This part number matches the current model number 36350
PartSelect #: PS8955497
Manufacturer #: 36350
$31.32
  Special Order
Intake pipe – Part Number: 36350
Intake pipe
This part number matches the current model number 36350
PartSelect #: PS12435881
Manufacturer #: 36350
$31.32
  Special Order
SVC-CONVECTION BAFFLE – Part Number: DE81-08072A
SVC-CONVECTION BAFFLE
This part number matches the current model number 36350
PartSelect #: PS17507150
Manufacturer #: DE81-08072A
  No Longer Available
Keep searches simple, eg. "belt" or "pump".
Refrigerator Ice and Water Filter – Part Number: MWFP
Refrigerator Ice and Water Filter
★★★★★
★★★★★
(76)
PartSelect #: PS8746144
Manufacturer #: MWFP
This OEM ice and water filter fits side-by-side and bottom-freezer GE models. The most common reason you would need to change this part is if you have never updated your model and it is no longer filt...
$73.01
  In Stock
Drawer Slide Rail - Right Side – Part Number: WR72X240
Drawer Slide Rail - Right Side
★★★★★
★★★★★
(58)
PartSelect #: PS306944
Manufacturer #: WR72X240
This drawer slide rail is for the right side of your refrigerator. The drawer slide rail attaches horizontally to the refrigerator wall and supports the drawer so it can easily slide in and out. If th...
$42.51
  In Stock
Defrost Heater Harness Kit – Part Number: WR51X10101
Defrost Heater Harness Kit
★★★★★
★★★★★
(15)
PartSelect #: PS1993872
Manufacturer #: WR51X10101
This dual heater kit replaces the single heater. It's redesigned to use two heating elements for a better defrost cycle.
$61.62
  In Stock
Drawer Slide Rail - Left Side – Part Number: WR72X239
Drawer Slide Rail - Left Side
★★★★★
★★★★★
(31)
PartSelect #: PS306943
Manufacturer #: WR72X239
This is a manufacturer-approved drawer slide rail for your refrigerator. This slide rail is for the left side of the fridge. All you need to complete this repair is a Phillips screwdriver. Remove the ...
$37.15
  In Stock
Ice Maker – Part Number: WR30X10093
Ice Maker
★★★★★
★★★★★
(77)
PartSelect #: PS1993870
Manufacturer #: WR30X10093
This 10 by 5 inch ice maker (Electromechanical Icemaker Kit, Ice Maker Assembly) produces ice. This particular model will produce seven crescent shaped cubes every cycle. It is constructed of plastic ...
$216.03
  In Stock
Dispenser Door Assembly or Flapper – Part Number: WR17X11653
Dispenser Door Assembly or Flapper
★★★★★
★★★★★
(87)
PartSelect #: PS964304
Manufacturer #: WR17X11653
This “Dispenser Door Assembly” (Door Recess Assembly, Ice Door Assembly, Dispenser Door, Refrigerator Dispenser Ice Chute Door Kit, Dispenser Door Flap, Ice Chute Door, Flapper) keeps the room air fro...
$15.57
  In Stock
Dual Inlet Water Valve – Part Number: WR57X10051
Dual Inlet Water Valve
★★★★★
★★★★★
(16)
PartSelect #: PS901314
Manufacturer #: WR57X10051
This valve comes with 1/4" compression inlet. NOTE: This part comes with new quick connections. To install - cut retaining nuts off of existing plastic water lines and gently push them into new valv...
$61.52
  In Stock
Bearing Slide – Part Number: WR1X2048
Bearing Slide
★★★★★
★★★★★
(3)
PartSelect #: PS294809
Manufacturer #: WR1X2048
Sold individually.
$10.22
  In Stock
Bottom Hinge Assembly – Part Number: WR13X10020
Bottom Hinge Assembly
★★★★★
★★★★★
(26)
PartSelect #: PS290199
Manufacturer #: WR13X10020
Comes with both cam risers. This hinge kit is suitable for the bottom of either the freezer door or the refrigerator door of some refrigerators.
$47.29
  In Stock
Defrost Heater and Bracket Assembly – Part Number: WR51X10055
Defrost Heater and Bracket Assembly
★★★★★
★★★★★
(29)
PartSelect #: PS303781
Manufacturer #: WR51X10055
The defrost heater keeps the cooling coils from frosting over. The heater will get hot and melt any ice or frost build up around the coils.
$106.41
  In Stock
Union Connector - 5/16 Inch to 5/16 Inch – Part Number: WR02X11330
Union Connector - 5/16 Inch to 5/16 Inch
★★★★★
★★★★★
(10)
PartSelect #: PS758446
Manufacturer #: WR02X11330
Quick connector for plastic water line - 5/16" to 5/16"
$9.02
  In Stock
Evaporator/Condensor Fan Grommet – Part Number: WR02X10098
Evaporator/Condensor Fan Grommet
★★★★★
★★★★★
(11)
PartSelect #: PS284555
Manufacturer #: WR02X10098
This evaporator fan motor grommet, or condenser fan grommet is built for refrigerators. It provides a cushion between the fan motor and the motor mounting bracket. It is made or round, black plastic a...
$11.58
  In Stock

Common Symptoms of models starting with 36350

[Viewing 23 of 23]
Leaking
Fixed by
these parts
Fixing Fixing Fixing
Show All
Fridge too warm
Fixed by
these parts
Fixing Fixing Fixing
Show All
Ice maker not making ice
Fixed by
these parts
Fixing Fixing Fixing
Show All
Freezer section too warm
Fixed by
these parts
Fixing Fixing Fixing
Show All
Not dispensing water
Fixed by
these parts
Fixing Fixing Fixing
Show All
Freezer not defrosting
Fixed by
these parts
Fixing Fixing Fixing
Show All
Light not working
Fixed by
these parts
Fixing Fixing Fixing
Show All
Door won’t open or close
Fixed by
these parts
Fixing Fixing Fixing
Show All
Ice maker won’t dispense ice
Fixed by
these parts
Fixing Fixing Fixing
Show All
Noisy
Fixed by
these parts
Fixing Fixing Fixing
Show All
Frost buildup
Fixed by
these parts
Fixing Fixing Fixing
Show All
Door Sweating
Fixed by
these parts
Fixing Fixing Fixing
Show All
Freezer too cold
Fixed by
these parts
Fixing Fixing Fixing
Show All
Fridge runs too long
Fixed by
these parts
Fixing Fixing Fixing
Show All
Fridge and Freezer are too warm
Fixed by
these parts
Fixing Fixing Fixing
Show All
Too warm
Fixed by
these parts
Fixing Fixing
Show All
Ice maker dispenses too little ice
Fixed by
these parts
Fixing Fixing Fixing
Show All
Fridge too cold
Fixed by
these parts
Fixing Fixing
Show All
Clicking sound
Fixed by
these parts
Fixing Fixing
Show All
Will Not Start
Fixed by
these parts
Fixing Fixing
Show All
Ice maker dispenses too much ice
Fixed by
these parts
Fixing Fixing
Show All
Touchpad does not respond
Fixed by
these parts
Fixing
Show All
Won’t start
Fixed by
these parts
Fixing
Show All
Keep searches simple. Use keywords, e.g. "leaking", "pump", "broken" or "fit".
Leaking water valve
Removed black cardboard covering on back of refrig with nut driver (6 screws), turned off water supply to pump, removed cooper waterline to pump with adjustable wrench, removed 1 screw holding pump to refrigerator, removed plastic waterline from pump by turning hose counter clockwise. Inserter plastic water line in new pump by screwing line in clockwise, pushed orange plastic stop around waterline into pump, connected cooper water line to pump first wrapping threads on pump with teflon plumbers tape, reinstalled pump to refrig and cardboard back on refrig with 6 screws.

One side note:.

This is the second pump which has burst at the blue plastic seam in seven years.
Parts Used:
Primary Water Inlet Valve
  • James from Centerville, OH
  • Difficulty Level:
    Easy
  • Total Repair Time:
    Less than 15 mins
  • Tools:
    Nutdriver, Socket set, Wrench (Adjustable)
8478 of 12455 people found this instruction helpful.
Was this instruction helpful to you?
Thank you for voting!
Freezer was still simi-cold but refrigerator was not.
Called a friend that lead me down the right path so i did a search for the part's and found this site. The trouble shooting that outher's had done was the same as mine, I descovered that the coil's in the freezer had frozen up complety. They are located behind a plasic cover in the freezer area, it had frozen up due to the Defrost heater element being defective, when i took it out it was black and burnt looking,It is located at the bottom edge of the coils,2 bolt's and a plug in on each side. That is probally the only part i needed but i went ahead and replaced the sensor and timer also.The sensor wires in the freezer( located on the very top of the coils) had to be cut and the new ones spliced in, only 2 wires and easy access. I also put shrink wrap on the splices to protect them from mosisture. The timer was located in the fridge area by the temp. control knobs. 2 small bolts and a plug in was all on it. It's been 5 day's and so far so good. The worst part was defrosting the frozen coils. This was done with the wife's hair dryer and a couple towel's to soak up the water. Don't just let the water go down the drain hole because the tray that catches it will not hold all the water from the frozen coil's. Just a reminder, don't forget to unplug the unit when working on it. Hope this help's and was very easy install, Cost about $125 in part's and a couple hours of labor(did a good cleaning while it was eampty for the repair) Good luck.
Parts Used:
Defrost Timer Defrost Heater and Bracket Assembly Defrost Thermostat
  • Richard from West Alton, MO
  • Difficulty Level:
    Easy
  • Total Repair Time:
    30 - 60 mins
  • Tools:
    Nutdriver, Screw drivers, Socket set
447 of 490 people found this instruction helpful.
Was this instruction helpful to you?
Thank you for voting!
Defrost Heater blows out, refrigerator frosts up, then stops cooling
Disclaimer - if you aren't confident about doing this repair, call a repair specialist in. Also, take care not to damage the freezer coils as they have refrigerant in them that I'm told is harmful if it leaks. It may also be under pressure. The instructions that follow won't require you to touch the coils. There is no need to unplug the refrigerator or disconnect the water supply to do this repair. The screw driver you will need is a phillips (the one withe the + head).

1st, take out your frozen food (which, if you need to do this repair may not be frozen) and put it in a cooler or the refrigerator.
2nd, remove the ice cube bucket and dump the ice cubes in the cooler to help keep the frozen food cool. Turn the ice cube maker off.
3rd, remove the freezer shelves.
4th, locate the panel covering the freezer coils. It's a panel at the back of the freezer. It hides the freezer coils and protects them from damage. It's held in place by two screws located at the top left and right corners of the panel.
5th, unscrew the screws holding the panel to the refrigerator.
6th, detach the clip at the top of the panel.
7th, remove the panel. You should see the coils now. The coils will be covered in frost if the defroster heater has failed. If the coils are not covered in frost, there may be another reason for the refrigerator failing to cool.
8th, even if the coils are covered in frost, you should also inspect the defroster heater at the bottom, underneath the coils. The business end of it is a long tube running horizontally between two wires. If it's black like a badly burned out light bulb, then it's failed. If the bulb appears fine, you may have a different reason for your refrigerator and freezer frosting up. We'll assume that the defroster heater has blown out, and proceed.
9th, place a towel at the bottom of the panel space, to soak up any water that melts and runs down. There is a drain under the coils. It collects water that melts during the defrost cycle, but I'd rather mop up the water instead of relying on the drain.
10th, use hot air blowing from the hair dryer to defrost the coils. Just play the air from the hair dryer over the coils, starting at the top, and working down. The frost will quickly melt and the water will be soaked up by the towels. If you want things to go faster, you can throw hot water on the coils to melt them faster, but that produces more water to mop up, and makes a big mess. It's also dangerous to have water lying around if you then decide to use the hair dryer to continue defrosting the coils.
11th. MOST IMPORTANT. Don't use your screwdriver or any other sharp object to pick away at the frost on the coils. If you damage the coils the refrigerant could leak out. I'm told that it's dangerous stuff. Furthermore, I expect that you'd have to buy a new refrigerator if you damaged the coils.
12th, once you've defrosted the coils, locate the defroster heater and bracket assembly again. It's held in place by two screws, and has two insulated wires running into it on either side. Unscrew the screws, disconnect the wires and remove the assembly. Throw it away - there are no useful parts in it.
13th, install the new defroster heater and bracket assembly by connecting the wires to it, mounting it back into its place, and rescrewing the screws.
14th, put the panel back in place, replace the clip, and screw the panel back in place.
15th, turn the ice cube maker back on and replace the ice cube bucket and shelves. Put your food back into the freezer.
16th, use the freezer and refrigerator as normal. If the defroster heater fails again (I'm on my third one in less than six years), you'll notice frost building up on the panel at the back of the freezer before your freezer and refrigerator stops cooling. The frost build up is your signal to defrost the freezer and buy another defroster heater and bracket assembly. I don't know why this part is so weak, and don't know any fix except to keep replacing it.
Parts Used:
Defrost Heater Harness Kit
  • Stuart from Lynchburg, VA
  • Difficulty Level:
    Easy
  • Total Repair Time:
    15 - 30 mins
  • Tools:
    Screw drivers
407 of 433 people found this instruction helpful.
Was this instruction helpful to you?
Thank you for voting!