


Appliance Parts
- Accessories
- Dishwasher
- Dryer
- Stove / Oven
- Microwave
- Refrigerator
- Washer
- See more... See less...
Lawn Equipment Parts
- Lawn Mower
- Chainsaw
- Blower
- Generator
- Air Compressor
- Lawn Tractor
- Pressure Washer
- See more... See less...
Shop With Confidence


How To Fix A Dishwasher That Will Not Fill With Water

About this repair:
- Rated as EASY
- 368 repair stories
- 3 step by step videos
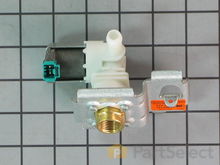
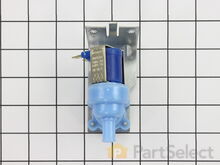
Water Inlet Valve
The water inlet valve is used to fill the dishwasher with the proper amount of hot water and is controlled by the timer or electronic control. The valve will be located behind the lower access panel and will have two wires attached to it, an outlet hose to the tub and a hot water inlet from the household supply. If your dishwasher does not fill, then you should first check the inlet supply to verify that you have enough water pressure.
How to inspect a dishwasher water inlet valve:
- Unplug your dishwasher and disconnect the water supply before starting.
- Locate your water inlet valve. It is commonly found on the lower left side of your dishwasher. You likely will need to remove the lower access panel to locate it.
- Looking for any signs of damage, wear, or cracking, visually inspect the water inlet valve.
- If your valve shows signs of any of the symptoms described above, you will need a replacement water inlet valve.

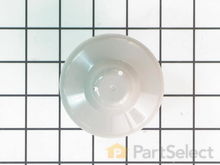
Float
A malfunctioning float could cause the dishwasher to not fill with water. The acts as a safety device that prevents the dishwasher from overfilling with water. The float rises with the water level in the dishwasher and when the proper level is reached, the float will trigger the float switch to turn off the water inlet valve.
How to check a dishwasher float assembly:
- Before beginning, verify that you have unplugged your appliance.
- Begin by opening your dishwasher door and removing the cover over the float assembly. Once you’ve done that, manually lift the float and let it drop multiple times, it should move freely, if it does not, remove the float to remove any foreign objects in the guide tube. You should also inspect the float for any visible wear or damage.
- Remove the lower access panel to determine if the float is mechanically engaging with the float switch.
- If you find any issues while performing this inspection, you will need a replacement float.


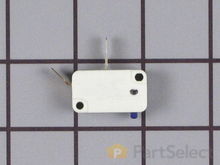
Float Switch
When the float switch is triggered by the float, power to the water inlet valve is interrupted and it stops the flow of water into the dishwasher.
How to test a dishwasher float switch with a multimeter:
- Disconnect your dishwasher from the power source before beginning this inspection; you will be handling electrical components.
- Locate and remove the float switch. It will be found behind the lower access panel, sitting directly below the float assembly. Use caution when disconnecting the wires from the switch, do not pull directly on the wires.
- Once you have removed it, test the float switch by setting your multimeter to Rx1 and touching the probes to the switch’s terminals. This should produce a reading of zero or infinity. With the probes still touching the terminals, press in on the switch’s button, this should change the reading to the opposite extreme (from zero to infinity or infinity to zero).
- If your test results produce readings that differ from the above, you will need a replacement float switch.


Door Switch
The door switch is a simple on/off mechanism that prohibits the dishwasher from operating when the door is open. If the door switch or switches are malfunctioning the dishwasher will not fill with water.
How to test a dishwasher door switch with a multimeter:
- Before beginning, ensure that you unplug your appliance as you will be working with electrical components.
- The door switch is typically located behind the door panel at the top of the door. You will need to separate the inner door from the outer door in order to access the switch. Once you have located it, remove the door switch in order to test it for continuity.
- Using a multimeter set to Rx1, test for continuity by touching one probe to the COM terminal and the other probe to the N.O. Terminal. With the actuator NOT pushed in, your reading should be infinity. Next, keeping the probes on the terminals, press in on the actuator until you hear a click, this should change the reading to zero.
- If the results of your test do not match the results above, you will need a replacement door switch.

More Repair Parts
Still not sure which part is broken? We can offer you custom troubleshooting help if you search with your model number.
