KitchenAid Washer Dryer Combo Parts

KitchenAid Appliance Parts

Popular KitchenAid Washer Dryer Combo Parts

Your Price
$19.63
   In Stock
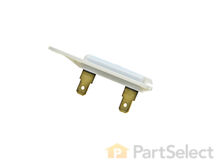
KitchenAid Washer Dryer Combo Dryer Thermal Fuse
★★★★★
★★★★★
354 Reviews
PartSelect Number PS11741460
Manufacturer Part Number WP3392519
The Dryer Thermal Fuse (Thermal Cutoff, Temperature Fuse) is a 2 by ½ inch, white, plastic safety mechanism that stops the flow of electricity to the motor circuit when a dryer overheats. If the fuse is missing or broken, your dryer will not start. A thermal fuse fails when the exhaust temperature exceeds the fuse rating, that is when the temperature rises above the temperature that the fuse is designed to handle. This can occur when a heating element is shorted, a regulating thermostat or thermister fails, or with a partially restricted exhaust vent. The fuse attaches to the blower wheel housing. It must be replaced when there is no longer continuity between the terminals. This is a one-time fuse, meaning it cannot be re-set. The replacement part features two 3/16 inch terminals.
Fixes these symptoms
  • Heat stays on after drum has stopped
  • Not Heating
  • Too hot
  • See more...
Installation Instructions
ANTHONY from CHESHIRE, CT
Dryer was working, but no heat.
First I unplugged the dryer, then removed the back panel, this exposed most all of the wiring and I could see the heater coils.
Not knowing what the problem was I started looking at the coils and could not see any broken parts.
So then checked the thermal fuse for continuity I removed the two wires from it with a small pair of needle nose pliers, it was held in place by two screws, once they were removed the fuse came out easily, I checked continuity with a volt meter placing the meter on X1 Ohms and could not get a reading.
I replaced with a new one and put it all back together the way I took it apart.
Then I plugged it in and it worked first time, I now have warm dry clothes.
Read more...
Your Price
$14.37
   In Stock
KitchenAid Washer Dryer Combo Rear Drum Support Roller Kit
★★★★★
★★★★★
117 Reviews
PartSelect Number PS347627
Manufacturer Part Number 349241T
The drum support roller kit allows the dryer to tumble properly by supporting the drum cylinder. The kit includes two drum rollers, four tri-rings, and one palnut (or retaining washer). The kit does not include a belt or idler pulley and rollers are not sold individually. The drum support roller kit may need to be replaced if the dryer is noisy or will not tumble. The tools needed to complete this repair are a putty knife, Phillips screw driver, and a 5/16 nut driver. This is an OEM part sourced directly from the manufacturer.
Fixes these symptoms
  • Drum Not Spinning
  • Marks left on clothes
  • Noisy
  • See more...
Installation Instructions
Mark from Fremont, NE
Wife told me Dryer would make a funny sound, then stop + had an a funny smell as well. The Electric motor that drove the unit was overheating and locking up, It was time to be replace.
The best part of my repair was I had everything back in service in 3 days. And one of these days was to consider just buying a new dryer. Had parts overnited and all parts fit and easy to replace.

1) Removed back - 6 screws
2) Removed dryer vent - 2 screws on top, 3 on bottom
3) Popped the top open
4) Removed Front of dryer cabinet - 2 screws
5) Removed Belt
6) Removed Drum
7) Cleaned up all lint
8) Pop off motor retainers front and back
Here is the tricky part for me.
9) Removed vent fan on back of motor.
I did not know that the back of the fan was square, and you could put an open ended wrench on it to hold it while you also have a vice grip on the front motor shaft. Then its a simple left to loosey operation. I first tryed to turn the fan blade to take it off, but proved to be to tight.
10) Repeat backwards to reassemble

While I had it apart I also replaced the Drum support rollers & Installed a new belt. Not that diffucult of a repair Good Luck, was certainly better than buying a new one at + $300.00 at Black Friday rates.
Read more...
Your Price
$5.04
   In Stock
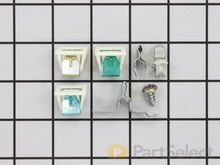
KitchenAid Washer Dryer Combo Door Catch Kit
★★★★★
★★★★★
125 Reviews
PartSelect Number PS334230
Manufacturer Part Number 279570
This part replaces your appliances latch (Door Latch Kit, Door Catch, Dryer Door Latch Kit). On your appliance you will find both a strike and a catch. The strike is mounted on the body of the dryer, while the catch is mounted on the dryer door. These two parts work together to keep your dryer door closed. The catch holds the door strike to keep the door closed during the drying cycle. If the door does not latch closed, you won’t be able to start a drying cycle. If this part is malfunctioning, you may not be able to open or close your door. In some instances, it may seem like your door is closing, but if it is not latching properly you won’t be able to start your drying cycle. You should replace this part as soon as it’s malfunctioning. Your dryer may run even though the latch is malfunctioning, but it is unsafe if the dryer continues to run while the door is open. This replacement part features 1 door latch kit which includes 2 strikes, 3 catches, and a set of instructions. This model is constructed of plastic and metal, and comes in white/silver.
Fixes these symptoms
  • Door Pops Open
  • Door won’t close
  • Lid or door won’t close
  • See more...
Installation Instructions
Terri from Saint Augustine, FL
Door Catch part had fallen out,/ was missing
Received your parts, Popped them both right into place, Even though only one side needed to be replaced, I wanted them to match up. It was amazing how easy this was. My husband was quite impressed I had ordered these rather then look for either a new or used dryer from some other source. Read more...
Your Price
$13.42
   In Stock
KitchenAid Washer Dryer Combo Roller Support Tri-Ring
★★★★★
★★★★★
5 Reviews
PartSelect Number PS11755850
Manufacturer Part Number WPW10512946
If you notice that your dryer is noisy or will not tumble, you may need to replace the tri ring. This part is triangular, and is less than an inch in size. Tri rings can be found both on the idler pulley shaft, or on the rear drum roller shaft. In either case, you will need to remove the front panel of the dryer and the drum to access the part for repair. Once you have accessed the damaged tri ring, you will simply need to slip it off and replace it with the new one. This part is sold individually. Be sure to disconnect the power source from the dryer before you begin this repair.
Fixes these symptoms
Installation Instructions
John from Tucson, AZ
worn out part
The repair was fairly easy. The most timely part of the repair was removing the twelve screws from the back panel to expose the repair. Read more...
Your Price
$27.87
   In Stock
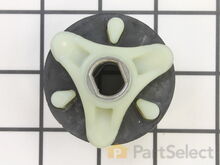
KitchenAid Washer Dryer Combo Direct Drive Motor Coupling
★★★★★
★★★★★
160 Reviews
PartSelect Number PS1485646
Manufacturer Part Number 285753A
This direct drive motor coupling (Direct Drive Washer Motor Coupling, Motor Coupling, Washer Motor Coupling, Coupling Kit) provides a cushioned connection between the transmission and the motor shaft. It attaches to the direct-drive transmission and the motor shaft. If this part is defective it will affect the agitator in your washer because of its direct connection with the motor. Your washer may not agitate, spin slowly, or not spin at all. The coupling must be replaced when there is no longer a consistent connection between the transmission and the motor shaft. The coupling can wear over time because of its location between two major parts of the dryer. It is subject to material fatigue over time from normal use, or breakage caused by frequent overloading. The part measures approximately 2 inches in diameter, and is constructed of plastic and metal. This model comes in black/white.
Fixes these symptoms
Installation Instructions
Jeff from Wayne, NJ
No movement from Basket & agitator
The job looked intimidating but turned out to be very easy.
First take off the water pump by removing the two clips that hold it in place. Place a shallow pan under the pump to catch the water that is in the pump and hoses. Open the hose clamps with a pair of pliers or channel locks (better) and slide the hoses off of the water pump.
The motor comes off next. Unplug the electrical connector from the motor and two wires from the capacitor. Remove the two screws holding the clamps in place and then pop off the two clamps. You will need to hold up the motor with one hand while you remove the clamps or it will fall to the floor once the clamps are removed.
One piece of the coupling assemble will be attached to the motor and the other will be attached to the gearcase drive shaft. If you want to clean up the mess created by the shredded rubber center piece of the coupling assembly you will have to take off the motor mounting plate. It is held on by two bolts and removing it makes installing the coupling easier but probably not necessary.
Push the back half of the coupling on to the gearcase drive shaft until the shaft is flush with the face of the coupling. Install the new rubber center piece on to the coupling then re-install the motor mounting plate. Install the other half of the coupling on to the motor shaft and lift the motor up to the coupling. You have to rotate the motor shaft by spinning the fan blades until the coupling lines up so you can slide it into the other half of the coupling. Then just reattach the motor, connectors and water pump in the reverse order of disassembly.
Read more...
Your Price
$17.64
   In Stock
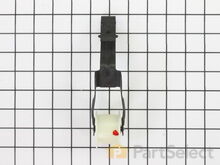
KitchenAid Washer Dryer Combo Idler Pulley Assembly
★★★★★
★★★★★
22 Reviews
PartSelect Number PS11743765
Manufacturer Part Number WP691366
This part provides the tension required for a multi-ribbed belt. It also helps the belt rotate the drum and attaches to the idler pulley wheel. If your dryer will not start or tumble, takes too long to dry, or is noisy during operation, you may need to replace the idler pulley assembly. Make sure to disconnect power before installing this part, and wear work gloves to protect your hands. While the dryer is disassembled for this repair, consider replacing the drive belt as well. You will need a putty knife, a Phillips screwdriver, and a 5/16 nut driver for this repair.
Fixes these symptoms
Installation Instructions
Ray from Denton, TX
Dryer tub belt broke
Removed the two screws that attatch the lent channel to the top of the dryer, then lifted the top of the dryer by pushing in on the two locking tabs located at the front , left and right , corners of the dryer top with a small flat head screw driver. The top of the dryer will fold back out of the way. At this point I removed the two 1/4 inch screws that are located on the inside of the dryer front left and right corners that hold the front panel/door to the two side panels. Now I was able to lift the front panel up and set it to the side. The bottom of the front panel that contains the dryer door that I just removed was held on the bottom by two clips that slide into slots on the front panel and did not require any removal to disconnect the bottom of the front panel, just pull up on the front panel. Since the tub was held in place by floating on a seal at the back of the dryer and a seal on the front panel , which I just removed the tub is now free floating except for the two alignment roller wheels at the bottom of the tub. It is easier if you lay the dryer on its back at this point with front of the tub pointing up. I pulled the tub out and cleaned the years of built up lent and removed all the pieces of the old , destroyed, belt. Note, the belt tentioner is located at the front of the motor which on the bottom right hand side. If your belt is broke like mine the tensioner may/will fall to the back of the dryer when you tilt it back, but do not worry. Once the dryer was cleaned up I put the tub back in place , still on its back and made sure the two alignment rollers were in place and rolled freely when the tub was turned by hand. Another note, my original belt tensioner did not have a rolling wheel that the belt rode on , but was a semi-circle smooth surface that the belt remained in constant friction with when the dyer was running, so I made sure the replacement tensioner I ordered with my new belt did have a rolling wheel that the belt would ride on, which I believe will reduce wear and extend the belt life. The new belt came with a diagram of the belt and tensioner routing which was helpful. Note: do not take the tensioner wheel off/apart when trying to route the belt. Follow the instructions routing diagram. The tensioner is held in palce by inserting the bottom back half into the slot in the bottom floor of the dryer making sure it is aligned with the belt pully on the shaft of the dryer motor. The dryer is still on its back side. Now, it was easier for me to route the belt around the center of the tub, following the marks from the original belt, and hold in in place in a few spots with masking tape and then route it thru the tensioner and onto the front pully of the motor. Make sure you have the grooves of the belt against the tub and the grooves are aligned with the pully on the motor. Now you can remove the masking tape that was holding the belt around the tub and spin the tub by hand watching the belt making sure it is not in a bind and is traveling around the motor pully , tensioner and tub freely. Make sure the tub is still sealed on the back side wall. As you turn the tub by hand you can adjust the belt by hand so that is following the original marks around the tub left by the orignal belt. Also double check the two alingment rollers and make sure they are spinning and on track. Now put the front panel with the door on by sliding it onto the two clips that are one the bottom at each side and put the two screws in that hold the front panel to the two side panels. Now stand the dryer back up and spin the tub by hand again making sure it has a good seal on the back side and on the front panel. Pull the top back down and put the two screws in that hold the lent channle to the top. I am not sure when the belt started failing on my dryer, but was amazed at how quiet it runs now. Guess I was use to the extra noise made by a dryer that was about to die. This was a cheap and easy repair and glad I did it myself. Read more...
Your Price
$27.58
   In Stock
KitchenAid Washer Dryer Combo Clutch Assembly
★★★★★
★★★★★
78 Reviews
PartSelect Number PS334641
Manufacturer Part Number 285785
A clutch assembly (Clutch, Washer Clutch) is found in your washing machine and is responsible for spinning the basket during the spin cycle. The clutch lining can wear over time. If the clutch lining is worn out, the clutch assembly will not rotate properly to release the brake. If you notice a burning smell, or the machine shaking and moving more than normal, this could indicate there is an issue with your clutch. If the washer spins when the washer basket is empty but not when it’s full, or if the assembly begins to turn blue, you may need to replace the clutch assembly. This assembly includes a brake cam driver, blue springs for large capacity washers, a black spring for compact washers, and the installation instructions. It’s constructed of plastic and metal, and comes in beige/silver.
Fixes these symptoms
  • Burning smell
  • Spinning Issues
  • Spins slowly
  • See more...
Installation Instructions
Andrew from SLC, UT
spin cycle did not engage
researched potential causes, found cluch dust under the washer and determined that it wouldn't engage because clutch was too worn. ordered the assembly, removed agitator from inside the tub as it is connected to the gear shaft, turned washer on it's back for access to motor, unattached the direct drive water pump from the motor drive, unbolted the 3 gearcase mounting bolts and took the entire gearcase, shaft, motor, etc... together, out from under the washtub. the clutch slides off the gearshaft with a little fidgeting and the new assembly is easily installed where the previous was. put everything back together... then... spin spin! worked perfectly Read more...
Your Price
$40.54
   In Stock
KitchenAid Washer Dryer Combo Igniter Kit
★★★★★
★★★★★
33 Reviews
PartSelect Number PS334180
Manufacturer Part Number 279311
If your dryer will not heat, takes too long to dry, or does not provide enough heat, you might want to replace your igniter kit. This silicone carbide igniter with ceramic holder kit includes the 3-inch flat igniter, bracket, 4-inch wire leads, and the plug. The kit can replace both round and flat igniters and is used for many gas clothes dryers. Be sure to disconnect the power source from your dryer before you do this repair. The igniter is located within the burner assembly, so you will require tools to complete the repair. You will need a putty knife, a small flat blade screwdriver, a 5/16 nut driver, and a 5/16 socket with a ratchet.
Fixes these symptoms
Installation Instructions
TEODY from MILPITAS, CA
No Heat. Dryer keeps running but no heat to dry clothes.
Repair was very easy. We are in the internet age so I use it all the time to get info on how to repair any thing in the house including cars. This time it was my dryer. I typed up 'Kitchen Aid dryer has not heat'and pressed searched and PartSelect came up. Typed in the model number and looked up the comments on No Heat. They had pretty cool site that shows videos on how to repair this things too. Came to conlclusion that the THERMAL FUSE was the main problem. Ordered it and as well as the Igniter assy just to make sure and as well as save on the shipping just in case. Ordered on Sunday night and the shipped the next day. It arrived on Tuesday. Unfortunately had a little problem on the shipment. Called PartSelect and they are so awesome they shipped me new parts asap at no extra charge. Awesome Awesome! Parts came in Thursday and first installed the Thermal Fuse and BAAAM! problem solved. Did not need the igniter assembly. Now I have an extra part in storage.
To replace the Thermal fuse.
1. Disconnect Dryer from power outlet. Remove the bolts on the back panel with a 1/4" socket. I used power drill because it is much faster.
2. Locate the Thermal Fuse. Disconnect wires and remove the bolt. Slide it up and pull. Install the new one and reconnect the wires. Replace the panel and plug the dryer.

That solved my problem. It should solve yours too. The whole process was less than five minutes.
Read more...
Your Price
$30.89
   In Stock
KitchenAid Washer Dryer Combo M Series New Style Coil Kit
★★★★★
★★★★★
148 Reviews
PartSelect Number PS334310
Manufacturer Part Number 279834
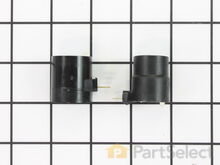
When the igniter reaches a high enough temperature, these coils (Coil Valve, Dryer Gas Valve Coil Kit, Dryer Valve Coil Kit, Gas Valve Solenoid) work together to open the gas valve and allow the gas to enter the burner. This is a safety mechanism to ensure that there are no unsafe buildups of gas inside your appliance. The coils are attached to the dryer gas valve. If the dryer does not heat or heats intermittently, the coil may not be opening the gas valve. Both coils must be operational for the valve to open. No continuity would indicate a defective coil, but they can be intermittent and fail when they get hot. Both coils should be replaced when one of them is broken. This part can break as a result of material fatigue from normal use. This part measures approximately 1 inch in diameter and 1 inch in height, and is constructed of plastic and metal. It comes in black/beige. This part features a 3-terminal boost/hold coil and a 2-terminal secondary coil
Fixes these symptoms
Installation Instructions
Michael from Kirkwood, MO
Gas Dryer would not ignite
1. Removed lint screen and holder frame. Unplugged the electrical cord and closed the gas valve in the line before it goes into the dryer.
2. Removed two bolts at bottom front of machine and took off the bottom front panel.
3. Removed three bolts from black plastic exit vent and took it out to give more room to access everything.
4. removed two wires and screws on the limit thermostat. Did the reverse to place the new one.
5. Removed wires (remembering placement), then holder screw. rotated the Gas Dryer Sensor counter clockwise to release the bottom tab so the sensor can be taken off the flame tube. Did the reverse to place the new one on.
6. Removed the one screw on the gas/flame tube that holds the bracket and igniter inside the flame tube. Removed the wires fro the igniter (remember placement) Slid the whole assembly toward the back of the machine to get the tube off the gas valve then rotated the whole assembly counter-clocwise to release the tab on the left side of the bracket. This was a little tight and had to work with it a bit to get the tab out and slide the whole piece out of the flame tube.
7. Once the tube and igniter were out i removed the scree that holds the igniter and replaced with the new one. Made sure no dust, etc. was in the piece.
8. Did the reverse to place the tube/igniter back into the flame tube.
9. Carefully and forcefully removed the wire connectors to the two coils. These were tough to get off. Removed the two screws that hold the bracket that holds the two coils in place. Slid the coils off the spindles remembering which one has the two wire connection and which one has the three wire connection and the way they went on. Replaced the old with the new. Placed the bracket onto the new coils and made sure the little bumps on the top are in the holes in the bracket. Tightened the screws to hold the coil bracket. Reattached the wire connectors to the coils making sure they go ALL the way back on.
10. Vaccumed everything I could to get lint, dust, etc. out.
11.Replaced the black vent plastic.
12 Made sure the exit vent on the back was not crimped or clogged. Checked the little flap door where the vent goes outside to make sure it opens and closes super easy to no air flow is restricted.
13. For testing I left the bottom panel open. Make sure you closed the door, reconnect the plug and turn the gas valve back on. Hit the go button on autodry or timed dry. The door must be closed to create the closed circulation of the system so the fan sucks the flame into the tube otherwise the flame will not fire deep into the tube and will set off one fo the overheat sensors. After hitting the go button your drum will start to rotate, then a few seconds later you'll hear a click and your igniter will start to burn bright orange. Another click and the gas should flow and ignite.
14. This shows that you've fixed the ignition problem. I just replaced everything I thought that could be wrong in stead of hunting and trial and error. All the parts were about $137 so I thought it was worth making sure.
15. IMPORTANT: If during your test the flame turns off after a little while then turns back on only to turn off again, don't panic. This happened to me as well. I found that you need to run the dryer with wet clothes in the dryer. The wetness in the clothes will keep the autodry sensor from shutting off the dryer since there will be moisture in the exhaust. If it's on timed dry the wet clothes will cool the exhaust air and keep the overheat sensors from turning the heat off. So no heating of dry clothes to get out wrinkles. Just dry the wet clothes. This is all I did and it's been working great so far. Good Luck!
Read more...
Your Price
$48.76
   In Stock
KitchenAid Washer Dryer Combo Direct Drive Water Pump
★★★★★
★★★★★
98 Reviews
PartSelect Number PS11741239
Manufacturer Part Number WP3363394
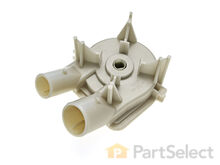
The direct drive drain pump (Whirlpool Direct Drive Washer Pump, Drain Pump, Washer Drain Pump, Water Pump) removes water from the washer during the drain cycle without the use of a belt. The pump is supposed to drain the water from the washer; if the water isn’t draining or if there is a leak, you may have a problem with your pump. You must replace this part if there is a blockage or clog. Although the symptoms may point to a malfunctioning drain pump, there could actually be a problem with one of the connecting hoses. This pump connected directly to the motor, and comes in white plastic. This replacement part features 1 direct drive water pump with 2 ports for water to pass through: a large one and a smaller one.
Fixes these symptoms
Installation Instructions
RICHARD from PHILA, PA
Replace Water Pump Coupling
Removed casing tip over washer disconnected water pump. Disconnected motor then replace coupling then reassemble motor then replaced water pump. Read more...

KitchenAid Washer Dryer Combo Appliance Types

Related KitchenAid Washer Dryer Combo Parts

Popular KitchenAid Washer Dryer Combo Models

Below are the most popular KitchenAid Washer Dryer Combo models we have. Enter your model number in the search box to find your model.