Washer Lights and Bulbs
- Search your model number to find:
- Genuine OEM parts guaranteed to fit
- Free manuals and guides
- Repair instructions and videos
Popular Washer Lights and Bulbs
Your Price
$8.87
In Stock
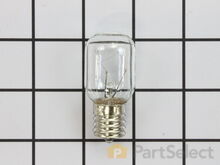
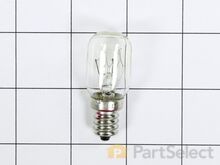
Washer Light Bulb - 40W
The filters are very easy to replace. No tools needed.
Hope this helps. Read more...
PartSelect Number PS2376034
Manufacturer Part Number 8206232A
This 40w light bulb is a replacement bulb constructed of glass and metal. It is an easy-to-install electrical part which produces 40w of light. If the bulb won't light up then it may be broken and should be replaced. The bulb attaches directly to an appropriate light socket and has a small screw-in base. To access the exterior light bulb, you will need to remove the panel on the bottom of the microwave using a Phillips screwdriver. If your exterior light bulb has not been changed before, it is probably held in place with some silicone. You will need to cut away this silicone to remove the old bulb. If you cannot access the silicone with a utility knife, it can be removed using dental floss. Once the silicone is removed, simply unscrew the old bulb, and replace it with the new one. Be sure to disconnect the power to the microwave before you begin this repair. This light bulb measures about 1 1/8 inches. We do not recommend using a higher-wattage bulb for this appliance, and can only recommend this specific bulb. If fixing the bulb does not solve your microwave light issue, it's possibly a problem with the socket, which means the socket and/or board will need to be replaced. This can be a more dangerous repair, so consult your user manual or a technician before attempting.
Installation Instructions
Chris from Cedar Hill, TX
Burned out light under microwave and Filters needed changing
I just removed the multiple screws which held the hood cover on. I then attempted to remove the light bulbs from the socket. This proved impossible because the bulbs were so fragile from the heat and grease build up. To make this task much easier and probably safer, just replace the bulb housing and light bulb. The bulb housing unplugs very easily. Just replace it then screw your new bulb in. P.S. Be sure to unplug appliance before you start.The filters are very easy to replace. No tools needed.
Hope this helps. Read more...
Your Price
$11.73
In Stock
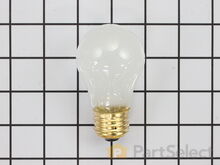
Washer Light Bulb - 40W
PartSelect Number PS884734
Manufacturer Part Number 8009
This an authentic OEM 40-Watt replacement light bulb, used in a number of household appliances. It is specially designed to withstand extreme temperatures, which is why these replacement bulbs are most often used to light the inside of refrigerators and ranges. It features a standard socket base, which means you simply unscrew the burnt-out bulb and screw in the replacement. Depending on the appliance you may require a screwdriver or nut driver to access the light bulb. We recommend you wear work gloves while handling this replacement part. It is constructed of glass and metal and is sold individually. Depending on the appliance and location of the bulb within it, you may want to consider disconnecting power and using a flashlight for easier access to unscrewing and re-screwing in your bulb during this repair.
Installation Instructions
judie from mays landing, NJ
interior drawers were off their rollers
pulled the washer out and replaces the top roller system on both sides and the replaced the weels and brackets on the bottom drwaer. however i had trouble putting the dish washer back correctly and had to call a repairman to adjust the dishwasher and alighn it to open and close properly. but i did do good inside. i feel it was easy and a success. thank you for having the supplies for us to attempt to repair it on our own.
Read more...
Your Price
$16.32
In Stock
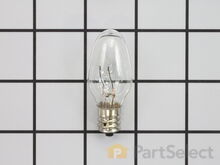
Washer Light Bulb - 10W
Most sites said the support rollers could cause this.
I found your site PartSelect and with help of your diagrams of the machine ordered the parts I thought were needed plus other parts that might cause the problem.
With machine torn down I replaced the rollers.
I had also ordered the main drive belt and idler assembly with the rollers and these also needed replacement. It is a good idea to order other suspect parts when doing this type of repair since you can return the parts not needed.
Your return policy is great.
Edward Brennan Read more...
PartSelect Number PS11739347
Manufacturer Part Number WP22002263
This ten watt appliance light bulb is two inches tall. It is used with both washers and dryers.
Installation Instructions
Edward from Andover, NJ
Dryer was sqeaking loudly when running
I Looked on internet sites for this type of problem.Most sites said the support rollers could cause this.
I found your site PartSelect and with help of your diagrams of the machine ordered the parts I thought were needed plus other parts that might cause the problem.
With machine torn down I replaced the rollers.
I had also ordered the main drive belt and idler assembly with the rollers and these also needed replacement. It is a good idea to order other suspect parts when doing this type of repair since you can return the parts not needed.
Your return policy is great.
Edward Brennan Read more...
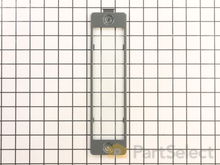
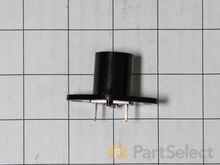
Washer Light Housing
As far as the shipping is concerned. It took forever, just to find out that the part was incorrect.
Better luck next time. right? Read more...
PartSelect Number PS2349147
Manufacturer Part Number W10240330
The screw that holds the housing into place comes separately. The part number for that screw is PS12728594.
Installation Instructions
Alida from TUCSON, AZ
The glass broke in the light housing
Repair unsuccessful because they sent the wrong part, even after I questioned their selection. It is amazing how a company as large as Whirlpool cannot clearly indicate to the people who work for them how to order the correct part. The fault lies not in the individual who is putting the order in but with the company who cannot take the time to make sure that person is successful in completing their job. Will never buy a product from this company again.As far as the shipping is concerned. It took forever, just to find out that the part was incorrect.
Better luck next time. right? Read more...
Washer Cover,Lamp
PartSelect Number PS3519698
Manufacturer Part Number 3550EL2001A
Installation Instructions
Lorraine from SEQUIM, WA
Lamp cover broke
Unscrew the screw, remove old part, place in new part, replace screw and you are done.
Read more...
Washer Light Bulb
PartSelect Number PS11728997
Manufacturer Part Number 6913EL3001E
Installation Instructions
Duane from TROY, TX
Washer Indicator Light Lens
Only that we took pictures to use as needed to be sure we knew how to put it all back together! Read more...
PartSelect Number PS11739313
Manufacturer Part Number WP22001948
Installation Instructions
Vicki from PUYALLUP, WA
Oven Control Panel broken Ceramic Stove top & burner indicateor light&ens
I don't want to give Instructions! Only that we took pictures to use as needed to be sure we knew how to put it all back together! Read more...
Washer Light Bulb - 120v 25w
PartSelect Number PS11747808
Manufacturer Part Number WPA3167501
This is a 120 volt, 25-watt light bulb that fits a variety of medium to large kitchen appliances. It functions by illuminating when the appliance door is open. It has a small base with a twist lock. This part is sold individually. This is a common wear part, so it is recommended order a spare and to check other appliance light bulbs in your home. This is an authentic OEM part that is sourced directly from the genuine manufacturer. Be careful when handling the light bulb; use a pair of needle nose pliers to remove the base if the glass bulb is broken.
Installation Instructions
Thomas from Oneonta, NY
Dryer made a loud noise and vibrated badly
First I made sure the unit was unplugged. I popped the top of the unit with a slotted screw driver, lifted the top up and rested it against the wall behind the dryer. I removed the two screws - one on each side in front on top of the dryer cabinet. Then I tipped back the front panel of the dryer slightly with the door of the dryer closed. I unclipped the door switch with a slotted screw driver and then lifted the entire front panel including the door off of the the two floor clips on bottom. I set the front panel aside. Next I lifted the large drum slightly to dislodge the rollers in back and slid the drum back slowly while sliding the thin belt back on the drum until the drum was out of the unit and the belt was detached and loose. Then I cleaned the unit thoroughly, vacuumed all lint and dirt and wiped down the outside of the large drum with mineral spirits to make sure it was totally clean and smooth. Then I removed the two rollers and the roller shafts at the back of the unit following the directions enclosed. My slip-ring pliers came in handy to remove the retaining rings on the roller shafts. I replaced the rollers and roller shafts and the supplied washers and spacers as per the instructions. I sprayed a little WD-40 on the surface of the rollers and it stopped all squeaking and vibration of the drum. Next I replaced the front drum pads and runners as per the instructions. I then slid the drum back in place taking care to slide the new belt back around the drum in the same position as the old belt. Now came the difficult part - laying on the floor and reaching under the drum I positioned the belt around the motor shaft and tension pulley. This must be done by "feel" and must be done correctly!! Follow the instructions on the positioning of the belt very carefully and make sure it is in the correct position on the drum, motor shaft, and tension pulley! Next, get up and rock the drum up and down slightly to make sure it has engaged the two rear rollers properly. Rotate the drum manually one or two turns to make sure the belt is in the correct position. Then replace the front door panel by dropping it onto the two clips at the base of the unit and taking care to replace the door switch in reverse order of taking it out. Then replace the two screws at the top front on each side of the unit to secure the front panel. Lower the top of the unit back in place, plug in the dryer, turn it on and enjoy the lack of noise you have created.
Read more...


