


Appliance Parts
- Accessories
- Dishwasher
- Dryer
- Stove / Oven
- Microwave
- Refrigerator
- Washer
- See more... See less...
Lawn Equipment Parts
- Lawn Mower
- Chainsaw
- Blower
- Generator
- Air Compressor
- Lawn Tractor
- Pressure Washer
- See more... See less...
Shop With Confidence


How to Fix A Washer That Won't Start

Click a Part Below to Start Your Repair:
Lid Switch & Actuator Door Switch & Strike Start Switch & Timer Knobs Drive Motor Main Control BoardAbout this repair:
- Rated as EASY
- 2013 repair stories
- 10 step by step videos
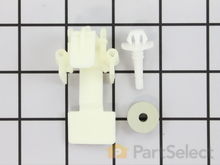
Lid Switch & Actuator
The lid switch on a top load washing machine is a safety device designed to prevent the motor circuit from operating when the lid is open. ln some models, the water inlet valve circuit is controlled as well. If the lid switch fails, the washer may not start. The lid switch is normally located beneath the main top with a projection on the lid or a pin attached to the lid that will actuate the switch when the lid is closed.
How to test the lid switch on a washing machine with a multi-meter:
- Disconnect your appliance from the power source before beginning, and then remove the top panel or cabinet to access the switch.
- Once you have located the switch, verify that the switch is being activated mechanically and that any levers or actuators are not damaged or sticking., then the switch may be defective.
- If the switch is being activated but there is no power being supplied to the motor or water valve circuits, remove the switch from the washer to check it for continuity.
- With your multi-meter on the Rx1 setting, touch the probes to the terminals, then press and hold the switch button down. You should receive a reading of zero.
- If you do not receive this reading, you will need a replacement lid switch.

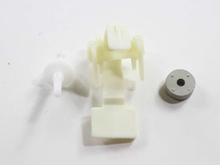
Door Switch & Strike
A safety feature found on front load washing machines is the door switch and the door lock and strike. On most models, the door switch must be closed, and the door lock must be activated before the washer will start.
How to test the door switch and strike on a washing machine with a multi-meter:
- The switch is normally located in the door frame of the washing machine but may also be part of the door lock assembly. Begin by visually inspecting the strike to make sure that it engages the door lock assembly and that the door remains closed. You should also be looking for any signs of damage or cracking.
- To test the switch for continuity, unplug the washing machine and remove the front panel in order to access the switch. Once you have access to it, remove the switch in order to test it.
- Using a multi-meter set to the Rx1 setting, place the probes on the switch’s terminals, you should receive a reading of infinity. With the probes still on the terminals, press in on and hold the switch’s button, your reading should change to zero or roughly zero.
- If your test results differ from those above, you will need a replacement door switch & strike.


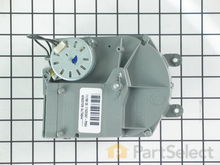
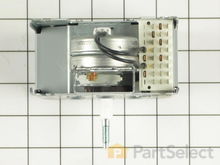
Start Switch & Timer
The start switch on some top load washers is often part of the timer and is activated by pulling out on the timer knob. Although not normally available as a separate part, the switch can be tested for continuity with a multi-meter.
How to test the start switch and timer in a washing machine with a multi-meter:
- Disconnect your washing machine from the power source as you will be handling electrical components.
- Remove the appliance’s cabinet in order to locate the switch. Once you have located it, carefully remove it from the washer. Removing the wires by grasping the metal connectors and not the wires themselves.
- Set your multi-meter to the Rx1 setting, place the probes on the timer contacts (as noted by your wiring diagram) and press and hold down on the switch’s button. You are testing for continuity and should receive a reading of zero or nearly zero.
- If you do not receive this reading, you will need a replacement start switch.

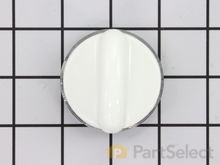
Knobs
On models that use a start switch that is part of the timer, you should also check the timer knob to ensure that it is properly engaging the shaft that operates the switch. Normal wear can cause the knob to slip on the shaft and not be able to engage the switch mechanism.
How to inspect the knobs on your washing machine:
- Unplug your washing machine before beginning.
- Remove the rear panel or cabinet in order to access the back of the timer.
- Once you have located the timer, visually inspect the shaft to verify that the knob engages the timer when it is pulled out and pushed in.
- If it does not engage, you will need replacement knobs.


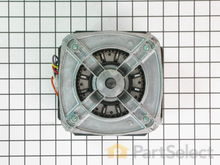
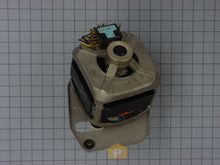
Drive Motor
All washing machines use a motor that is responsible for spinning and agitating during the cleaning cycle. Many top load brands use a reversing motor which means the motor spins in one direction for agitating and another for spinning and draining. If the motor does not start but makes a humming or buzzing noise, then it may be defective.
How to test a washing machine drive motor with a multi-meter:
- Before beginning, make sure that you disconnect the power from your appliance as you will be handling electrical components, and then remove the cabinet of your washer
- Locate and remove the drive motor in order to test it. Use caution when disconnecting the wires attached to the motor, lightly grasp the metal connectors when removing them, do not pull directly on the wires.
- Using a multi-meter on the Rx1 setting, touch the terminals of the motor with the meter’s probes. You are testing for continuity and should receive a reading of zero or close to zero.
- With one probe still touching the terminal, touch the other probe to the bare metal housing of the motor. You are testing the ground connection and should not receive any reading from this test.
- If your tests produce readings that are different from those above, you need a replacement drive motor.

Main Control Board
On electronic control models, the main control board operates the individual components of the washer including the fill circuit and the drive motor in the same manner as a manual timer model. If the control board does not provide the proper voltage to the drive motor, fill valve, drain motor or door lock then the washer may not start. The main control board on most washers is complicated and difficult to diagnose without proper test equipment and procedures. You can visually inspect the control for signs of electrical arcing or burned or damaged components on the board.
How to inspect the main control board in a washing machine:
- Because you will be working with the electrical components of your washer, make sure you have disconnected the appliance from the power source before beginning.
- Locate and remove the main control board in order to inspect it. It is usually located directly behind the control pad, and you will need to remove all or part of your washer’s cabinet to access it.
- Visually inspect the control board for any signs of wear, damage, cracking, or burning.
- If you find any of the above, you will need a replacement main control board. Use caution when replacing a control board as sometimes the burned components are caused by external component failures. These will need to be identified and corrected before installing a new control board.


More Repair Parts
Still not sure which part is broken? We can offer you custom troubleshooting help if you search with your model number.
