Range Hinges
- Search your model number to find:
- Genuine OEM parts guaranteed to fit
- Free manuals and guides
- Repair instructions and videos
Popular Range Hinges
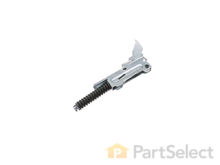
Range Door Hinge - Active With Spring
Replace door, return locking clips to forward position, check door for operation. Read more...
PartSelect Number PS11752376
Manufacturer Part Number WPW10299224
This is a door hinge active with spring, for your range. The hinge controls the opening and closing of the oven door. If your oven door seems to be sticking, you may want to consider replacing this part. We recommend replacing both hinges at the same time. This model is roughly 9.5 inches long, f4 inches wide, and almost 1inch thick.
Fixes these symptoms
- Door won’t close
- See more...
Installation Instructions
Charles from PAYETTE, ID
DOOR HINGE BROKEN, NOT SUPPORTING DOOR
Followed youtube instructions: lifted clips on door hinges, removed door. removed screws, removed rear cover, replaced right hinge. reassembled door. caution: door handle will fall off when top two screws are removed. Alignment of screws is some what difficult, requires awl. Replace door, return locking clips to forward position, check door for operation. Read more...
Your Price
$98.27
In Stock
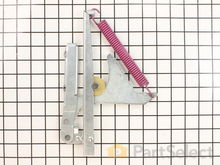
Range Door Hinge
PartSelect Number PS11744215
Manufacturer Part Number WP74008014
The hinges control the rate that the oven door opens and closes, and allows the door to stay open at an angle. This hinge can be used on either the left or right hand side of your oven, and is approximately 20 1/2 inches long. If your oven door will not open or close easily, you may need to replace this part. It may be a good idea to replace both hinges at the same time. If a spring has become loose on one hinge, the other hinge is likely to have the same issue. The repair is simple and only requires a Phillips screwdriver and a small bent nail. For a full step-by-step guide, check out the video below.
Fixes these symptoms
- Door won’t close
- See more...
Installation Instructions
William from Statesville, NC
Oven door wouldn't close completely
Parts arrived in three days and it was an easy swap of the hinges but the same problem still existed: the oven door wouldn't close completely, so the oven light stayed on and the convection wouldn't work either unless the door closed all the way. The replacement hinge's springs apparently aren't strong enough to close it and the springs aren't adjustable - which is a design flaw. I did correct the problem though, by using three dollars worth of 1" round magnets, which I placed inside the door: they stay put and are strong enough to pull the door tight.
Read more...
Range HINGE DOOR
PartSelect Number PS9494421
Manufacturer Part Number WB10X21659
Fixes these symptoms
- Door won’t close
- See more...
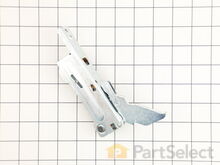
Range Door Hinge - Left or Right Side
PartSelect Number PS2087906
Manufacturer Part Number 74010546
This door hinge can be used for the left or right side. As per the manufacturer if the hinges have never been replaced on the appliance, they suggest to replace the door hinge receptacle kit.
Fixes these symptoms
- Door won’t close
- See more...
Installation Instructions
Norman from Brockton, MA
I leaned on the door and broke the hindge
I had a lot of trouble unlocking the door hindge you must pull the door out to change the hinge they are on the hinge and slide foward then pull the door up and out lay the door flat on a table cover the table with a towel so you don't scrach either one. Unscrew 6 screws on the door cover. 3 on top 3 on bottom take the cover off the hinges are exposed there 3 screws on the hinge 1 on the front and 2 on the bottom replace hinges install face insert door and lock the hinge it's all done. I wish I had these directions
Read more...
Range Door Hinge - Left or Right Side
PartSelect Number PS2088468
Manufacturer Part Number 74011142
Sold individually.
Fixes these symptoms
- Door won’t close
- See more...
Installation Instructions
Patrick from MORAGA, CA
Two digits on the touch pad didn't work "9" & "0". Went to utube and they said hinges go bad causing heat to leak affecting touch pad
Pull range out 6 inches. Open door to 45 degrees and pull up to remove door. Remove both side plates, two screws each side. Remove both hinges by loosening two small bolts on the front of range that connect to the hinges. Place new hinges in place. Bolt hinges using bolts you removed, replace side panels. Slide door on hinges and push back range.
Read more...
Range Door Hinge - Left Side
PartSelect Number PS11747290
Manufacturer Part Number WP9760574
This hinge is for a stainless steel door and is located on the left side of the oven door.
Fixes these symptoms
- Door won’t close
- See more...
Installation Instructions
Tony from HAYDEN, ID
door hinges worn out oven door not fully closing
Remove and replace oven door hinges. Disassembly of oven door unit required. Step by step instructions available on youtube.
Read more...
Range Door Hinge - Passive Without Spring
PartSelect Number PS11752379
Manufacturer Part Number WPW10299227
Fixes these symptoms
- Door won’t close
- See more...
Range HINGE- DOO
The hinge replacements did not fix the problem. I think the problem was that the hinge's mating part inside the door had been deformed, perhaps by leaning on the door when fully opened. I compensated for that by placing two stacked magnets near the upper hinge mounting screw hole on the inside of the oven body. (0.75" screws , 8-24 or metric equiv., needed for the upper screw location.) This gave the hinge about 15 degrees of additional door tilting force. In addition, I added 6 ceramic magnets across the top of the door mating surface, kudos to that website. Now it pulls fully flush with the magnets.
Ceramic magnets are good to 400+ degrees and they come in boxes of 120 for $12.00.
I only had one oven as a sample, but I could see what I thought was deformation on the inside of the oven door where the hinges are inserted. In this case, I think that makes (only) hinge replacement futile.
Sorry if this solution does not fit your marketing desire, but I did leave the new hinges installed. Read more...
PartSelect Number PS2088772
Manufacturer Part Number 74011475
Fixes these symptoms
- Door won’t close
- See more...
Installation Instructions
Barrett from MERCER ISLAND, WA
The oven door didn't shut all the way
Clearly, the oven gasket was not the cause of the problem.The hinge replacements did not fix the problem. I think the problem was that the hinge's mating part inside the door had been deformed, perhaps by leaning on the door when fully opened. I compensated for that by placing two stacked magnets near the upper hinge mounting screw hole on the inside of the oven body. (0.75" screws , 8-24 or metric equiv., needed for the upper screw location.) This gave the hinge about 15 degrees of additional door tilting force. In addition, I added 6 ceramic magnets across the top of the door mating surface, kudos to that website. Now it pulls fully flush with the magnets.
Ceramic magnets are good to 400+ degrees and they come in boxes of 120 for $12.00.
I only had one oven as a sample, but I could see what I thought was deformation on the inside of the oven door where the hinges are inserted. In this case, I think that makes (only) hinge replacement futile.
Sorry if this solution does not fit your marketing desire, but I did leave the new hinges installed. Read more...
Your Price
$48.72
In Stock
Range Hinge with Roller - Right Side
Then I removed the drawer to access the spring.
Removed the spring, noting which attachment hole was used.
Removed the hinge assembly with a Phillips screwdriver.
Replacef the unit.
Repeated for the other hinge assembly.
Note: it took longer to find the correct parts in the parts diagrams than it did to replace them. Read more...
PartSelect Number PS231612
Manufacturer Part Number WB14X104
This is a hinge with roller for the oven door on your range. The roller allows you to open and close the door with ease and control. If your door is not opening easily, you may need to replace this part. To make this repair you will need a Phillips screwdriver and a pair of pliers. Take note that this model is only for the right-hand side of your unit, to replace the left-hand side, see the related parts section. We recommend replacing both hinges at the same time.
Fixes these symptoms
- Door won’t close
- Door won’t open after self cleaning cycle
- See more...
Installation Instructions
Frank from Pebble Beach, CA
The right side hinge assembly broke. Replaced both sides
First I removed the door by lifting it off the hinge assemblies.Then I removed the drawer to access the spring.
Removed the spring, noting which attachment hole was used.
Removed the hinge assembly with a Phillips screwdriver.
Replacef the unit.
Repeated for the other hinge assembly.
Note: it took longer to find the correct parts in the parts diagrams than it did to replace them. Read more...
Range Door Hinge - Right Side
PartSelect Number PS11747291
Manufacturer Part Number WP9760575
Fixes these symptoms
- Door won’t close
- See more...
Installation Instructions
William from Dumfries, VA
Inside oven door glass was broken and door was not closing completely.
I removed the door from the oven by locking the hinges with the built-in locks leaving the door open about 20 degrees. the door can then be lifted slightly off the hinges and pulled out at the bottom while tilting the top inward to remove it from the oven. With the door laying on a suitable surface with the outside face down, I removed about 6 or 8 screws from the door inside panel freeing the springs and the inside panel from the middle and front panels. Care must be taken to note from which locations the pointed self-taping screws come as opposed to the narrower-thread machine screws that hold the springs. Note: The inside panel does not need to be removed! Once the inside panel is freed from the inner panels, using suction cups the glass can be lifted slightly and slid toward the bottom of the door, rotated slightly, and removed through the window hole in the back face of the door. The new glass is installed in a similar way using suction cups by maneuvering it at a angle through window hole and into its frame. The hinges were replaced by lifting the bottom of the inner door panel slightly to clear the hinge and swapping in the new ones. Be sure to observe the difference between the left and right hinges in the location of the screw hole at the bottom of each hinge The narrow-thread machine screws that hold the hinges to the inside panel should be installed first while you can get you hand inside the door to hold each hinge in alignment with the screw holes while you start each screw. Re-install the pointed self tapping screws by pressing down on the rear panel to collapse the spring-action glass frames within the door so that the short screws will reach their threaded hole. Be careful to back off the self tapping screws first until you feel a click into the original threads to avoid stripping the holes. Last re-install the door on the oven. The replacement hinges should have come with the springs already "cocked" with the built in locks in place. Install the door with it in tan almost-closed position by sliding the hinge extensions into the slots in the oven. Once the extensions are properly in the slots the door can be fully opened and the built-in hinge locks re-positioned to the unlocked position to allow the door to fully close. Should you accidentally release only one of the hinge locks in trying to insert the hinge extensions into the slots you will have to reset the hinge. If the door is free from the oven, this may require a pair of heavy pliers, like channel lock pliers, to re-tension the hinge spring and "cock" the hinge extension by re-positioning the built-in lock in the locked position. If the hinge lock on one side of the door releases, but the the opposite side hinge extension is not fully inserted into the oven slot I recommend carefully moving the door to the fully open position, being careful to avoid twisting the inserted spring's extension, so that the hinge lock can be re-positioned to the locked position, the door full removed, and start again to install it. It helps to have two persons to hold opposite sides of the door for this operation as the door is heavy, but not essential. When in the proper position the hinge extensions may not appear fully inserted, but this is normal to allow for closing of the built in locks. It helps to observe how much of the hinge extension is exposed either before removing the door initially, or, if you have a double oven, looking at the hinges on the door of the other oven. Good luck with your repair.
Read more...
Range Hinge Brands
- Amana Range Hinges
- Bosch Range Hinges
- Crosley Range Hinges
- Electrolux Range Hinges
- Frigidaire Range Hinges
- Gaggenau Range Hinges
- General Electric Range Hinges
- Gibson Range Hinges
- Hotpoint Range Hinges
- Jenn-Air Range Hinges
- Kelvinator Range Hinges
- Kenmore Range Hinges
- KitchenAid Range Hinges
- Magic Chef Range Hinges
- Maytag Range Hinges
- Roper Range Hinges
- Tappan Range Hinges
- Uni Range Hinges
- Westinghouse Range Hinges
- Whirlpool Range Hinges


