Range Hardware
- Search your model number to find:
- Genuine OEM parts guaranteed to fit
- Free manuals and guides
- Repair instructions and videos
Popular Range Hardware
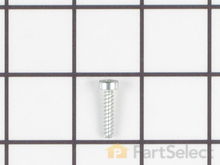
Range Torx Screw
This was made more difficult by the fact that the screws that hold the burners to the range top were rusted and had to be drilled out so the the burners could be released from the top.
1. Disconnect the power to the range.
2. Open the top oven door.
3. Remove 2 - 1/4" sheet metal screws at the front corners of the range top assy. Remove the Burner knobs and the two Phillps screws that holds the gas valve assembly to the range top.
4. With a drill, remove the tops of the screws to release the burners from the range top. If the screws are in good condition and just unscrew them and the upper burners from the Orifice Holders. (I had to replace the orifice holders because the screws were stuck in them due to rust).
5. When the burners are free, lift the range top at the front and remove it from the range. Disconnect the ignitor wires from the ignitors on each holder.
6. To replace the Orifice Holders, disconnect the gas supply pipes from each holder by loosening the compression nut at the holder using an adjustable wrench. Secure the Orifice Holders when loosening the fittings, BE CAREFUL not to damage the aluminum gas supply pipes.
7. Note that there are 3 different Holders, be sure to use the holder that matches the specific location.
8. For LP gas fueled ranges ONLY, remove the small gas jets from the old holders and install them in place of the parts supplied with the new orifice holders. The new parts contain NATURAL GAS jets which are not compatible with LP gas. Each Different Orifice Holder uses a specific orifice or jet, make certain that the orifice matches the orifice holder. Check for leaks at the gas connections using soapy water.
9. Carefully raise the old ignitor switches (4) off the shafts of the gas valves. Note the top and bottom configuration of the switches
10. Carefully release the wires that come from the rear of the range from the rearmost switch. Press a suitable pin or other suitable tool in a the hole, beside the wire, just enough to release the wire. (Look at the NEW switch assemble to see how this works). Remove the wires from the NEW switch first to see how it is done. Repeat the process on the old switches. (you will re-use the wires that come up from the rear of the range.
11. Install the new switch assembly over the four (4) burner gas valves, take care to align the "D" shaped shafts with the holes in each valve.
12. Insert the wires in the two connections on the rearmost switch. CAUTION!!! Be sure to install the wires so that the color codes agree with the wires on the new switch assembly. Black to black and gray to gray.
13. Install the 4 clear plastic "shields" over the shafts and against the top of each switch.
14. Re-connect the ignitor wires to the burners and Re-Install the range top, in the reverse order of dis-assembly. Read more...
PartSelect Number PS11741257
Manufacturer Part Number WP3368921
7-18 x 3/4" - sold individually.
Fixes these symptoms
- Gas igniter glows, but will not light
- Will Not Start
- See more...
Installation Instructions
Michael from Dardanelle, AR
Ignitor switches shorted out
The ignitor switches are installed on top of the 4 gas valves for the range top. These switches control the electronic ignition. To replace the switch assembly the top of the range must be removed to gain access. This was made more difficult by the fact that the screws that hold the burners to the range top were rusted and had to be drilled out so the the burners could be released from the top.
1. Disconnect the power to the range.
2. Open the top oven door.
3. Remove 2 - 1/4" sheet metal screws at the front corners of the range top assy. Remove the Burner knobs and the two Phillps screws that holds the gas valve assembly to the range top.
4. With a drill, remove the tops of the screws to release the burners from the range top. If the screws are in good condition and just unscrew them and the upper burners from the Orifice Holders. (I had to replace the orifice holders because the screws were stuck in them due to rust).
5. When the burners are free, lift the range top at the front and remove it from the range. Disconnect the ignitor wires from the ignitors on each holder.
6. To replace the Orifice Holders, disconnect the gas supply pipes from each holder by loosening the compression nut at the holder using an adjustable wrench. Secure the Orifice Holders when loosening the fittings, BE CAREFUL not to damage the aluminum gas supply pipes.
7. Note that there are 3 different Holders, be sure to use the holder that matches the specific location.
8. For LP gas fueled ranges ONLY, remove the small gas jets from the old holders and install them in place of the parts supplied with the new orifice holders. The new parts contain NATURAL GAS jets which are not compatible with LP gas. Each Different Orifice Holder uses a specific orifice or jet, make certain that the orifice matches the orifice holder. Check for leaks at the gas connections using soapy water.
9. Carefully raise the old ignitor switches (4) off the shafts of the gas valves. Note the top and bottom configuration of the switches
10. Carefully release the wires that come from the rear of the range from the rearmost switch. Press a suitable pin or other suitable tool in a the hole, beside the wire, just enough to release the wire. (Look at the NEW switch assemble to see how this works). Remove the wires from the NEW switch first to see how it is done. Repeat the process on the old switches. (you will re-use the wires that come up from the rear of the range.
11. Install the new switch assembly over the four (4) burner gas valves, take care to align the "D" shaped shafts with the holes in each valve.
12. Insert the wires in the two connections on the rearmost switch. CAUTION!!! Be sure to install the wires so that the color codes agree with the wires on the new switch assembly. Black to black and gray to gray.
13. Install the 4 clear plastic "shields" over the shafts and against the top of each switch.
14. Re-connect the ignitor wires to the burners and Re-Install the range top, in the reverse order of dis-assembly. Read more...
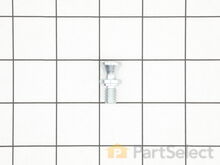
Range Door Handle Fastener
PartSelect Number PS6447735
Manufacturer Part Number WR01X11007
This is a door handle fastener to secure the handle to your refrigerator drawer. It is also known and a mounting bolt or screw. It is approximately 1 inch in total length, and is made of metal.
Fixes these symptoms
- Door won’t open or close
- See more...
Installation Instructions
Charles A. from ARVADA, CO
Your Price
$10.97
In Stock
Range Lid Bumper
1) Remove all shelves and ice dispencer
2) Remove (x2 screws / a green wire that's clipped on) and the evap cover
3) Remove (x3 screws) cover motor/solenoid and unplug harness
3) Remove (x2 screws) icemaker and unplug harness
4) Remove/Loosen (x2 screws bottom / x2 screws top) Duct air freezer
5) Remove (x2 screws) Orifice evap fan and unplug harness
note: will need to remove right screw to get green ground wire off. And be careful on to damage the gasket.
6) Once Orifice out of refrig, disassemble.
7) Main thing to replace is the Motor DC Evap fan, and maybe CapDust, BumperLid, GrommetEvpFan.
8) now just go in reverse order...
That's it . . . wasn't too hard and NO MORE whining!!! Save at least a couple of hundred by not having a prof. come out and do it. Easy enough for most DIY person. Read more...
PartSelect Number PS284979
Manufacturer Part Number WR02X10540
The lid bumper or evaporator fan motor bumper in your refrigerator prevents the fan motor from scraping against the side bracket. If your refrigerator/freezer is noisy, the bumper could be worn down or missing, and the sound could be a result of the motor scraping the side bracket. You will find it between the fan motor and the side bracket on the evaporator fan motor assembly. To access the bumper, you will need to remove the evaporator fan motor assembly from the freezer. This part is made of orange rubber and is less than half an inch in diameter. It has a rounded top and a slightly pointed bottom, and is sold individually.
Fixes these symptoms
- Fridge too warm
- Noisy
- See more...
Installation Instructions
Darren from Renton, WA
Loud high pitch whining noise behind freezer
Ref. still worked but had this loud high pitch whining noise coming from inside freezer for a few months. It's probably a bad bearing or motor.1) Remove all shelves and ice dispencer
2) Remove (x2 screws / a green wire that's clipped on) and the evap cover
3) Remove (x3 screws) cover motor/solenoid and unplug harness
3) Remove (x2 screws) icemaker and unplug harness
4) Remove/Loosen (x2 screws bottom / x2 screws top) Duct air freezer
5) Remove (x2 screws) Orifice evap fan and unplug harness
note: will need to remove right screw to get green ground wire off. And be careful on to damage the gasket.
6) Once Orifice out of refrig, disassemble.
7) Main thing to replace is the Motor DC Evap fan, and maybe CapDust, BumperLid, GrommetEvpFan.
8) now just go in reverse order...
That's it . . . wasn't too hard and NO MORE whining!!! Save at least a couple of hundred by not having a prof. come out and do it. Easy enough for most DIY person. Read more...
Your Price
$16.68
In Stock
Range Single Heating Element Support Clip
I had noticed that the former element was sagging at the front end. I installed the additional clips (not original) on each forward end of the element for additional support. Read more...
PartSelect Number PS243701
Manufacturer Part Number WB2X9719
The metallic clip, or also known as a broil element support, is for a oven element on a range. This part holds the broil element in place on top of the oven. If your support clip is broken then this replacement should be the solution. The tools needed for this project are slip joint pliers. For safety precautions, make sure to unplug your range from the power source, or shut off the house circuit breaker before starting this project. Refer to the installation instructions for best results and accuracy.
Fixes these symptoms
- Element will not heat
- See more...
Installation Instructions
Paul from Canton, NY
broiling element had burned through, req. its replacement
First I removed the two screws that hold the element in place. I also removed a screw that held one end of a support bracket. I then pulled the element out about 3 inches and disconnected the two wires. Reversing these steps, I finished the element's replacement.I had noticed that the former element was sagging at the front end. I installed the additional clips (not original) on each forward end of the element for additional support. Read more...
Range Door Bumper - Black
PartSelect Number PS241365
Manufacturer Part Number WB2K15
Sold individually.
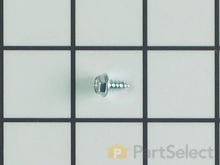
Range Screw, 8/18 x 3/8
PartSelect Number PS11746840
Manufacturer Part Number WP90767
This screw is sold individually.
Installation Instructions
Alexander from Lakeland, FL
Broken Dryer Knob
First let me just say that Partselect.com is now one my stored favorites in my web browser. I came home from a business trip and saw a pair of pliers on the dryer. I thought that was odd until my wife informed me that the knob on the dryer had broken. So she was using the pliers to select the cycle. Somehow she knew where the missing pointer was actually pointing. Since the dryer was over 5 years old I saw this as an opportunity to upgrade both appliances. Not with my frugal wife. A search of the Internet popped up partselect. I ordered Wednesday morning and the parts where on my doorstep late Thursday. Trust me I was very surprised. Everything worked perfectly. Two thumbs up!!!
Read more...
Range Screw - 10-16 x 1
PartSelect Number PS11741409
Manufacturer Part Number WP3387230
This screw is sold individually.
Installation Instructions
Wendy from BRAINTREE, MA
Freezer handle came loose on one side
Discovered that the seating in the handle was stripped on one side so removed the old handle (toughest part of the repair). Based on a previously asked/answered question, the PartSelect website provided an accurate list of the required parts (and corresponding part numbers) so I had everything I needed. Installing the new handle was very straightforward and quick.
Read more...
Range Mounting Screw
PartSelect Number PS6011723
Manufacturer Part Number WR01X11014
This OEM part is from GE and is designed for use in your refrigerator. This part is known as a door mounting screw, and is for mounting the handles of the refrigerator to the door studs.
Fixes these symptoms
- Door won’t open or close
- See more...
Range Hardware Brands
- Admiral Range Hardware
- Amana Range Hardware
- Caloric Range Hardware
- Crosley Range Hardware
- Electrolux Range Hardware
- Estate Range Hardware
- Frigidaire Range Hardware
- General Electric Range Hardware
- Gibson Range Hardware
- Hardwick Range Hardware
- Hoover Range Hardware
- Hotpoint Range Hardware
- Inglis Range Hardware
- Jenn-Air Range Hardware
- Kelvinator Range Hardware
- Kenmore Range Hardware
- KitchenAid Range Hardware
- Litton Range Hardware
- Magic Chef Range Hardware
- Maytag Range Hardware
- Norge Range Hardware
- Roper Range Hardware
- Tappan Range Hardware
- Uni Range Hardware
- Westinghouse Range Hardware
- Whirlpool Range Hardware


