Enter the code DIYDAD10 at checkout to apply your discount. Discount will be applied at checkout when the code is entered & applies to all parts. Cannot be combined with any other coupon or special offer & cannot be applied to a previously placed order. Not valid toward tax or shipping & handling. Discount has no cash value. Discount expires on June 17 at 11:59pm EST.
You've Got 10% Off Your First Order!Save 10% with code at checkout *click to copy coupon code
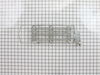
This hose clamp is used in a wide variety of household appliances. Most often it is found in washers, dishwashers, refrigerators, freezers, dehumidifiers, garbage disposals, or air conditioners. This ...
$11.80
In Stock
Order within the next 10 hrs and your part ships today!
If your washer shakes or vibrates loudly when it reaches its max speed, make sure the 4 levelling legs are even. Adjust the legs so that the machine is level, and tighten the locking nuts on the legs ...
$18.51
In Stock
Order within the next 10 hrs and your part ships today!
The hose clamp is used to hold the water hose in place which will prevent the hose from leaking water. Sometimes the clamp may lose its ability to latch on, causing a leaking washer. For the installat...
$11.12
In Stock
Order within the next 10 hrs and your part ships today!
This inlet hose washer, also known as a high pressure inlet hose washer, is used in washing machines, refrigerators, freezers, and dishwashers. The function of this part is to create a watertight seal...
$8.02
In Stock
Order within the next 10 hrs and your part ships today!
Unplugged the 220 volt source. Disconnected the vent line from the back of the drier. Removed the six screws holding the back panel with a 1/4 inch nut driver. Tipped the drier up at a 45 degree angle against the wall to give better access to the inside. Removed the screws holding the two thermostats to the side of the heater box and
... Read morelaid them aside. Disconnected the two red power lines to the heater element. Removed the large screw at the top of the heater box and removed the flexible bracket holding the heater box, then lifted the heater box up and away from the drier. Removed the one screw holding the heater element inside the heater box and pulled out the old heating element. The old element was open as found using an ohmeter on the two main terminals. Threw away the old element. Removed the new heating element from the box and slid it into the heater box making sure to align the terminal bracket with the hole in the heater box for the reinstallation of the mounting screw. Tightened this screw. Remounted the heater box to the two mounting slots and reinstalled the flexible mounting bracket to the top of the heater box and installed and tightened the large screw holding this bracket. Cut off and removed the old electrical push-on terminals from the two red power wires for the heater element. These were discolored and oxidated from the conducted heat over the years of operation. Using the supplied short red leads with push-on terminals already installed, I wire tied these new leads to the existing red power leads and pushed them onto the heater element terminals. Rechecked the soundness of the twisted wire connections to make sure they were tight. Replaced the back panel and reinstalled the six 1/4" screws with the 1/4' nut driever. Reinstalled the driver vent line and tightened its holding ring. Slid the drier back into position on the floor. Checked the level and readjusted the leveling legs for a steady floor stance. Reinstalled the 220 volt power connecter and set the controlls for a drying cycle. Let the drier run for aproximately 1 minute and then checked the air temperature inside the drier. IT WAS NOW PRODUCING HOT AIR. Project completed successfully and I was now a HERO in my wifes eyes. Absolutely no technical problems encountered. Just remember, unplug the drier before starting ANY repairs. To forget this COULD RUIN YOUR DAY.
This is the second heating element I have replaced in this dryer which I bought new in 1977. That's right it is 32 years old and still works great!
The replacement process is simple: One: pull the dryer away from the wall so that you have room to work in the back. Two: Disconnect the dryer vent hose from the back of t
... Read morehe dryer. Three: Remove the five - 5/16" hex head sheet metal screws that hold the back cover in place and set the cover to the side. Four: Go to the front of the dryer and remove the lint filter and the two slot head screws that hold the lint filter opening to the internal frame. Five: Pop the top of the dryer open and remove the one 5/16" hex head screw that holds the top of the heating element strap to the frame. Six: Go to the back of the dryer and remove the two leads from the thermostat that is mounted to the heating element casing. CAUTION: Be careful to note the position of the wires and be certain that you reattach the correct wire to the correct lead. Seven: Lift the heating element case up about 1/2" to disengage the hooks at the bottom that hold it in place.Then pull the bottom of the heating toward you slightly while sliding it down. This will allow you to remove the heating element and casing. Eight: Remove the heating element from the casing and insert the replacement heating element.
Reverse the above process to reassemble. This entire process only takes about 20 minutes.
An additional note: Be certain that you pay careful attention to the positioning of the strap that holds the top of the heating element case to the dryer frame. If you install it incorrectly, the heating element case can fall away from the back of the drum assembly.
First, I moved the dryer out where it would be easily accessable. I then removed the back of the dryer using a nut driver. Once this was complete, I removed the cover holding the heating element. I disconnected the two wires and puled the old element out. I replaced it with the new heating element and reconnected the two wires. I then rep
... Read morelace the back cover and moved the dryer back in place. The dryer works and heats much better now. Thankyou