


Models
>
QHE16HYPAFS
QHE16HYPAFS Haier Refrigerator - Overview
Sections of the QHE16HYPAFS
[Viewing 5 of 5]


Keep searches simple, eg. "belt" or "pump".


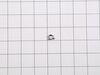
Water Tubing Clip
PartSelect #: PS295031
Manufacturer #: WR1X5278
This water tubing clip, also known as a P-clamp, is usually used within refrigerators and freezers to organize the water line and tubing, but due to its versatility, this clip may also be used in othe...
$8.06
In Stock


Questions And Answers for QHE16HYPAFS
We're sorry, but our Q&A experts are temporarily unavailable.
Please check back later if you still haven't found the answer you need.
Sort by:
- < Prev
- 1
- Next >
Search filter:
Clear Filter
Your search term must have 3 or more characters.
Keep searches simple. Use keywords, e.g. "leaking", "pump", "broken" or "fit".
Sorry, we couldn't find any existing answers that matched.Try using some different or simpler keywords, or submit your new question by using the "Ask a Question" button above!
Tomas
July 5, 2023
Installation of the IM4d ice maker. The ice maker mounting holes don't match up. Cannot raise the ice maker high enough to meet the mounting screws. Also, how can I remove the water tube access cover on the back of the refrigerator to ensure that the connection is correct?
For model number QHE16HYPAFS
Hello Tomas, thank you for a very interesting question. To install the icemaker, follow these steps: Inside the freezer, remove the cover for the icemaker power supply socket. For easy installation, remove the top and middle left freezer drawer. Drive both mounting screws halfway into screw holes on the support bracket of the left-side upper wall in the freezer. Lift the icemaker so the fill tube assembly fits in the fill cup opening. Hang the icemaker on the screws and on the L-shaped tab in front of the supporting bracket. Make sure: The power cord is still firmly in the socket. The fill tube assembly extends into the fill cup opening at the back of the ice maker. The icemaker mounting screws should be located in the uppermost position of the mounting slots on the icemaker bracket. The icemaker is level. The icemaker power switch is in the OFF position. Securely tighten the ice maker with the mounting screws. Removing the access cover requires removing screws that attach the cover to the back of the refrigerator case. We hope this solves your problem!
Was this helpful?
Thank you for voting!
- < Prev
- 1
- Next >
Common Symptoms of the QHE16HYPAFS
[Viewing 1 of 1]

Keep searches simple. Use keywords, e.g. "leaking", "pump", "broken" or "fit".
The fill cup kept breaking and we couldn't find the part. Did a google search and found Partselect.com who had it.
Slide it over the fill hose and just line it up and put it in the slot.
Parts Used:

-
Lana from Fort Myers, FL
-
Difficulty Level:Really Easy
-
Total Repair Time:Less than 15 mins
4 of 13 people
found this instruction helpful.
Was this instruction helpful to you?
Thank you for voting!