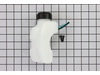
This fuel tank assembly is supplied by the original manufacturer for use in trimmers. It is responsible for storing and transferring fuel to the engine for combustion. The assembly consists of a plast...
It is an authentic manufacturer-sourced replacement part that i supplied for Craftsman trimmers. The function of a carburetor is to mix the air and the gas into a highly combustible mix before it goes...
This genuine bump head knob assembly, sometimes known simply as the bump head, is black and approximately 2 inches long. Sold individually, this plastic part releases the cutting line. Over time, this...
This fuel tank cap fits on top of the fuel tank in your lawn equipment. It prevents gasoline from spilling out and keeps moisture and dirt from entering the tank. If the cap is damaged, it will be vis...
This plastic throttle trigger measures 2.5-inches in length and controls the power, speed, and intensity of the motor for your lawn equipment through the throttle cable and carburetor it is attached t...
This spool is for line trimmers.
Spool houses the cutting line and fits inside the cutting head to cut grass and weeds.
Wear work gloves to protect your hands when installing this part.
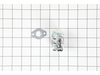
This Switch is a black, plastic on/off switch for a trimmer. Installation of this manufacturer-certified switch is rated as "Easy" and requires a screwdriver, wrench set and socket set. Refer to your ...
Ask our experts a question about this model and we'll get back to you as soon as possible!
1 question answered by our experts.
Sort by:
< Prev
1
Next >
Search filter:
Clear Filter
Your search term must have 3 or more characters.
Keep searches simple. Use keywords, e.g. "leaking", "pump", "broken" or "fit".
Sorry, we couldn't find any existing answers that matched.Try using some different or simpler keywords, or submit your new question by using the "Ask a Question" button above!
Lucy
August 23, 2022
the cord you pull to start want go back down. why?
For model number M2510
Hello Lucy, thank you for asking! This problem is usually caused by torn, greasy, and dirty poles or recoil springs. You will have to open the assembly that is holding the shaft to the engine to access them. Now use a carb-cleaner to remove grease from the spring if they are dirty, then lubricate them and if they are torn then you must replace them. If this does not help then you must check the recoil starter assembly (part number: PS10039402). If it is stuck or has some broken part then you will have to replace it. Please feel free to reach out to us if you need assistance regarding replacement or purchase, our customer service is available seven days a week.
Removed the two screws holding the fuel tank to the main unit. Removed the two fuel lines and any stuck on rubber. Installed and installed two screws to mount the new tank. Slid fuel lines on their respective connectors. Done.
emptied fuel from tank. pulled off the 2 fuel lines from the carburetor.opened the air cleaner door. removed the 2 torque screws that hold on the carburetor. removed the carburetor and air cleaner gasket. installed new carburetor and gasket and put back and tightened the 2 torque screws. closed air cleaner door and pushed the fuel lines o
... Read morento the new carburetor.put some fuel in the tank. started the trimmer. runs great.
The fuel tank is held in place by 2 screws. Simply take the screws off and pull off the fuel lines. Take the new fuel tank. Put it in place and screw the 2 screws in to hold the fuel tank. Connect the fuel lines and you're done. This is the easiest repair I have ever done on any of my lawn equipment.


_WW_1.gif "Engine_Assembly Diagram and Parts List for 41ADZ03C758 MTD Trimmer")
_WW_2.gif "General_Assembly Diagram and Parts List for 41ADZ03C758 MTD Trimmer")