Enter the code DIYDAD10 at checkout to apply your discount. Discount will be applied at checkout when the code is entered & applies to all parts. Cannot be combined with any other coupon or special offer & cannot be applied to a previously placed order. Not valid toward tax or shipping & handling. Discount has no cash value. Discount expires on June 17 at 11:59pm EST.
You've Got 10% Off Your First Order!Save 10% with code at checkout *click to copy coupon code
This turntable tray is for microwaves.
Turntable tray rotates in the center of the microwave to help ensure the food cooks evenly.
Follow the instructions in the owner's manual when installing this part.
We're sorry, but our Q&A experts are temporarily unavailable.
Please check back later if you still haven't found the answer you need.
1 question answered by our experts.
Sort by:
< Prev
1
Next >
Search filter:
Clear Filter
Your search term must have 3 or more characters.
Keep searches simple. Use keywords, e.g. "leaking", "pump", "broken" or "fit".
Sorry, we couldn't find any existing answers that matched.Try using some different or simpler keywords, or submit your new question by using the "Ask a Question" button above!
Donald
February 9, 2024
Light comes on, timer runs, but turntable doesn't turn and the microwave itself doesn't come on.
For model number JES1656SR2SS
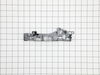
Hi Donald, thank you for getting in touch. Based on our understanding of the issue, we would suggest checking the PCB assembly, part number PS8767153, to solve the problem. We hope that helps!
1. Take out the case by unscrew 8 screws on the back and side of the case 2. Take out the control panel by unscrew 1 screw on the top and slide up 3. Take out the latch by unscrew 2 screws, and slide out 3 electric switches that clipped on the latch 4. Clip the switches onto the new latch 5. Slide in lever switch into
... Read morelatch 6. Put back the latch 7. Put back the control panel 8. Put back the case
REPLACE SWITCH -STAND ON (NOT THE SWITCH-MONITOR) THERE ARE TWO OF THESE SWITCHES THE TOP ONE WAS DEFECTIVE. THE ON OFF SWITCH BUTTON ON THE SWITCH WAS BROKEN
Slide a Butter knife at left side by open push knob door will open. Then open all screws from top cover push cover top side front way then door locks Bracket have 3 microswitch pulls out switches mark them top medium and bottom. Remove 3 screws holding brackets will come out. On bottom see a Cam has 1/4” holes can holding Saft broken then
... Read more install new door lock bracket install microswitch put 3screw and slide Cam on saft . I put a small screw on saft to hold cam on place. There was no screw . That’s why cam saft was broke. Put top cover tight all the screws and door lock fixed.