Models > JCD2389GES > Symptoms > Leaking

Parts That Fix Jenn-Air Refrigerator JCD2389GES Leaking

Leaking is a commonly reported symptom for the JCD2389GES Jenn-Air Refrigerator, and we have put together a full guide on how to fix this. This advice is based on feedback from people who own this exact appliance. We have listed the most common parts for your JCD2389GES Jenn-Air Refrigerator that will fix Leaking. We have included repair instructions, and helpful step-by-step video tutorials. If you are experiencing this issue, not to worry, DIYers just like you have fixed this, and shared their experience to help you!

Fixes Symptom 53% of time
★★★★★
★★★★★
150 Reviews

Rated by 272 customers 


Easy 

15 - 30 mins 

Ratings submitted by customers like you who bought this part.   

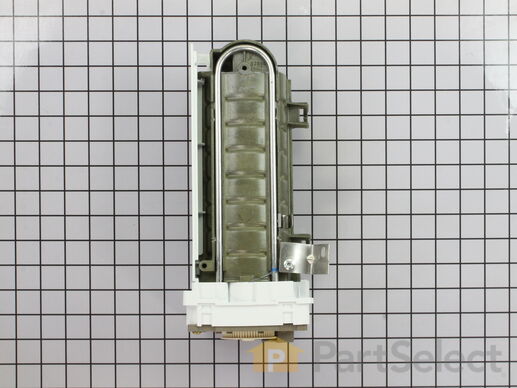
This ice maker (Ice Maker Assembly, Refrigerator Ice Maker) produces ice cubes that are ejected into the storage bucket. It is located in the freezer section of your appliance, mounted on the freezer wall. The ice maker can break from normal wear and accidental damage. If this happens, your refrigerator may no longer make ice cubes, or may not make enough cubes, and the part should be replaced. This model measures approximately 11 inches long and 5 inches wide. It’s constructed of plastic and metal, and comes in black/white/silver. This assembly includes the ice mold and the control device.

$ 139.15
  In Stock
PartSelect Number PS2121513
Manufacturer Part Number D7824706Q

Replacing your Amana Refrigerator Replacement Ice Maker

Replacing your Replacement Ice Maker

Customer Repair Stories

Water overflowed ice maker turnning ice bucket into solid mass of ice

My ice maker has been shedding its non-stick coating for over a year. Within the last month of so, it started pouring water into the ice bucket below, turning it into a solid mass of ice. So I purchased a new ice maker assembly. I encountered two problems not mentioned in the 21 or so do-it-yourselfer repair stories that precede this one. First problem: one of the three screws that hold the ice maker to the refrigerator wall is hidden behind the large (black) end of the ice maker and is difficult to access. Before trying to replace the ice maker, make sure you have the physical dexterity to remove that screw. Second problem: it is not apparent how to remove the wire harness that plugs into the ice maker assembly. BEFORE you can remove the wire harness, you MUST remove the large white cap that covers the black end of the ice maker assembly and then push in a retaining tab to release the wire harness. If you don't do this, the wire harness will not release. Other than those two problems, it was relatively easy to remove three screws, unplug the wire harness, transfer three small, metal parts from the old ice maker to the new, plug in the new wire harness, mount the ice maker assembly so that the water tube is in the proper position, and then re-install the three screws. The ice maker works fine now. (P.S. I was told by an expert that the real problem might be a malfunctioning fill valve. I would have replaced the fill valve if replacing the ice maker assembly had not fixed the problem.)
  • Harry from Grand Ledge, MI
  • Difficulty Level:
    A Bit Difficult
  • Total Repair Time:
    30 - 60 mins
  • Tools:
    Pliers, Screw drivers
269 of 365 people found this instruction helpful.
Was this instruction helpful to you?
Thank you for voting!

Icemaker producing few or no cubes and often leaving "kling-ons" on ice tray

Interior surface of ice tray felt rough & flaky (coating deteriorated) so cubes would not release.
Unplug appliance.
Remove timer cover by hand pressure @ edge.
Remove single attachment screw & bracket at lower front of icemaker.
Disconnect wiring harness from socket @ rear of compartment.
Tricky part was determining what type of connection held the other two attachment points along the long edge of the icemaker. I did not have repair manual or useful drawing but looked @ PartsDirect pic of side brackets & used a small mirror to confirm that mine were also some sort of "snap in" attachment.
Remove icemaker unit by pushing upward and outward on the unit. I takes a good bit of pressure and will pop loose, but be careful not to break attachment bracket from freezer wall.
Scavenge shut off bar and wiring harness from old icemaker once you have it out & attach to new one before installing it back in freezer.
Again, you might find a mirror useful to align those pesky snap-in brackets with the new unit.
Since you probably kept your freezer running while waiting for the part, the plastic snap-ins will be cold and brittle. I warmed them up first by applying a dampened cloth heated in the microwave to make them a little more pliable.
A good push of the new unit towards the snap-ins along with some upward force will get it stable.
Reattach the metal screw in bracket & connect the wiring harness to rear plug... and don't forget to plug the whole thing back in.
It will take awhile for the first batch of cubes dump as the timer may need to cycle completely around to get to the fill cycle... be patient.
Dump the first couple of batches of cubes just to make sure you're free of any residue.
  • Bernie from Diamond Bar, CA
  • Difficulty Level:
    Easy
  • Total Repair Time:
    30 - 60 mins
  • Tools:
    Nutdriver
801 of 888 people found this instruction helpful.
Was this instruction helpful to you?
Thank you for voting!
Fixes Symptom 10% of time
★★★★★
★★★★★
6 Reviews

Rated by 25 customers 


Really Easy 

15 - 30 mins 

Ratings submitted by customers like you who bought this part.   

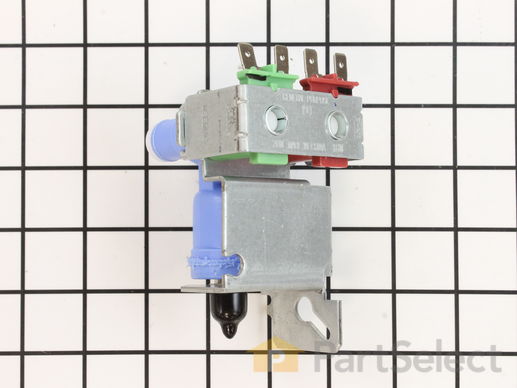
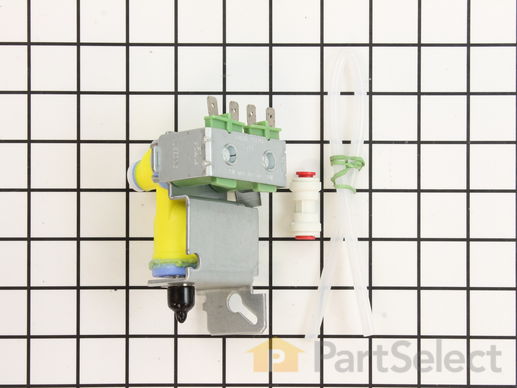
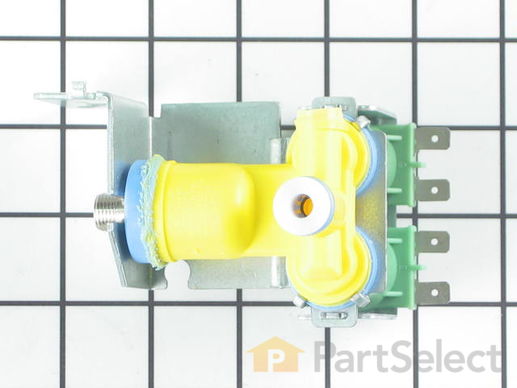
This valve is located behind the refrigerator. It has a 1/4" compression inlet fitting. This part is a solenoid-operated switch that, when activated, releases water from the supply line to the water valve and into the compact icemaker mold.

$ 113.99
  In Stock
PartSelect Number PS2060970
Manufacturer Part Number 61005626

Replacing your Maytag Refrigerator Double Inlet Water Valve

Replacing your Double Inlet Water Valve

Customer Repair Stories

Ice maker over flowing

My ice maker was overflowing and i realized that it was the water valve that needed replaced. unscrewed 1 nut, unhooked 3 water lines, unhooked electrical components and re-installed in reverse order. took about 10-15 mins.
  • ben from manhattan, KS
  • Difficulty Level:
    Really Easy
  • Total Repair Time:
    15 - 30 mins
  • Tools:
    Nutdriver, Pliers
13 of 16 people found this instruction helpful.
Was this instruction helpful to you?
Thank you for voting!

Ice Maker had quit due to faulty valve

Repair work was very easy. Water supply was to the icemaker/water dispenser. After removing the outer fiber cover with a screwdriver, the valve was removed by unscrewing one nut. Post removal water lines were removed with a ordinary pair of scissors approximately 1/2" from where it entered the faulty valve. the two electrical connections were then removed from the faulty valve. The water lines were then connected to the replacement water valve very easily by just inserting and applying a small amount of pressure. The electrical connections were then connected, replacement valve reattatched to the frame work (fit perfectly). After this I turned on the water and BINGO ice :) Post knowing the replacement valve worked I re-attached the fiber cover and pushed the refrigerator back in it respective location. Again this repair was very easy and the part arrived sooner than expected.
  • Brian from Imperial, CA
  • Difficulty Level:
    Really Easy
  • Total Repair Time:
    15 - 30 mins
  • Tools:
    Nutdriver, Screw drivers
65 of 76 people found this instruction helpful.
Was this instruction helpful to you?
Thank you for voting!
Fixes Symptom 8% of time
★★★★★
★★★★★
2 Reviews

Rated by 4 customers 


Really Easy 

Less than 15 mins 

Ratings submitted by customers like you who bought this part.   

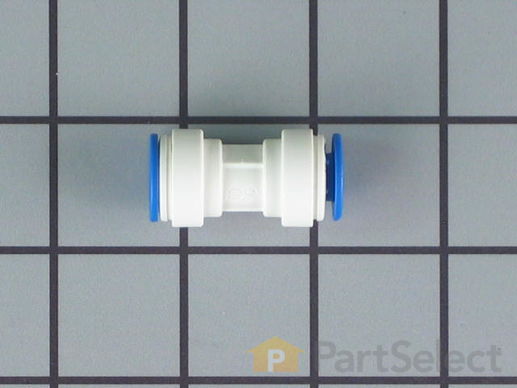
Sold Individually. - * Part may differ in appearance, but functions same as original.

$ 24.41
  In Stock
PartSelect Number PS11740187
Manufacturer Part Number WP2300868

Replacing your Whirlpool Refrigerator Water Tube Connector/Union - 5/16 to 5/16

Replacing your Water Tube Connector/Union  - 5/16 to 5/16

Customer Repair Stories

Leaking water tube connector/union

Received the union I ordered, then discovered that the tubes were different sizes, so I had the wrong part. I had read elsewhere that it was necessary to trim the two ends of the tubes with a box cutter to stop the leaks - I did this, and the leaking stopped. I was then able to go to a local hardware store and get a 5/16 to 1/4 union and replace it. The leaking is stopped, and the water supply in the door is now working like new. No problem with partselect, but I did buy a caliper so that I can check tube diameters if I ever have a similar problem! This is a great site to find instructions - well worth the time to search!
  • Roderick from NEWTOWN, PA
  • Difficulty Level:
    Easy
  • Total Repair Time:
    15 - 30 mins
  • Tools:
    Pliers, Screw drivers
7 of 7 people found this instruction helpful.
Was this instruction helpful to you?
Thank you for voting!

Had to replace a hose connector at the base of my refrig/frreezer

Perhaps a helpful hint:

When aI received the hose adapter/connector, I inserted the 2 hose ends only to have water drip from the connection.
I used a utility knife to remove an inch from each side, then reinserted the hoses. That made the differnce. Dry as a bone.

LG
  • Leo from Salem, SC
  • Difficulty Level:
    Really Easy
  • Total Repair Time:
    Less than 15 mins
43 of 76 people found this instruction helpful.
Was this instruction helpful to you?
Thank you for voting!
Fixes Symptom 6% of time
★★★★★
★★★★★
1 Review

Rated by 4 customers 


A Bit Difficult 

1- 2 hours 

Ratings submitted by customers like you who bought this part.   

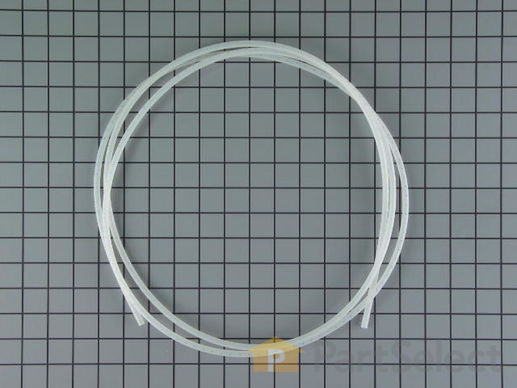
This part supplies water to refrigerator components that require water, such as the ice maker and water dispenser. If you notice a leak coming from your refrigerator, the plastic tubing that feeds your water and ice dispenser might need to be replaced. This part is made of clear plastic and is 1/4 inch thick, and 8 1/2 feet long. Make sure to disconnect power to the refrigerator and shut off the water supply prior to installing this part. Safely store any perishable food items that could deteriorate while the power to the refrigerator is disconnected. Work gloves are recommended to protect your hands during this installation.

$ 16.70
  In Stock
PartSelect Number PS11747816
Manufacturer Part Number WPB5705307

Customer Repair Stories

Ice from icemaker taste metallic; new ice maker directly from box

I did not do the repair yet, there is no schematic on how to route the hose; also no description of how to do the routing/connections.
  • Samuel from ALEXANDRIA, VA
  • Difficulty Level:
    Difficult
  • Total Repair Time:
    More than 2 hours
2 of 3 people found this instruction helpful.
Was this instruction helpful to you?
Thank you for voting!
Fixes Symptom 4% of time

Rated by 9 customers 


Easy 

30 - 60 mins 

Ratings submitted by customers like you who bought this part.   

This double outlet water valve kit replaces the sometimes problematic plastic "Y" connector.

$ 178.31
  In Stock
PartSelect Number PS2003420
Manufacturer Part Number 12001892

Customer Repair Stories

Valve Leaking

The valve on the frig cracked when the frig was in freezing temps during a move.
The part was slightly different than the picture on the parts website due to a design change that eliminated the Y in the water line created only one connection on the valve where there used to be two. I found this out reading on other websites.
This design change also resulted in a part number change, but because this website had such good pics and views, I was able to determine the part was right. We received the part within 3 days and installation was easy. We eliminated the Y in the line and attached the fittings.
  • Betsy from Zimmerman, MN
  • Difficulty Level:
    Easy
  • Total Repair Time:
    15 - 30 mins
  • Tools:
    Pliers, Wrench set
6 of 7 people found this instruction helpful.
Was this instruction helpful to you?
Thank you for voting!

Water dispenser and ice maker wouldn't work (bought the fridge u$ed)

I bought the following parts:

PS109042 Double Outlet Water Valve
PS46363 Dual Outlet Water Valve Kit

When I bought the fridge, the part that PS109042 replaces was cracked and leaking water badly. When I ordered the replacement part, I got confused and ordered PS46363 by mistake. The original parts look similar even when side by side, but the replacement parts are revised drastically.

PS46363 is for the line that is between the water source and the water filter. The original lines from the filter are split (the original part has two inlets) and pipe to one inlet. You'll have to cut your hose right before it forks. The directions that come with the part are very straight-forward.

PS109042 actually distributes the filtered water to the water dispenser and icemaker. The old part had plastic fittings that held the water hosing to the part. The new part has no plastic fittings, yet holds the hosing to the part tightly. The directions that come with the part are very short and concise.

I also replaced the factory water filter with a Brita replacement (they are cheaper and I've used Brita filters before...they are solid).

All in all, I spent less than $100 on fixing a $500 used fridge that works as good as new. My wife was initially doubtful but fairly satisfied with the cost of the parts and the simplicity of installing them.
  • Ronald from Gainesville, VA
  • Difficulty Level:
    Easy
  • Total Repair Time:
    15 - 30 mins
  • Tools:
    Nutdriver, Screw drivers, Socket set
12 of 14 people found this instruction helpful.
Was this instruction helpful to you?
Thank you for voting!
Fixes Symptom 3% of time
★★★★★
★★★★★
10 Reviews

Rated by 13 customers 


Easy 

15 - 30 mins 

Ratings submitted by customers like you who bought this part.   

This refrigerator ice maker fill cup dispenses the water into the ice cube mold during the fill cycle. Replacing the water fill cup is a possible solution if you notice that the ice maker is leaking, or not making/dispensing ice. If you notice the fill cup has been damaged or cracked; replace the part straight away. This water fill cup is a genuine OEM part and will fit most refrigerators, but check the list of compatible brands to make sure yours is included before purchasing.

$ 40.40
  In Stock
PartSelect Number PS11743318
Manufacturer Part Number WP628356

Replacing your Kenmore Refrigerator Water Fill Cup and Bearing

Replacing your Water Fill Cup and Bearing

Customer Repair Stories

Icemaker arm was broken

The tiny piece of plastic that holds the wire that shuts off the icemaker, broke early on with our fridge (after just a few months.) We superglued it, but last week it bit the dust for good.

Once I got this part, I removed the freezer door and trays, and pulled the icemaker out by removing 3 flathead screws and unplugging the cables. Laying in the freezer on the floor was a bit unconfortable, but not too bad.

Then I inspected the icemaker. There was no obvious way to remove the part without disassembling the front of the unit (where the motor is) to release the spindle and free the part, so I did that - 3 or 4 nuts was all that held it together. Once that was out, I removed the spindle, swapped out the part, and put it all back together and back in the freezer. Plugged it in and waited.

It took a while to start making ice. Like 5 hours. Now it's going pretty slow (much slower than before.) Haven't had time to look into it, but my suspicion is the rubber hose that feeds water into the icemaker is blocked with ice or kinked. In any case, we have ice now (but not a lot), and the unit shuts itself off properly. However, we went from having too much ice (thing never shut off) to too little (thing makes ice too slow), so I need to shoot for somewhere in the middle ;)
  • Jason from Austin, TX
  • Difficulty Level:
    A Bit Difficult
  • Total Repair Time:
    30 - 60 mins
  • Tools:
    Nutdriver, Screw drivers
32 of 44 people found this instruction helpful.
Was this instruction helpful to you?
Thank you for voting!

The Bearing Cup Assembly was broken and ice would jamb against it during the ice making cycle.

I removed the ice maker from the refrigerator, by removing one screw on the underside bracket and loosening the two screws at the top side, then lifting the ice maker off the loosened screws. I then unplugged the electrical harness that supplies power from the refrigerator to the ice maker. I then disassembled the ice maker by removing the front cover which is snapped in place, then removing two recessed screws at the front. I removed the broken part, I then reassembled the ice maker with the new part. I replaced the two recessed screws at the front and snapped on the cover. Then I reinstalled the ice maker in the refrigator by plugging in the harness, slipping the ice maker over the loosened screws in the refrigerator and replacing the screw that was removed from the underside bracket. Tightening all the screws completed the project.
  • David from Chester, CA
  • Difficulty Level:
    Really Easy
  • Total Repair Time:
    Less than 15 mins
  • Tools:
    Nutdriver, Screw drivers
107 of 133 people found this instruction helpful.
Was this instruction helpful to you?
Thank you for voting!
Fixes Symptom 3% of time

Rated by 35 customers 


Easy 

15 - 30 mins 

Ratings submitted by customers like you who bought this part.   

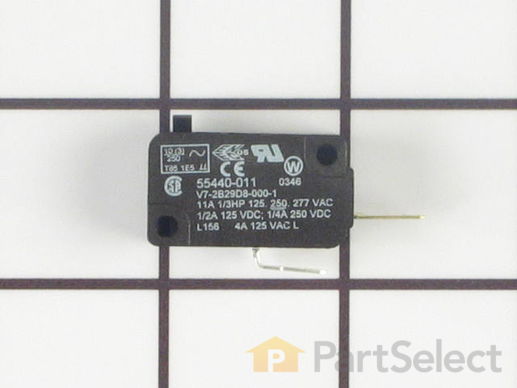
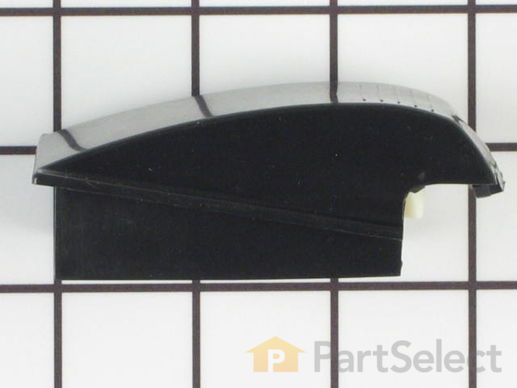
This limit switch is located in the ice/water dispenser section. The switch pictured here is black, though this type of switch is also available in white.

  No Longer Available
PartSelect Number PS2060868
Manufacturer Part Number 61005520

Customer Repair Stories

ice despencer not running

repair&parts instalation was easy but troubleshutting difficult.
  • Joseph from Whiting, IN
  • Difficulty Level:
    Really Easy
  • Total Repair Time:
    15 - 30 mins
  • Tools:
    Pliers, Screw drivers
2 of 3 people found this instruction helpful.
Was this instruction helpful to you?
Thank you for voting!

Ice dipsenser was malfunctioning

Viewed the repair video. Removed covering. Replaced limit switch, control board, and solenoid. Very easy repair!
  • Greg from Highland Village, TX
  • Difficulty Level:
    Really Easy
  • Total Repair Time:
    15 - 30 mins
  • Tools:
    Pliers, Screw drivers
3 of 4 people found this instruction helpful.
Was this instruction helpful to you?
Thank you for voting!
Fixes Symptom 3% of time
★★★★★
★★★★★
1 Review

Rated by 1 customer 


Easy 

30 - 60 mins 

Ratings submitted by customers like you who bought this part.   

The compression nut is used as a connection between the water supply line and other components in your refrigerator such as your ice maker and your water dispenser. Tools required for this repair include a pair of pliers and a socket set. Before installing this part you should take all perishable foods out of your refrigerator and store them somewhere cool, unplug the refrigerator from the power source, and shut off the water supply. This repair may require you to wear work gloves to protect your hands, and is considered an easy do-it-yourself fix.

$ 13.13
  In Stock
PartSelect Number PS11743305
Manufacturer Part Number WP627018
Fixes Symptom 2% of time

Rated by 2 customers 


Easy 

15 - 30 mins 

Ratings submitted by customers like you who bought this part.   

This valve is to supply water to your refrigerator for the ice maker or the water dispenser. It's also useful for filtering your water as it comes through the line.

$ 172.40
  In Stock
PartSelect Number PS11743240
Manufacturer Part Number WP61005627
Fixes Symptom 2% of time
★★★★★
★★★★★
13 Reviews

Rated by 73 customers 


Easy 

15 - 30 mins 

Ratings submitted by customers like you who bought this part.   

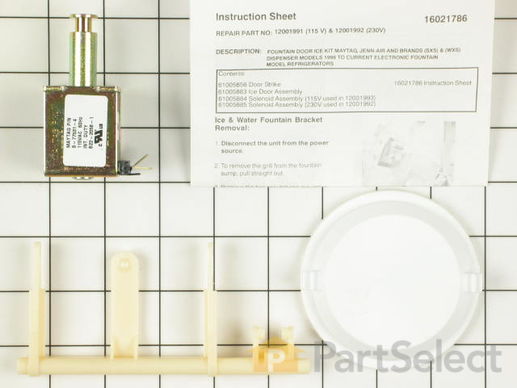
In addition to the solenoid (115V), this kit also comes with a door strike and an ice door assembly. Please be advised the spring and roll pin are not included with this kit.

$ 158.73
  In Stock
PartSelect Number PS2003478
Manufacturer Part Number 12001991

Replacing your Maytag Refrigerator Ice Dispenser Solenoid and Door Kit

Replacing your Ice Dispenser Solenoid and Door Kit

Customer Repair Stories

Ice Door Would Not Open

Jenn-air jcd-2389gtw refridgerator/freezer side by side ice door would not open to dispense ice from the ice dispensor I did an online order for the repair kit #ps2003478 (115v) ice dispenser solenoid and door kit to fix the problem with the ice door not opening. As I had deduced, the “solenoid” had gone bad, and the kit held most all the items required to make the repair. The only additional item the kit needs to have is the “fountain door return spring”. Be careful not to loose the spring when disassembling the unit. You might want to order an additional spring just in case you loose or break the original. The instruction sheet was pretty thorough, except for being small and the pictures hard to see. My refrigerator/freezer has decorative panels that had to be removed before I was actually able to get the escutcheon off of the unit, and this configuration wasn’t addressed in the instructions. After figuring out that I had to remove all the trim from the door of the freezer before I could start the repair, the job wasn’t that difficult, but you have to have patience and take your time to make sure you don’t damage the electrical components of the ice dispenser. Make sure you note the position and location of the fountain door return spring before you remove the ice door!! This is important so that you can get the correct “tension” when reinstalling the mechanism. If there isn’t enough tension on the spring, the door will not seal properly, and the dispenser will freeze up. Also, when it comes time to disconnect the “electrical edge connector” from the control panel, be sure to make note of it’s position. It isn’t difficult to pull off, but could be easily broken if you are not careful. The rest of the repair and installation is straight forward and simple. Just take your time and it goes back together pretty easily. Tools you will need are; needle nose pliers, phillips screwdriver with a small and medium bit, and a “torx” tool set to remove the torx screws from the escutcheon and fountain bracket.
  • Stanley from Southlake, TX
  • Difficulty Level:
    A Bit Difficult
  • Total Repair Time:
    30 - 60 mins
  • Tools:
    Pliers, Screw drivers
21 of 22 people found this instruction helpful.
Was this instruction helpful to you?
Thank you for voting!

Ice Dispenser "round chute" broken side tab, ice/water fountain not working

I could see that a tab was broken from the round chute that opens for ice dispensing and closes to seal off freezer ice chute when not in use. With the tab broken, the round door would not shut to seal the freezer chute and dispensing water would spatter everywhere. I looked for just the round door part, but is only sold in the "Ice dispenser solenoid and door kit" I only had to use the round chute/flap from the kit. The instructions were easy to follow and I had the fridge back working in about 10 minutes. It took me longer to find the right star headed screwdriver that I needed to remove the Maytag star screws (5) total. Because I didn't have to replace the solenoid or the spring mechanism, this was especially easy, and now I have those parts on hand if one day I need them!!
  • Scott from Walker, LA
  • Difficulty Level:
    Really Easy
  • Total Repair Time:
    Less than 15 mins
119 of 129 people found this instruction helpful.
Was this instruction helpful to you?
Thank you for voting!
Fixes Symptom 2% of time

Rated by 2 customers 


Really Easy 

30 - 60 mins 

Ratings submitted by customers like you who bought this part.   

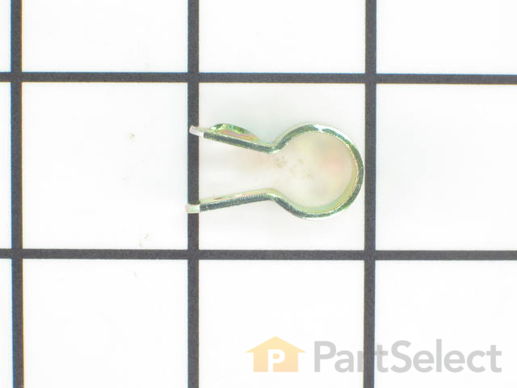
This water hose clamp is used in your refrigerator to support the water tube. If the tubing or hose is working, but is loose inside the unit, the clamp, which is supposed to support it in place, could be broken or damaged. If this is a symptom of yours, you should replace the clamp. These tube clamps are sold individually, the screw is not included. Make sure to unplug your refrigerator from the power source before installing this part. Refer to the manual provided by the manufacturer for further instructions.

$ 7.43
  In Stock
PartSelect Number PS11742726
Manufacturer Part Number WP488878
Fixes Symptom 1% of time

Rated by 8 customers 


Easy 

15 - 30 mins 

Ratings submitted by customers like you who bought this part.   

Once a glass is pressed against the actuator pad it will cause the dispenser to deliver ice or water when activated.

$ 65.56
  In Stock
PartSelect Number PS2059378
Manufacturer Part Number 61003804

Customer Repair Stories

Dryer won't stay hot

My dryer will not say hot. When I turn on the dryer, the flame will turn on but seconds later it turns off. I researched through various sites on the internet and decided my gas coils needed to be replaced. Well, that didn't work so I am currently ordering a ignitor assembly to try and fix the problem......wish me luck
  • Sean from Santa Maria, CA
  • Difficulty Level:
    Really Easy
  • Total Repair Time:
    Less than 15 mins
  • Tools:
    Screw drivers
1 of 2 people found this instruction helpful.
Was this instruction helpful to you?
Thank you for voting!

ice and water dispenser sticks

The actuator rubber pad had hardened over time so that it wouldn't allow the solenoid to retract and stop the flow. To fix: Turn off fuse to fridge. Removed the screws on fountain faceplate. Remove faceplate. Unscrew fountain computer assembly (2 or 3 screws) to access the actuator pad from behind. Unplugged the computer ribbon. Replace black actuator pad.

It works fine now.
  • E from Los Angeles, AL
  • Difficulty Level:
    A Bit Difficult
  • Total Repair Time:
    Less than 15 mins
  • Tools:
    Screw drivers
5 of 6 people found this instruction helpful.
Was this instruction helpful to you?
Thank you for voting!
Fixes Symptom 1% of time
★★★★★
★★★★★
5 Reviews

Rated by 28 customers 


Really Easy 

15 - 30 mins 

Ratings submitted by customers like you who bought this part.   

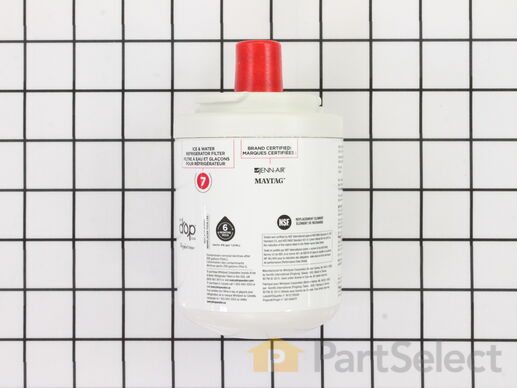
This is the replacement water filter for your refrigerator. It is white in color with a red cap and is approximately 3 inches wide and 6 inches tall. The water filter reduces contaminants and improves taste in your refrigerator water supply. It is recommended to replace the water filter every six months to maintain effectiveness. You will find the water filter at the back, top portion of your fresh food compartment. To remove the filter, simply twist it to the left until it can be removed. Then, remove the cap on the new filter, line up the arrow with the indentation, and twist to the right until it is secure. You may want to put a towel down below the filter when completing this repair, to catch any spills or drips. When you replace the water filter, hold down the dispenser trigger for a few minutes so that all the air is purged from the water lines, and the water tank fills up. This is an OEM part and is sold individually.

  No Longer Available
PartSelect Number PS11722137
Manufacturer Part Number EDR7D1

Replacing your Maytag Refrigerator Water Filter

Replacing your Water Filter

Customer Repair Stories

Needed to replace filter

1/4 turn of old filter. it popped out. Inserted new filter, 1/4 turn and it clicked in. Piece of cake. I'm a freakin' genius.
  • Phyllis from University Place, WA
  • Difficulty Level:
    Really Easy
  • Total Repair Time:
    Less than 15 mins
7 of 9 people found this instruction helpful.
Was this instruction helpful to you?
Thank you for voting!

Refrigerator Filter needed replacing

Turn counter clockwise, following the remove arrow on the filter, until it stops. Wiggle and pull down on the filter until it comes off. Put date sticker on new filter to remember when it was replaced. Align the lines on the filter and push it up where the old one was and turn it clockwise until it stops, following the install arrow. Close the door and push both the light and lock button together to reset the replace filter light. Run the water through the door for a couple minutes to get all of the air out of the system. Very easy and quick. Most time spent flushing out the air.
  • Bruce from Alfred Station, NY
  • Difficulty Level:
    Really Easy
  • Total Repair Time:
    Less than 15 mins
92 of 104 people found this instruction helpful.
Was this instruction helpful to you?
Thank you for voting!
Fixes Symptom 1% of time
★★★★★
★★★★★
5 Reviews

Rated by 31 customers 


Easy 

30 - 60 mins 

Ratings submitted by customers like you who bought this part.   

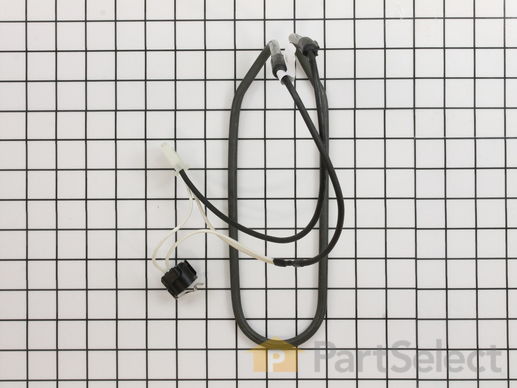
This part assembly has 2 functions: The defrost heater keeps the cooling coils from frosting over and the thermostat senses that the heat near the cooling coils has reached the desired temperature.

$ 71.20
  In Stock
PartSelect Number PS11743281
Manufacturer Part Number WP61006199

Replacing your Jenn-Air Refrigerator Defrost Heater and Thermostat Assembly

Replacing your Defrost Heater and Thermostat Assembly

Customer Repair Stories

Freezer was overfrosting and not defrosting. Frig. was not getting cold.

This was very easy. I removed all the shelves in the freezer compartment. I removed two nutscrews to remove the back wall. Then I removed the little radiator looking part by removing two more nutscrews. I unplugged the old thermostat assembly and installed the new one exactly like I removed it, then I reversed the procedure to put it all back together. Very easy my wife could have done it. ThANKS!! to Parts Select for the help of all the blogs I read before doing the job.
  • Daniel O. from Gilroy, CA
  • Difficulty Level:
    Really Easy
  • Total Repair Time:
    30 - 60 mins
  • Tools:
    Nutdriver
9 of 9 people found this instruction helpful.
Was this instruction helpful to you?
Thank you for voting!

Refrigerator warmed up and freezer became colder

After removing all shelves, I removed the 2 screws holding the 2 panels in front of the evaporator and heater. The heater is located at the bottom of the evaporator coils and is held on by a simple wire clip. After removing the heater and thermostat, is very easy to replace the new unit and reconnect the wire harness.
  • John from Cambria, CA
  • Difficulty Level:
    Really Easy
  • Total Repair Time:
    Less than 15 mins
  • Tools:
    Nutdriver
27 of 28 people found this instruction helpful.
Was this instruction helpful to you?
Thank you for voting!
Fixes Symptom 1% of time
★★★★★
★★★★★
1 Review

Rated by 12 customers 


Really Easy 

15 - 30 mins 

Ratings submitted by customers like you who bought this part.   

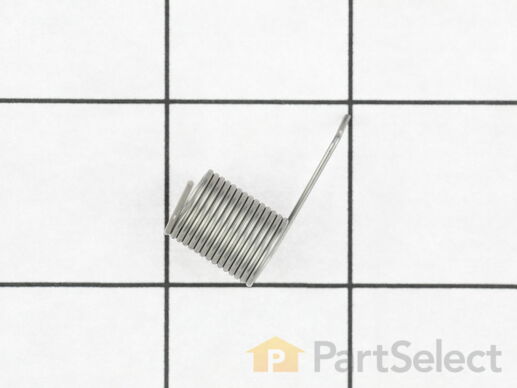
Sold Individually.

$ 11.10
  In Stock
PartSelect Number PS2059882
Manufacturer Part Number 61004388

Replacing your Maytag Refrigerator Ice Chute Door Return Spring

Replacing your Ice Chute Door Return Spring

Customer Repair Stories

The Ice Maker Wouldn't Dispense Ice

First we ordered a new solenoid. . . The little piece that opens and closes whenever you push the button to dispense ice. That definitely needed to be replaced, and it was easy to do. However, that didn't fix the problem, so we looked and looked at the assembly and decided that a spring was missing. We ordered the spring, and when it arrived, we found that it matched exactly one that was already on the assembly. :-) Not the problem. Thirty minutes later we figured it out,. The diagrams at part select were not helpful with this. It was a matter of figuring out how the magnetic weight fit into the assembly. That's all it was! Now we have an extra spring for the future.
  • Patricia from Stanardsville, VA
  • Difficulty Level:
    Easy
  • Total Repair Time:
    30 - 60 mins
  • Tools:
    Screw drivers
0 of 2 people found this instruction helpful.
Was this instruction helpful to you?
Thank you for voting!

Soring old, need replaced. Air leaking in and melting ice

Followed included instructions. Thank you.
  • Jerlene from BERLIN, MD
  • Difficulty Level:
    Very Easy
  • Total Repair Time:
    15 - 30 mins
  • Tools:
    Nutdriver, Pliers
1 person found this instruction helpful.
Was this instruction helpful to you?
Thank you for voting!
Fixes Symptom 1% of time
★★★★★
★★★★★
4 Reviews

Rated by 99 customers 


Easy 

30 - 60 mins 

Ratings submitted by customers like you who bought this part.   

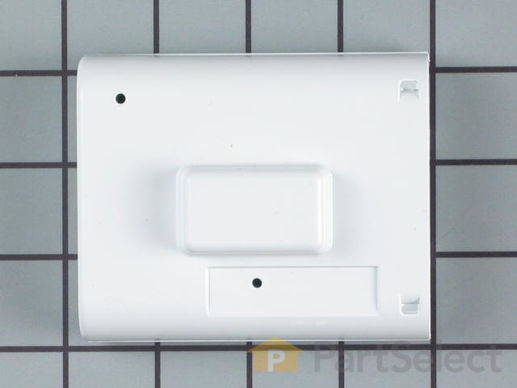
This part allows the refrigerator to go into defrost mode only when required.

$ 99.92
  In Stock
PartSelect Number PS2061226
Manufacturer Part Number 61005988

Replacing your Jenn-Air Refrigerator Adaptive Defrost Board

Replacing your Adaptive Defrost Board

Customer Repair Stories

Refrigerator compartment not cooling; Freezer compartment icing up on back wall

Well, off course, I started with the refrigerator UNPLUGGED :)
The hardest part of this repair was removing the plastic cover in the ceiling of the refrigerator compartment to get to the board. The screws all were easy to find (2 on either side of the temperature slide control; 2 on either side of the bulbs; and two in the underside of the compartment that houses the board in the far back right corner) and came out easily, however the 2 little plastic "tab locks" at the rear of the cover made things a little difficult. The right combination of pressure on the tabs and outward pulling of the cover took me quite a few tries to get right; but once the cover was off the rest of the repair was simple! The replacement part is a little different from the original in that it is now encased in a plastic housing, whereas the original was just a bare board. But it fit in perfectly - I snapped off the old wiring assembly and snapped in the new one, and we were off to the races. The cover proved to go back on a little easier than it had come off and in about 3 hours I heard the first piece of ice drop and the refrigerator compartment was down to 30 with the temperature setting set in the middle at 5. (I've sinced lowered it a little to bring the temp to about 36) - This was a really easy repair that saved me about $200; a break I really needed. And if you don't believe that it's easy and that you can do it yourself, this should really motivate you.................................. I AM A GIRL!!!! :) lol.
Good luck!!!
  • Michele from Port St. Lucie, FL
  • Difficulty Level:
    Easy
  • Total Repair Time:
    15 - 30 mins
  • Tools:
    Nutdriver, Screw drivers
45 of 45 people found this instruction helpful.
Was this instruction helpful to you?
Thank you for voting!

Fridge Side Warm Freezer Fine

Removed the Hex head small screw at the middle back of the Back wall of the fridge above the top shelf. Removed the 2 small Hex Head screws that go into the of the Plastic cover upwards into the top roof of the fridge.
I ended up with an extra screw so I dont know what I did...
The hard part is pushing up on the two tabs, one on each side in the extreme back on the bottom of that white plastic cover. You have to pull the coverwhile releasing the tab (locks) by pushing UP. The Right side was easier, I got that side to release and drop down. But the left side took some pressure on the tab with a fat screwdriver.
Then you have to kinda of Bend the cover to get it to slide out...

Then take out the 2 phillips screws above the light bulbs. the left side one is tricky, need long skinny driver.

Drop assembly down and on the back right is the ADP board. Mine was a bare board but the replacements are enclosed in white plastic that fit in place just fine.

Pry connector off of the board carefully and drop new plastic circuit board case in and replace.

Put a thermometer in a glass of water. unplug fridge for 10 minutes and then plug it in. Give it a few hours..
Everything seems fine.
A steady 39 degrees with the Fridge control at a few ticks right of middle.
I have no idea what it was before my troubles...
But 36 - 41 seems to be what you need.
  • james from livermore, CA
  • Difficulty Level:
    Easy
  • Total Repair Time:
    Less than 15 mins
  • Tools:
    Nutdriver, Screw drivers
177 of 187 people found this instruction helpful.
Was this instruction helpful to you?
Thank you for voting!