Enter the code DIYDAD10 at checkout to apply your discount. Discount will be applied at checkout when the code is entered & applies to all parts. Cannot be combined with any other coupon or special offer & cannot be applied to a previously placed order. Not valid toward tax or shipping & handling. Discount has no cash value. Discount expires on June 17 at 11:59pm EST.
You've Got 10% Off Your First Order!Save 10% with code at checkout *click to copy coupon code
This is a duct felt seal for a dryer. The duct felt seal allows the front-load dryer drum to glide smoothly on the front panel. Your dryer will not function properly if the drum felt seal is compromis...
This Drive Belt is 89.5" long and comes in black, featuring four ribs on the inside for a better grip. This is a long belt that wraps all the way around the dryer drum, around a tension pulley, and th...
This light bulb, also known as a drum lamp, illuminates and lights up the dryer drum when the door is open. If the light bulb in the dryer is burnt out or lighting is inconsistent, replacing it can so...
This drum glide bearing is an authentic OEM replacement part that is compatible with dryers. It is white in color and made of highly durable plastic. The bearing allows the drum to rotate smoothly and...
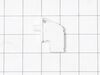
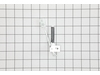
This OEM replacement dryer slide bearing is white in color, and approximately 3 inches long. The slide bearings are supportive linings for your dryer. If they have eroded, or are damaged, the drums wi...
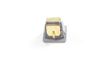
This is a timer control knob for your dryer. The timer is the main part within dryers that is responsible for controlling when the different processes of the drying cycle occur, and it is important th...
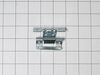
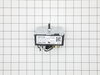
This is the door switch for your dryer. Door switches are used to communicate with the control board when the door is fully closed, so the drying cycle can safely begin, and if it is opened so it can ...
This is a replacement O-ring for the drum bearing retainer on your dryer. The drum bearing is found at the back of the dryer drum. The O-ring is designed to create a seal on the drum bearing. The O-r...
Ask our experts a question about this model and we'll get back to you as soon as possible!
1 question answered by our experts.
Sort by:
< Prev
1
Next >
Search filter:
Clear Filter
Your search term must have 3 or more characters.
Keep searches simple. Use keywords, e.g. "leaking", "pump", "broken" or "fit".
Sorry, we couldn't find any existing answers that matched.Try using some different or simpler keywords, or submit your new question by using the "Ask a Question" button above!
John
January 12, 2020
How to reset drum and install heat deflector
For model number GTD45GASJ1WS
Hi John, thank you for your question. Unfortunately we do not have an installation video for your heat deflector however we do have a video that will show you how to remove your drum to get to the screws holding that part in. You can view that video here: https://www.youtube.com/watch?v=Bwa3_XN4kiw. You should be able to use the steps in the video to remove the drum in your appliance. Good luck with your repair.
Was this helpful?
Thank you for voting!
< Prev
1
Next >
✖
Ask a Question
Ask our experts a question on this model and we'll respond as soon as we can.
Removed the front Dryer panel. Left drum in place and lifted it up slightly to get access to motor drive. Slipped belt in place and put panel back on. This was a first attempt ever at fixing an appliance and it was no big deal.
First I found and watched three videos on how to open the dryer and replace the igniter. Then I opened the dryer, but I did not remove the belt as suggested in the video, and then I removed the ignitor and flame detecter as the videos had shown. I got on-line and ordered the new parts from PartsSelect in the afternoon and had t
... Read morehem in my hands the next morning by 9:30 am. I installed the new parts and everything worked fine again. You must be very careful with the igniter to not touch it with hands or anything else. I practiced puting in the old parts first.
I had to take most of the dryer apart because there is no rear access to the motor. It turned out to be easy to dissasembel the dryer. The only problem that I had was that I could not figure out how to route the belt around the motor and the idol pullies. I could not find anywhere that gave instructions on how to properly tension the belt
... Read more. I finally figured out that the idoler pulley needs to be locked in place on the right side of the engie mount. Then the belt needs to be routed over idoler pulley and under the motor pulley. Finally release the idoler pully from the locked postion to put tension on the belt. It really turned out to be pretty easy.


 – Part Number: WE3M51")


")


