Enter the code DIYDAD10 at checkout to apply your discount. Discount will be applied at checkout when the code is entered & applies to all parts. Cannot be combined with any other coupon or special offer & cannot be applied to a previously placed order. Not valid toward tax or shipping & handling. Discount has no cash value. Discount expires on June 17 at 11:59pm EST.
You've Got 10% Off Your First Order!Save 10% with code at checkout *click to copy coupon code
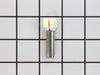
This door handle for your washer is sold without screws, they can be ordered separately, or you can reuse the existing screws if they are in good shape. To replace this part, simply unscrew the handle...
$43.41
In Stock
Order within the next 5 hrs and your part ships today!
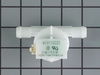
This pump helps expel water from the washing machine and is activated after the spin speed is maintained for a specific period of time. This part is used on front load models.
$160.79
In Stock
Order within the next 5 hrs and your part ships today!
Used with some front load washers. The attaching solenoids on the valve open and close according to the desired temperature, or amount of water needed.
$75.70
In Stock
Order within the next 5 hrs and your part ships today!
This touch-up paint can be used on a wide variety of household appliances. It is most often used on washers, dryer, refrigerators, dishwashers, ranges, freezers, trash compactors, or microwaves. It is...
$8.02
In Stock
Order within the next 5 hrs and your part ships today!
The hose clamp is used to hold the water hose in place which will prevent the hose from leaking water. Sometimes the clamp may lose its ability to latch on, causing a leaking washer. For the installat...
$11.12
In Stock
Order within the next 5 hrs and your part ships today!
This part continually measures the amount of water entering the tub. It will make adjustments if too much or too little water is present.
$105.25
In Stock
Order within the next 5 hrs and your part ships today!
Questions And Answers for GHW9250MT0
We're sorry, but our Q&A experts are temporarily unavailable.
Please check back later if you still haven't found the answer you need.
1 question answered by our experts.
Sort by:
< Prev
1
Next >
Search filter:
Clear Filter
Your search term must have 3 or more characters.
Keep searches simple. Use keywords, e.g. "leaking", "pump", "broken" or "fit".
Sorry, we couldn't find any existing answers that matched.Try using some different or simpler keywords, or submit your new question by using the "Ask a Question" button above!
RALPH
December 20, 2023
When using one of the fresh cleaners for washers, Which settings should I use?? I do not have a CLEAN seating.
For model number GHW9250MT0
Hi Ralph,
Thank you for your question. When using the Affresh tablet, depending on your washer, select the Clean Washer Cycle or the Normal or Heavy Cycle and use hot water. Make sure no clothing or other items are in the washer when cleaning with Affresh. After the cycle is completed, use a cloth to wipe away any residue. We hope this helps!
(1) First I unpluged the washer then I removed the water from the tube with a water vac.(2) Then I removed the three (3) screws that holds the front panel, using a Torx T-20 socket. ( this is a front load washer ). The panel is below the loading door. (3) I packed towels under the washer. (4) I slowly removed the cleanout i
... Read moren the front of the pump, using the water vac to catch the water as it leaked out. (5) I removed the wiring to the motor. (6) I removed the screw that holds the pump in place with a Torx T-20 socket. (7) I pulled the pump forward so the clamps that hold the drain hose and discharge hose could be removed using the hose clamp pliers. ( they come off much easier then they go back on ). (8) I tested the pump and found it would run but was making a lot of noise and running slow. (9) To reinstall start with number (7) and work backwards to number (1) skipping (3) and (4). Don Kramer Wichita, Kansas
1. remove the three screws from the top backside of the top panel 2. push the top panel to the rear 1/8 to 1/4 inch 3. lift/rotate top panel from rear to front, set aside. 4. remove the three wire connectors from latch. 5. use #15 Torx to remove the three screws from the latch. 6. remove and replace part using to
... Read morep opening. 7. reverse order to finish.


 Diagram and Parts List for Whirlpool Washer")
 Diagram and Parts List for Whirlpool Washer")