


Models
>
GFS227
GFS227 (MN02) Caloric Refrigerator - Overview
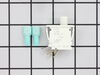
Sections of the GFS227
[Viewing 10 of 10]


Keep searches simple, eg. "belt" or "pump".

Condenser Fan Motor Kit
PartSelect #: PS395284
Manufacturer #: 833697
This condenser fan motor kit is designed for use with refrigerators. This fan draws air through the condenser coils and over the compressor. It does this with the goal of cooling the warm refrigerant ...
$63.18
In Stock

Door Switch Kit
PartSelect #: PS1964648
Manufacturer #: W10169313
This part replaces two terminal switches in a dryer and prevents the dryer from running when the door is open. This includes two connectors. If your dryer will not shut off, start, or does not tumble,...
$29.94
In Stock

Heater Wire - 240V
PartSelect #: PS1760885
Manufacturer #: Y311946
This heater wire is 240V and is 79" long.
No Longer Available


Filter Drier Tube
PartSelect #: PS11728084
Manufacturer #: W10843121
This filter dryer is for refrigerators and filters refrigerant that travels through the sealed system of the refrigerator.
$38.13
In Stock

Questions And Answers for GFS227
We're sorry, but our Q&A experts are temporarily unavailable.
Please check back later if you still haven't found the answer you need.
Common Symptoms of the GFS227
[Viewing 9 of 9]Fridge too warm
Fixed by
these parts
these parts

Show All
Noisy
Fixed by
these parts
these parts
Show All
Freezer section too warm
Fixed by
these parts
these parts
Show All
Fridge runs too long
Fixed by
these parts
these parts
Show All
Will Not Start
Fixed by
these parts
these parts
Show All
Fridge and Freezer are too warm
Fixed by
these parts
these parts
Show All
Won’t Start
Fixed by
these parts
these parts
Show All
Too warm
Fixed by
these parts
these parts
Show All
Leaking
Fixed by
these parts
these parts
Show All


Keep searches simple. Use keywords, e.g. "leaking", "pump", "broken" or "fit".
Sometimes the condenser fan would start causing the refrigerator to overheat.
Unplug the appliance.
Removed the screws holding the back panel.
Removed the fan blade.
removed 3 screws holding the condenser fan.
Remove the 3 metal brackets attached to the fan.
(First note which studs the brackets are attached to. Attach the 3 metal brackets to the new fan. (New screws were supplied)
Cut ... Read more and strip the wire about two inches from the fan.
Cut and strip the new wire. I cut the new wire in half (about 6 inches.) Connect the two wires, twist and used 2 wire nuts. Tie wrap the wire to the wire harness. Mount the new fan (three screws)
Screw the back panel back on.
Mount the new
Read less
Parts Used:

-
Tom from Franklin, WI
-
Difficulty Level:A Bit Difficult
-
Total Repair Time:15 - 30 mins
-
Tools:Nutdriver, Pliers
180 of 204 people
found this instruction helpful.
Was this instruction helpful to you?
Thank you for voting!
Switch sticking in on position
FIRST unplug dryer from electrical source, CAUTION, the top of this dryer does not open with clips, do not pry on top to open! On the front of the dryer look under the lower panel, and find two screws, one on the left side, and one on the right, remove these screws, and pull slightly down on panel to remove. Behind this panel find two s
... Read more
crews holding the door panel, one on the left, and one on the right, remove the left, and support the door panel while removing the right side. Gently pull the bottom of door panel outward, and the clips on top of door panel will unhinge from top, carefully rotate left side of door panel to floor, and note the wire connections on switch, and orientation of switch, then unplug wires, and move door panel to a comfortable working positon. Door must be open to remove switch, then depress the two plastic retaining keepers on each side of switch, and push switch through toward door. Replace with new switch, reconnect the wires, and reassymble in reverse order. Remember, door assymbly must be inserted in dryer top at an angle, and then bottom rotated downward, and bottom panel nylon guildes inserted into door panel bottom.
Read less
Parts Used:

-
Don from Jacksonville, FL
-
Difficulty Level:Really Easy
-
Total Repair Time:15 - 30 mins
-
Tools:Nutdriver
99 of 133 people
found this instruction helpful.
Was this instruction helpful to you?
Thank you for voting!
Dryer wouldn't heat
Since the heating coil is right behind the front door I had to remove all panels starting with the back one to get to it. The back has a lot of tech screws that I removed with the nut driver. The side panels were removed with a phillips screwdriver. The top is held in place with the other panels. The base was shifted away from the fro
... Read more
nt and I released the heating coil case with 4 screws in the front and was able to pull it out of the top to replace it. I cut the old one out with wire cutters and snaked the new one through the ceramic insulators. I was careful not to touch the new one without gloves because the oil from your hands can burn them out more quickly. I screwed the new ones to the contact points while trying not to stretch it too much. I vacuumed the whole dryer out before putting it back together.
Read less
Parts Used:

-
Edith from Grove City, OH
-
Difficulty Level:Difficult
-
Total Repair Time:More than 2 hours
-
Tools:Nutdriver, Screw drivers, Wrench (Adjustable)
59 of 68 people
found this instruction helpful.
Was this instruction helpful to you?
Thank you for voting!