This is the second heating element I have replaced in this dryer which I bought new in 1977. That's right it is 32 years old and still works great!
The replacement process is simple:
One: pull the dryer away from the wall so that you have room to work in the back.
Two: Disconnect the dryer vent hose from the back of t
... Read more
he dryer.
Three: Remove the five - 5/16" hex head sheet metal screws that hold the back cover in place and set the cover to the side.
Four: Go to the front of the dryer and remove the lint filter and the two slot head screws that hold the lint filter opening to the internal frame.
Five: Pop the top of the dryer open and remove the one 5/16" hex head screw that holds the top of the heating element strap to the frame.
Six: Go to the back of the dryer and remove the two leads from the thermostat that is mounted to the heating element casing. CAUTION: Be careful to note the position of the wires and be certain that you reattach the correct wire to the correct lead.
Seven: Lift the heating element case up about 1/2" to disengage the hooks at the bottom that hold it in place.Then pull the bottom of the heating toward you slightly while sliding it down. This will allow you to remove the heating element and casing.
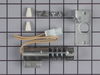
Eight: Remove the heating element from the casing and insert the replacement heating element.
Reverse the above process to reassemble.
This entire process only takes about 20 minutes.
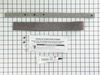
An additional note: Be certain that you pay careful attention to the positioning of the strap that holds the top of the heating element case to the dryer frame. If you install it incorrectly, the heating element case can fall away from the back of the drum assembly.
Read less