Enter the code DIYDAD10 at checkout to apply your discount. Discount will be applied at checkout when the code is entered & applies to all parts. Cannot be combined with any other coupon or special offer & cannot be applied to a previously placed order. Not valid toward tax or shipping & handling. Discount has no cash value. Discount expires on June 17 at 11:59pm EST.
You've Got 10% Off Your First Order!Save 10% with code at checkout *click to copy coupon code
This is a replacement screw for your washer or dryer. The screw is approximately half an inch in length and is a Phillips-head screw. It screws in from the outside of the drum, into the vane/baffle. T...
This is a shoulder screw and is used in conjunction with multiple appliances within your home. This specific model is size 10, and it has 16 threads to an inch. This part is made entirely of metal and...
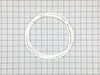
This is a bellow, though it may also be known as a door boot seal, and it is a part for your washing machine. The function of the bellow is to prevent leaks by forming a seal in between the wash tub a...
This part is the replacement screw for your washer. The head is approximately inch in diameter and the screw is approximately 3/4 inch in length. It is made of metal and is sold individually. This is...
Bought new part. #1 Lesson learned: Always inspect the actual part number of the ordered/received part. Verify with number marked on the item somewhere. We did not do this and turned out we reinstalled a slightly smaller bellow (wrong part number received in shipment). We were able to fully install it but it was minutely not laying perfec
... Read moretly around the diameter. So minor we did not notice. We did have great difficulty installing though. Anyway, after 1st test run, bellow already had developed a small hole in bottom right quadrant from rubbing on the drum. Left a bunch of gray powdery debris on the drum too. We did not realize error until that point. Took bellow off again to verify part number on it. It was wrong. That explained why the door was so very tight to close and difficult to open. Other than all that, use the video to do the install. It was free to view and easy to follow.
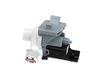
1 you have to order a new motor control board 2 unscrew the back panel 3 unscrew the top panel 4 unscrew the bracket 5disconnect the old motor control board 6 connect the new motor control board