


Models
>
01149-0
01149-0 Briggs and Stratton Generator - Overview
Sections of the 01149-0
[Viewing 1 of 1]
Keep searches simple, eg. "belt" or "pump".

Fuel Valve W/Bushing
PartSelect #: PS8911051
Manufacturer #: 192980GS
Made of durable rubber and plastic components, this Fuel Valve and Bushing are designed for use in over 150 models of generators and pressure washers. This item is sold as a kit, including the valve a...
$19.31
In Stock


Seal,Oil
PartSelect #: PS9277860
Manufacturer #: 391086S
The Oil Seal is a manufacturer-approved rubber part which provides a seal between the crankcase and crankshaft by attaching around the axle shaft on the crankhouse housing. Installation is rated as "M...
$6.59
In Stock


Fuel Filter
PartSelect #: PS17016257
Manufacturer #: 394358B
This Fuel Filter is a white plastic part attached within the fuel delivery system between the fuel tank and carburetor. Installation is rated as "Easy" and requires a set of pliers and a screwdriver. ...
$3.99
In Stock

Line-Fuel
PartSelect #: PS9140673
Manufacturer #: 791745
This fuel line is compatible with several different makes and models of small engine equipment and is sold as an individual part. Equipped with the securing clamp, this rubber fuel line is used to tra...
$10.16
In Stock


Questions And Answers for 01149-0
We're sorry, but our Q&A experts are temporarily unavailable.
Please check back later if you still haven't found the answer you need.
Common Symptoms of the 01149-0
[Viewing 1 of 1]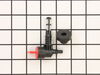
Keep searches simple. Use keywords, e.g. "leaking", "pump", "broken" or "fit".
Dry rotted rubber
Put some dish soap on the rubber, push into the tank hole, slip 1x2 into the handle of the tank and over the new part and pry down pushing it into the hole. Took about 2 minutes.
Parts Used:
-
James from PICAYUNE, MS
-
Difficulty Level:Very Easy
-
Total Repair Time:Less than 15 mins
5 of 7 people
found this instruction helpful.
Was this instruction helpful to you?
Thank you for voting!
old valve dripped gas when opened on cold sub zero day
old valve easily pulled out with screwdriver and pliers
install difficult due to 40 degree cold temp and bushing didn't want to squeeze into fuel tank hole
install required lots of liquid soap on bushing, which popped into place by using upward prying pressure from 3"X24" plywood braced into under-shelf of gas tank
... Read more
r />
used same technique to insert valve upward into bushing
works great!
install difficult due to 40 degree cold temp and bushing didn't want to squeeze into fuel tank hole
install required lots of liquid soap on bushing, which popped into place by using upward prying pressure from 3"X24" plywood braced into under-shelf of gas tank
used same technique to insert valve upward into bushing
works great!
Read less
Parts Used:
-
Alan from RADFORD, VA
-
Difficulty Level:A Bit Difficult
-
Total Repair Time:1- 2 hours
-
Tools:Pliers, Screw drivers
2 of 2 people
found this instruction helpful.
Was this instruction helpful to you?
Thank you for voting!
Gas tank leaking, pull starter rivets worn, rope and rope bushing worn
The gas tank was a simple job, close the fuel shut off, remove fuel hose then back out 2 bolts on the mounting bracket. Reverse procedure to mount.
To replace the pull starter/recoil assy. Remove low oil warning light, and air filter housing then remove the 4 bolts holding the front cover. Once the front cover is free remove kill sw ... Read more itch wire
Drill out the rivets holding the recoil housing w/ 3/16 bit. Screws w/ nuts are included to use in place of rivets, I used red Locktite on the screws which hold the started recoil to the front cover. Make sure the pull rope is correctly oriented in the 11:00 position. Replace front cover, four bolts. Air filter housing, kill switch wire and low oil warning light
Read less
Parts Used:
 – Part Number: 691993")

-
Dennis from EUFAULA, OK
-
Difficulty Level:Easy
-
Total Repair Time:30 - 60 mins
-
Tools:Nutdriver, Screw drivers, Socket set, Wrench set
1 person
found this instruction helpful.
Was this instruction helpful to you?
Thank you for voting!