Models > WRB322DMBM00 > Symptoms > Leaking

Parts That Fix Whirlpool Refrigerator WRB322DMBM00 Leaking

Leaking is a commonly reported symptom for the WRB322DMBM00 Whirlpool Refrigerator, and we have put together a full guide on how to fix this. This advice is based on feedback from people who own this exact appliance. We have listed the most common parts for your WRB322DMBM00 Whirlpool Refrigerator that will fix Leaking. We have included repair instructions, and helpful step-by-step video tutorials. If you are experiencing this issue, not to worry, DIYers just like you have fixed this, and shared their experience to help you!

Fixes Symptom 77% of time
★★★★★
★★★★★
30 Reviews

Rated by 11 customers 


Really Easy 

30 - 60 mins 

Ratings submitted by customers like you who bought this part.   

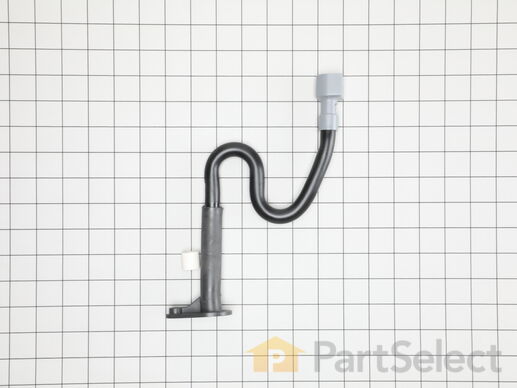
The p-trap drain tube kit may also be known as the duck bill, or the drain pipe, and it is compatible with your refrigerator. The function of the p-trap drain kit is to carry the water that has formed during the defrost cycle to the bottom of the refrigerator, where your drain pan is located. The tools you will need for this repair include a 1/4-inch nut driver and a small flat-blade screwdriver. To do this repair you will need to pull the refrigerator forward in order to reach the lower access panel at the back. This kit includes the tube extension piece and spacer.

$ 39.50
  In Stock
PartSelect Number PS8691807
Manufacturer Part Number W10619951

Replacing your Whirlpool Refrigerator P-Trap Drain Tube Kit

Replacing your P-Trap Drain Tube Kit

Customer Repair Stories

Freezer icing up .

Watched Partselect video of P-trap installation.Removed water line & back cover& disconnected wires to water solenoid .Removed old drain tube & old problematic rubber funnel. Used contact cleaner to clean rubber residue from drain line and used a little silicone to aide reassembly. Job went well thanks to video.
  • Rich from Lansing, IL
  • Difficulty Level:
    Easy
  • Total Repair Time:
    30 - 60 mins
  • Tools:
    Nutdriver, Wrench (Adjustable)
11 of 12 people found this instruction helpful.
Was this instruction helpful to you?
Thank you for voting!

Water leaking from bottom of refrigerator onto floor

The video on website is very good and explains everything in detail. Just follow the directions. This is EASY!!!!
  • Jack from DINUBA, CA
  • Difficulty Level:
    Really Easy
  • Total Repair Time:
    30 - 60 mins
  • Tools:
    Nutdriver, Screw drivers
102 of 111 people found this instruction helpful.
Was this instruction helpful to you?
Thank you for voting!
Fixes Symptom 10% of time
★★★★★
★★★★★
4 Reviews

Rated by 1 customer 


A Bit Difficult 

30 - 60 mins 

Ratings submitted by customers like you who bought this part.   

$ 79.89
  On Order
PartSelect Number PS11756973
Manufacturer Part Number WPW10655367

Customer Repair Stories

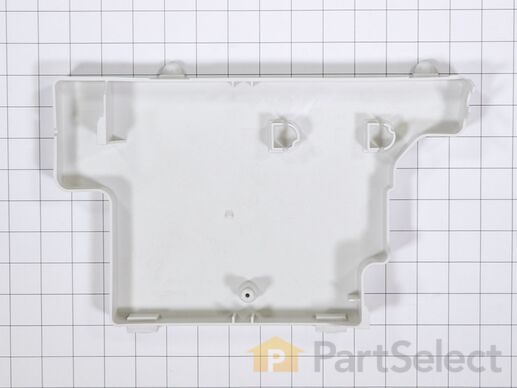
The tray that catches the defrost drainage was cracked and leaking.

Unplug the refrigerator and pull it out so you can work behind it.I had to get a helper to lean the refrigerator forward and let it rest on a towel I placed on the countertop. The tray was underneath the refrigerator near the back so I leaned it forward enough to remove the metal plate that holds the tray in place. I placed a scotch behind the front wheels to keep it from rolling backward off the counter it was resting on. I had to remove the cover from the unit on the lower back side of the refrigerator to see how the tray was moumted. Once you remove the plate you have to slide the fan off the tray and then you can remove the tray. Simply reverse the whole process to install the new tray, upright the refrigerator and plug it back in to the outlet.
  • Elmer R from Jenkins, KY
  • Difficulty Level:
    Really Easy
  • Total Repair Time:
    30 - 60 mins
  • Tools:
    Screw drivers
Was this instruction helpful to you?
Thank you for voting!

drip pan was cracked

Removed rear cover, removed fan and than drip tray. install new tray and reassemblied
  • Brian from Bismarck, ND
  • Difficulty Level:
    A Bit Difficult
  • Total Repair Time:
    30 - 60 mins
  • Tools:
    Nutdriver
28 of 82 people found this instruction helpful.
Was this instruction helpful to you?
Thank you for voting!
Fixes Symptom 4% of time

Rated by 2 customers 


Easy 

15 - 30 mins 

Ratings submitted by customers like you who bought this part.   

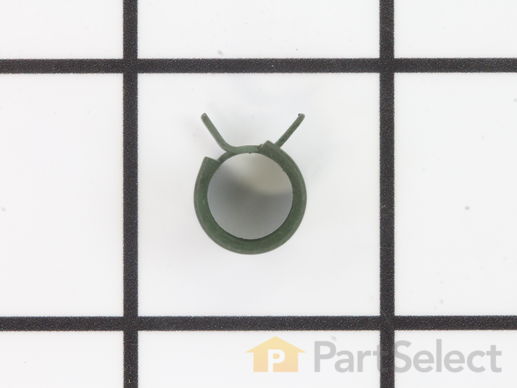
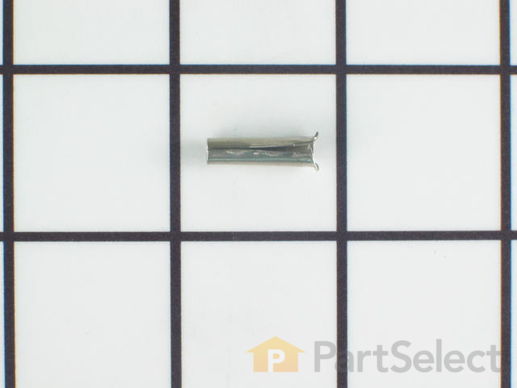
This is a speed lamp clip, and may also be known as the water line spring clamp. It is used in conjunction with your refrigerator. If you have a leak at your fill tub, this part may be the reason. The function of this clip is to keep the fill tube and the water line connected. This will allow water to flow freely without leakage into your water/ice dispensers. This part is quite small, with less than a half-inch in outer diameter. The clip is an off-black, almost olive color, and is rounded.

$ 13.53
  In Stock
PartSelect Number PS11747913
Manufacturer Part Number WPM0114003
Fixes Symptom 3% of time
★★★★★
★★★★★
1 Review

Rated by 2 customers 


Easy 

15 - 30 mins 

Ratings submitted by customers like you who bought this part.   

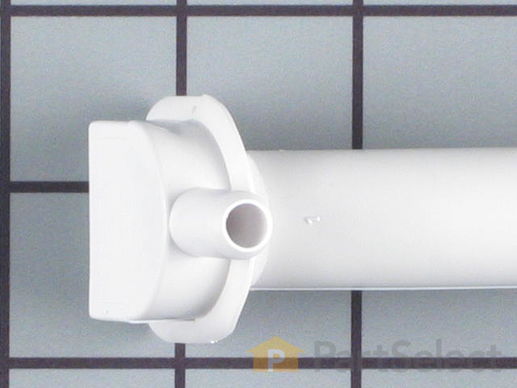
This fill tube elbow is almost eleven inches long. It is all white in color and is made of plastic. It is used with the icemakers of some refrigerators.

$ 59.14
  On Order
PartSelect Number PS12727858
Manufacturer Part Number W11176463
Fixes Symptom 3% of time

Rated by 3 customers 


Easy 

15 - 30 mins 

Ratings submitted by customers like you who bought this part.   

Sold individually.

$ 11.08
  In Stock
PartSelect Number PS11747809
Manufacturer Part Number WPA3223101

Customer Repair Stories

Water line feeding ice maker was not producing ice

Take out the elbow fill tube and check to see if ice build up inside tube. Clean tube of ice build up. Replace tube back in. In my case that corrected my problem.
  • Daniel from SAINT ALBANS, VT
  • Difficulty Level:
    Really Easy
  • Total Repair Time:
    Less than 15 mins
  • Tools:
    Pliers, Socket set
1 person found this instruction helpful.
Was this instruction helpful to you?
Thank you for voting!
Fixes Symptom 1% of time
★★★★★
★★★★★
65 Reviews

Rated by 25 customers 


Easy 

30 - 60 mins 

Ratings submitted by customers like you who bought this part.   

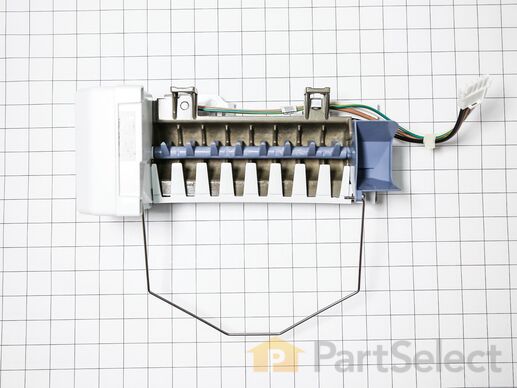
This is an ice maker assembly for various models of refrigerator. This ice maker assembly is used to freeze and eject ice into the ice bucket, then dispense the ice. This ice maker comes with the necessary shut-off arm, as well as a wire harness to properly install it into the freezer compartment of your refrigerator. If your current ice maker is either not producing ice or not breaking the ice up properly, it will need to be replaced. This ice maker assembly is an OEM part and is sold on its own, without any other parts or accessories.

$ 115.46
  In Stock
PartSelect Number PS11765620
Manufacturer Part Number W10884390

Customer Repair Stories

Ice maker was leaking fresh water into the tray freezing large clumps of cubes together.

First and foremost shut off the water supply to the Ice maker. Some recommend unplugging the refrigerator or disabling the circuit breaker to the refrigerator. Then after emptying the freezer remove the freezer door by loosening the four hex head screws and lift the door straight up and set it off to the side.You can then remove the lower basket. Now locate the clamps located at the rear sides of the inner basket and use a small flat blade screwdriver to gently push the tabs toward the outside of the side clamps while pulling up at the same time and releasing the clamp. Now repeat this procedure on the opposite side of the inner basket. The inner basket can then be pulled out being careful to not damage the roller tracts or gear rollers. Three hexhead screws secure the ice maker to the wall. The screw under the ice maker must be removed while the two on top just loosened. The electrical plug is removed by depressing the tabs on the top and bottom of the plug and then pulling outward. Carefully lift the ice maker upward and out from the two upper hex head screws. You can then install the replacement icemaker by reversing the procedure.
  • william from GROVE, OK
  • Difficulty Level:
    A Bit Difficult
  • Total Repair Time:
    15 - 30 mins
  • Tools:
    Nutdriver, Screw drivers
15 of 15 people found this instruction helpful.
Was this instruction helpful to you?
Thank you for voting!

Ice maker did not work in the bottom freezer

Shut down refrigerator at the breaker. Placed freezer items in a cooler. Removed top shelf. You must release roller covers on each side to remove the shelf ( Two front screws must be removed) Took off freezer door. (4 screws holding the door to the bracket) Disconnected ice maker electronic plug. Totally removed bottom screw holding ice maker. Loosen two top screws and remove ice maker. Reverse process to install.
  • Raymond from NORTH VENICE, FL
  • Difficulty Level:
    Easy
  • Total Repair Time:
    30 - 60 mins
  • Tools:
    Screw drivers, Socket set
29 of 37 people found this instruction helpful.
Was this instruction helpful to you?
Thank you for voting!
Fixes Symptom 1% of time
★★★★★
★★★★★
173 Reviews

Rated by 59 customers 


Really Easy 

Less than 15 mins 

Ratings submitted by customers like you who bought this part.   

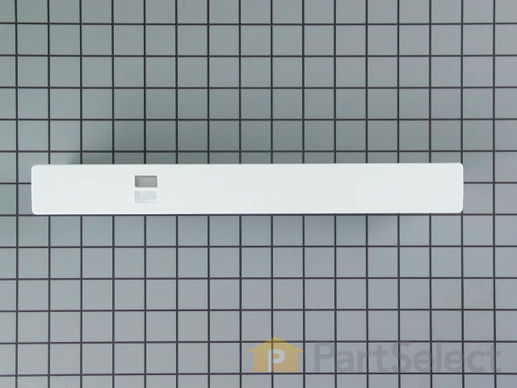
This is a center crisper rail for your refrigerator. This part acts as a support rail for the crisper drawer by holding the center of the crisper frame. You will need to replace this part is if your current drawer is not opening or closing properly. This crisper rail is white and it is made entirely of plastic. It is roughly 13.5 inches long, and 2.5 inches wide. This is an easy repair which requires no tools.

$ 50.81
  In Stock
PartSelect Number PS11757048
Manufacturer Part Number WPW10671238

Replacing your Kenmore Refrigerator Refrigerator Center Crisper Drawer Slide Rail - White

Replacing your Refrigerator Center Crisper Drawer Slide Rail - White

Customer Repair Stories

crisper drawers were off center rail due to c.r fracture

removed old rail,lifted glass panel above and inserted new rail-voila!!done.
  • albert from quakertown, PA
  • Difficulty Level:
    Really Easy
  • Total Repair Time:
    Less than 15 mins
42 of 46 people found this instruction helpful.
Was this instruction helpful to you?
Thank you for voting!

Cracked & Snapped Center Crisper Rail

A very easy fix took all of five minutes
  • Ruth from Roxbury, MA
  • Difficulty Level:
    Really Easy
  • Total Repair Time:
    Less than 15 mins
226 of 245 people found this instruction helpful.
Was this instruction helpful to you?
Thank you for voting!
Fixes Symptom 1% of time
★★★★★
★★★★★
3 Reviews

Rated by 2 customers 


Really Easy 

15 - 30 mins 

Ratings submitted by customers like you who bought this part.   

$ 109.82
  In Stock
PartSelect Number PS11755667
Manufacturer Part Number WPW10498976

Customer Repair Stories

not dispenceing water

replaced water valve still does not work
  • paul from HARWICH, MA
  • Difficulty Level:
    Really Easy
  • Total Repair Time:
    30 - 60 mins
  • Tools:
    Nutdriver, Pliers
2 of 5 people found this instruction helpful.
Was this instruction helpful to you?
Thank you for voting!

Leak at the water inlet valve

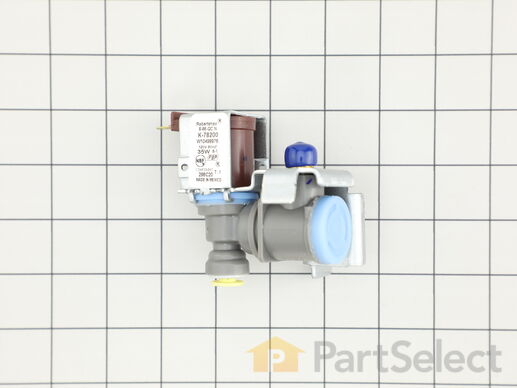
Unplug the refrigerator, removed the screws/nuts from the backing plate. Disconnected the water supply line. Removed the backing plate, disconnected the internal water line. Removed the water inlet valve from the backing plate. Installed new valve, reconnected water lines, put backing plate back on. Done.
  • John from BROOKLYN PARK, MN
  • Difficulty Level:
    Really Easy
  • Total Repair Time:
    Less than 15 mins
  • Tools:
    Nutdriver
2 of 2 people found this instruction helpful.
Was this instruction helpful to you?
Thank you for voting!