Models > WRB322DMBM00 > Symptoms > Fridge too warm

Parts That Fix Whirlpool Refrigerator WRB322DMBM00 Fridge too warm

Fridge too warm is a commonly reported symptom for the WRB322DMBM00 Whirlpool Refrigerator, and we have put together a full guide on how to fix this. This advice is based on feedback from people who own this exact appliance. We have listed the most common parts for your WRB322DMBM00 Whirlpool Refrigerator that will fix Fridge too warm. We have included repair instructions, and helpful step-by-step video tutorials. If you are experiencing this issue, not to worry, DIYers just like you have fixed this, and shared their experience to help you!

Fixes Symptom 52% of time
★★★★★
★★★★★
22 Reviews

Rated by 22 customers 


Easy 

30 - 60 mins 

Ratings submitted by customers like you who bought this part.   

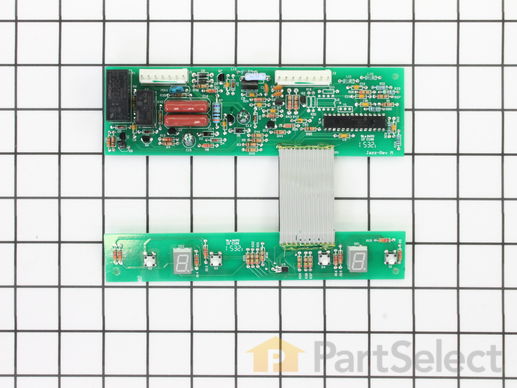
The electronic control board is used in refrigerators to monitor and manage the temperature settings, such as cooling or defrosting times. If your fridge or freezer is too warm, too cold, is not defrosting, will not start, and/or runs too long then replacing the control board could solve your appliance problem. The tools needed for this installation project is a small flat blade screwdriver. *Please note: the board will need to be programmed after installation. Remember to unplug refrigerator from power source as a safety precaution. Refer to the manual provided by the manufacturer for further installation instructions and accurate guidance.

$ 207.60
  In Stock
PartSelect Number PS11755733
Manufacturer Part Number WPW10503278

Replacing your Whirlpool Refrigerator Electronic Control Board

Replacing your Electronic Control Board

Customer Repair Stories

defroster mode was not working causing freezer to ice up and refrigerator to be warm. Also fan was running continuely

The hard part for me was figuring out which part was causing the problem. I read what others had done and followed their test methods. I checked the defroster heater for continuity and the defroster thermostat to make sure it was closing. the defroster termostat has to be cold to check it. You will need to check it while it is in ice or take it out and put it in another freezer for 30 mins and then check it for continuity. Those items checked out ok so it had to be the control board. The control board is a 5 min job to replace but making sure that is your problem is the hard part. I think the control board was bad due to a power surge we had when the power went out and came back on. It might be a good idea to put a surge protector on your home to protect your fridge and all your other electronic stuff. Our refrigerator is now working like new again. Thank you for all your help, Jim
  • James from Welches, OR
  • Difficulty Level:
    A Bit Difficult
  • Total Repair Time:
    1- 2 hours
  • Tools:
    Nutdriver, Screw drivers
180 of 211 people found this instruction helpful.
Was this instruction helpful to you?
Thank you for voting!

Freezer is cold, Refridgerator is not as cold as it should be

Having seen this problem before in other equipment so I had an idea where to look. Problem: the automatic defrost function was not operating. Looking through openings in the back panel of the freezer compartment, you could see the evaporator coils and fins were a solid chuck of ice. There are three logical components to check. Heater element, thermostat (located just above the evaporator) and a relay on the control board (located in the fridge control panel). Checked the heater with an ohm meter -- OK. The thermostat closes the circuit at around 20 degrees and opens at around 32 degrees. Pulled out the thermostat, wiring, fan unit. Everything unplugs, unscrews, and unclips, don't cut wires. Put the whole assembly in a friends freezer for an hour or so to see if the thermostat closes -- OK. Problem had to be with the control board. Replaced control board, reprogrammed it per included instruction. Everything is working again.
  • Russell from Hardinsburg, KY
  • Difficulty Level:
    A Bit Difficult
  • Total Repair Time:
    More than 2 hours
  • Tools:
    Screw drivers
355 of 430 people found this instruction helpful.
Was this instruction helpful to you?
Thank you for voting!
Fixes Symptom 19% of time
★★★★★
★★★★★
4 Reviews

Rated by 7 customers 


Easy 

30 - 60 mins 

Ratings submitted by customers like you who bought this part.   

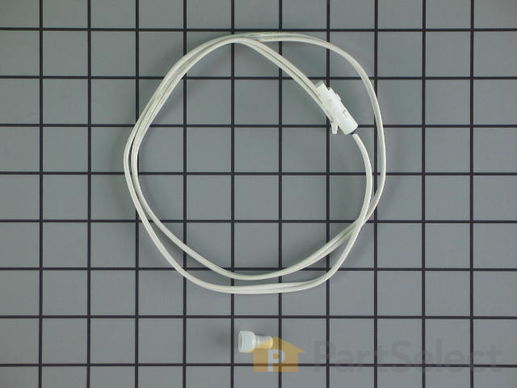
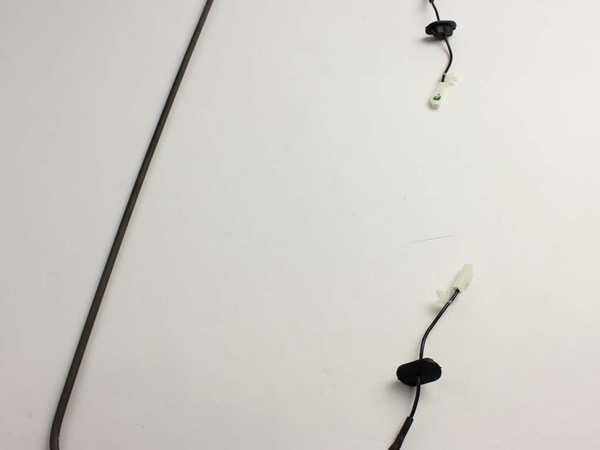
This long harness thermistor kit is what helps monitor and regulate the temperature inside your refrigerator. It can be located in either the freezer compartment near the evaporator coils or in the fresh food compartment near the airflow channels, depending on the model. If you notice issues like excessive icing in the freezer, inadequate cooling in the refrigerator, temperature fluctuations, or error messages on the display panel, it indicates a potential problem with the thermistor. Since your fridge will not be able to maintain the desired temperature, this results in food spoilage, inefficient cooling, and potential damage to the cooling components. To replace the thermistor, disconnect it from the connector plug or wiring harness and remove any mounting brackets or clips using a screwdriver if necessary. Remember to consult your user manual to determine the required number of thermistors, as they are sold individually as OEM replacement parts.

$ 45.58
  In Stock
PartSelect Number PS2003772
Manufacturer Part Number 12002355

Replacing your Maytag Refrigerator Thermistor

Replacing your Thermistor

Customer Repair Stories

Our refrigerator was too cold as the thermistor seems to have gone

It was great. We replaced the thermistor A little difficult to get to the thermistor but once we found it five minutes. My refrigerator seems happy but we will monitor it and see.
  • Ellen from SUN CITY WEST, AZ
  • Difficulty Level:
    Really Easy
  • Total Repair Time:
    15 - 30 mins
  • Tools:
    Screw drivers
19 of 29 people found this instruction helpful.
Was this instruction helpful to you?
Thank you for voting!

The refrigerator was freezing most products

Remove the light cover. Use a flat head screw driver to push in the tabs on the back of the program mount and pull down to expose the computer board. The Thermistor is clipped on under the vent holes on the right side. Cut both wires to remove the old thermistor strip a 1/4 inch off the remaning wires and the new thermistor wires twist both ends together crimp on the wire caps snap in the new thermistor reinstall the program board until the retainer clips snap into place, slide the light cover back on.
  • michael from MARION, IL
  • Difficulty Level:
    Easy
  • Total Repair Time:
    Less than 15 mins
  • Tools:
    Pliers, Screw drivers
25 of 28 people found this instruction helpful.
Was this instruction helpful to you?
Thank you for voting!
Fixes Symptom 10% of time
★★★★★
★★★★★
4 Reviews

Rated by 11 customers 


Easy 

30 - 60 mins 

Ratings submitted by customers like you who bought this part.   

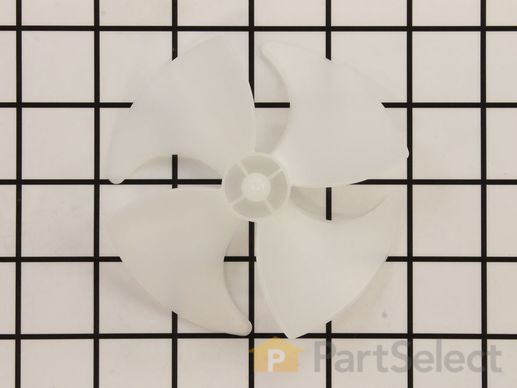
If your refrigerator or freezer is too warm, or making noises, you may need to replace the fan blade. The fan blade attaches to the evaporator motor, which is in the freezer section, to help circulate the cold air into the refrigerator and freezer sections. The fan blade is white in color and made from plastic. This is a genuine OEM part. Please be sure to disconnect the power to your refrigerator before starting your repair.

$ 37.20
  In Stock
PartSelect Number PS11738973
Manufacturer Part Number WP2169142

Replacing your Whirlpool Refrigerator Evaporator Fan Blade

Replacing your Evaporator Fan Blade
Fixes Symptom 8% of time
★★★★★
★★★★★
8 Reviews

Rated by 5 customers 


Easy 

30 - 60 mins 

Ratings submitted by customers like you who bought this part.   

$ 64.50
  In Stock
PartSelect Number PS11773024
Manufacturer Part Number W11024089

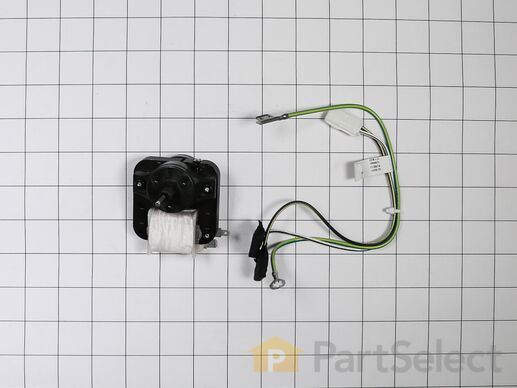
Replacing your Whirlpool Refrigerator MOTOR-EVAP

Replacing your MOTOR-EVAP

Customer Repair Stories

No evap. fan function, freezer cold, refrigerator not cold.

My unit was a bottom mounted freezer, the door assembly and side out rack unit took more time then the repair. Once you take the back panel off it is just a matter of unplugging and two screws. Easier to pull fan mounting housing out to replace motor. Be careful its all plastic, pot off fan blades off shaft, pot out old motor, pot in new motor, slide fan blades back on shaft, make sure you get the mounting housing behind the duck that goes up to your refrigerator section, two screws and plug in connections and your done. Put back panel, rack and door assembly back in and you are friggen again, once you plug it in of course.
  • Michael from WINCHESTER, VA
  • Difficulty Level:
    Easy
  • Total Repair Time:
    30 - 60 mins
  • Tools:
    Nutdriver, Screw drivers
3 of 4 people found this instruction helpful.
Was this instruction helpful to you?
Thank you for voting!

Refrigerator section wasn't getting cold.

Took out the drawer and upper rack out of freezer removed back wall from freezer took out fan motor housing and replaced motor and thermostat. Works like new now.
  • Edward from Muncie, IN
  • Difficulty Level:
    A Bit Difficult
  • Total Repair Time:
    30 - 60 mins
7 of 14 people found this instruction helpful.
Was this instruction helpful to you?
Thank you for voting!
Fixes Symptom 3% of time
★★★★★
★★★★★
2 Reviews

Rated by 3 customers 


Really Easy 

15 - 30 mins 

Ratings submitted by customers like you who bought this part.   

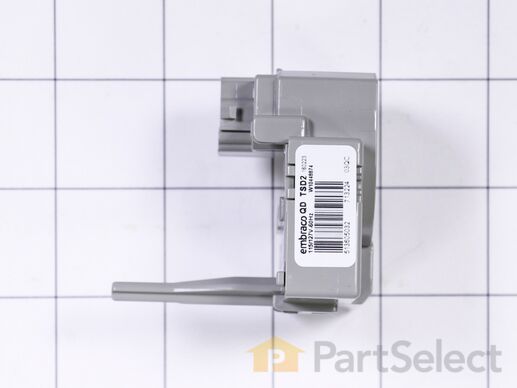
$ 94.12
  In Stock
PartSelect Number PS11754876
Manufacturer Part Number WPW10448874

Customer Repair Stories

Refrigerator and freezer not cooling

It was easy to replace the start and run capacitors. But did not fix my problem, also replaced the evaporator fan still not fixed. Pulled refrigerator out of RV and ordered a new one.
  • Tom from FENTON, MO
  • Difficulty Level:
    Easy
  • Total Repair Time:
    30 - 60 mins
  • Tools:
    Pliers
3 of 3 people found this instruction helpful.
Was this instruction helpful to you?
Thank you for voting!
Fixes Symptom 2% of time
★★★★★
★★★★★
1 Review

Rated by 4 customers 


Very Easy 

15 - 30 mins 

Ratings submitted by customers like you who bought this part.   

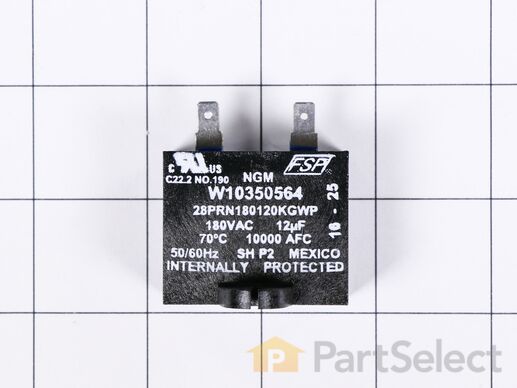
$ 73.15
  In Stock
PartSelect Number PS11753490
Manufacturer Part Number WPW10350564

Customer Repair Stories

Fridge would not start

Unplug the fridge then wheel the refrigerator out to where you can get to the back - you will probably have to disconnect the ice maker water hose. Using the nut driver remove all the screws from the lower panel on the fridge. You will not have to remove the water hose connection just move the panel around a little. Look on the left side (facing the back of the fridge) you will see the capacitor held onto the compressor with a spring clip. Just pull the clip toward you and that will free the capacitor. Pull up on the capacitor and that will unplug it from the compressor. Be careful not to touch the two poles on the old capacitor. Capacitors store electricity and it could give you a jolt. I used electrical tape to insulate the poles and then threw it away. Plug in the new capacitor- re-hook the clip, reinstall the back panel, plug it in and verify that the fridge is working. Hook your water hose back up and move it back into place and you are done.
  • Glen from PT CHARLOTTE, FL
  • Difficulty Level:
    Really Easy
  • Total Repair Time:
    15 - 30 mins
  • Tools:
    Nutdriver
7 of 8 people found this instruction helpful.
Was this instruction helpful to you?
Thank you for voting!
Fixes Symptom 2% of time
★★★★★
★★★★★
30 Reviews

Rated by 11 customers 


Really Easy 

30 - 60 mins 

Ratings submitted by customers like you who bought this part.   

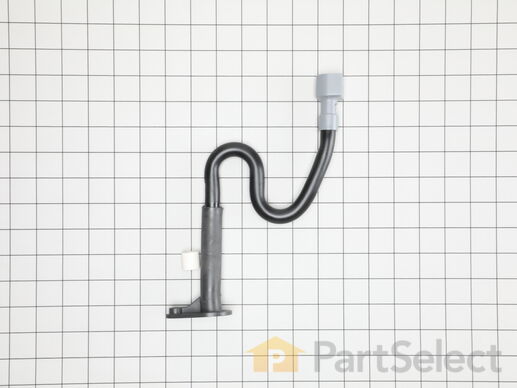
The p-trap drain tube kit may also be known as the duck bill, or the drain pipe, and it is compatible with your refrigerator. The function of the p-trap drain kit is to carry the water that has formed during the defrost cycle to the bottom of the refrigerator, where your drain pan is located. The tools you will need for this repair include a 1/4-inch nut driver and a small flat-blade screwdriver. To do this repair you will need to pull the refrigerator forward in order to reach the lower access panel at the back. This kit includes the tube extension piece and spacer.

$ 39.50
  In Stock
PartSelect Number PS8691807
Manufacturer Part Number W10619951

Replacing your Whirlpool Refrigerator P-Trap Drain Tube Kit

Replacing your P-Trap Drain Tube Kit

Customer Repair Stories

Freezer icing up .

Watched Partselect video of P-trap installation.Removed water line & back cover& disconnected wires to water solenoid .Removed old drain tube & old problematic rubber funnel. Used contact cleaner to clean rubber residue from drain line and used a little silicone to aide reassembly. Job went well thanks to video.
  • Rich from Lansing, IL
  • Difficulty Level:
    Easy
  • Total Repair Time:
    30 - 60 mins
  • Tools:
    Nutdriver, Wrench (Adjustable)
11 of 12 people found this instruction helpful.
Was this instruction helpful to you?
Thank you for voting!

Water leaking from bottom of refrigerator onto floor

The video on website is very good and explains everything in detail. Just follow the directions. This is EASY!!!!
  • Jack from DINUBA, CA
  • Difficulty Level:
    Really Easy
  • Total Repair Time:
    30 - 60 mins
  • Tools:
    Nutdriver, Screw drivers
102 of 111 people found this instruction helpful.
Was this instruction helpful to you?
Thank you for voting!
Fixes Symptom 1% of time

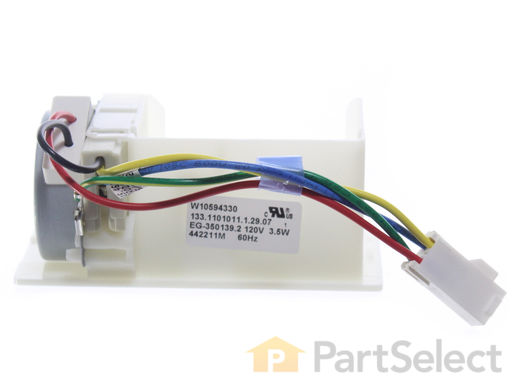
$ 109.64
  In Stock
PartSelect Number PS11756642
Manufacturer Part Number WPW10594330
Fixes Symptom 1% of time
★★★★★
★★★★★
5 Reviews

Rated by 4 customers 


Very Easy 

Less than 15 mins 

Ratings submitted by customers like you who bought this part.   

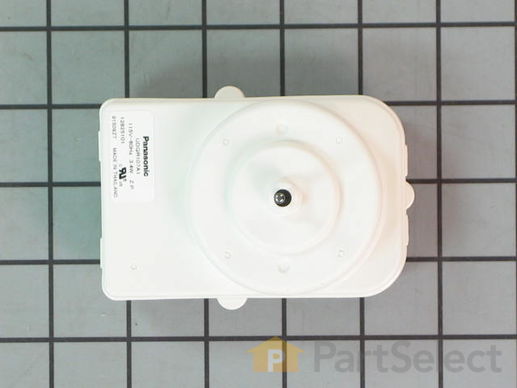
This is a condenser fan motor for your refrigerator/freezer. This fan motor is most commonly used with frost-free refrigerators with a condenser coil. It controls the rotation of the condenser fan blade. When the compressor runs, so does this fan, circulating air through the refrigerator grille, cooling the compressor and condenser coils. This fan motor also helps to evaporate excess water in the drain pan. This model is all white in color, and is roughly 4 inches long, 3 inches wide, and 3.5 inches thick.

$ 125.08
  In Stock
PartSelect Number PS16744942
Manufacturer Part Number W11613295

Replacing your Whirlpool Refrigerator MOTOR-COND FAN,115VAC 1090RPM

Replacing your MOTOR-COND FAN,115VAC 1090RPM

Customer Repair Stories

The refrigerator was working for just 1 minute and breaks, I discovered that the fan was not working , I understood that there wsa something wrong with the condenser fan motor. I just order a new one.

The installation video for condenser fan motor helped a lot to know how to disconnect the old fan motor and connect the new one. So easy just know how to remove and put back the fan gently, observe carefully where is the center and the connector position; 15 min after everything was done and the unit works well to date.
  • John from PHOENIX, AZ
  • Difficulty Level:
    Really Easy
  • Total Repair Time:
    15 - 30 mins
  • Tools:
    Nutdriver
1 person found this instruction helpful.
Was this instruction helpful to you?
Thank you for voting!

Refrigerator would cool for a very short period of time. Then the compressor would shutdown via internal thermal overload or high head pressure. This was caused by the lack of airflow across the condenser coils and compressor.

(1) Slide out appliance and remove power source. (2) Removed lower access cover on rear of refrigerator. (3) Disconnected plug to the condenser fan motor. (4) remove blades by pulling gently forward (5) remove mounting hardware holding the fan motor (3 screws) (6) motor is now free and new motor can be installed
  • Daniel from RICHTON, MS
  • Difficulty Level:
    Very Easy
  • Total Repair Time:
    Less than 15 mins
  • Tools:
    Nutdriver, Pliers
8 of 16 people found this instruction helpful.
Was this instruction helpful to you?
Thank you for voting!
Fixes Symptom 1% of time
★★★★★
★★★★★
1 Review

$ 88.68
  In Stock
PartSelect Number PS11738607
Manufacturer Part Number WP12729128