Models > MDB7100AWW > Symptoms > Not cleaning dishes properly

Parts That Fix Maytag Dishwasher MDB7100AWW Not cleaning dishes properly

Not cleaning dishes properly is a commonly reported symptom for the MDB7100AWW Maytag Dishwasher, and we have put together a full guide on how to fix this. This advice is based on feedback from people who own this exact appliance. We have listed the most common parts for your MDB7100AWW Maytag Dishwasher that will fix Not cleaning dishes properly. We have included repair instructions, and helpful step-by-step video tutorials. If you are experiencing this issue, not to worry, DIYers just like you have fixed this, and shared their experience to help you!

Fixes Symptom 17% of time
★★★★★
★★★★★
2 Reviews

Rated by 21 customers 


Easy 

30 - 60 mins 

Ratings submitted by customers like you who bought this part.   

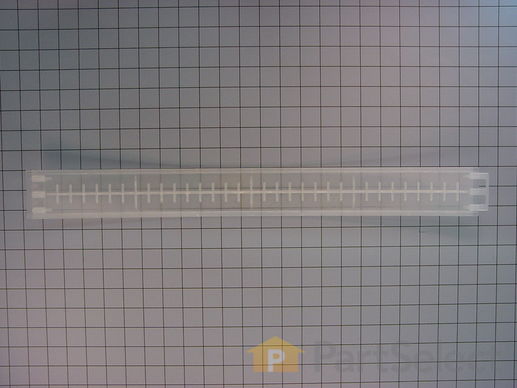
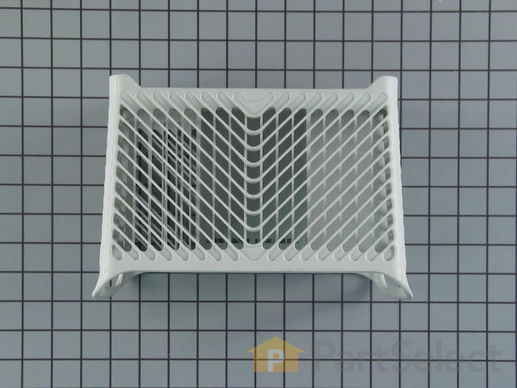
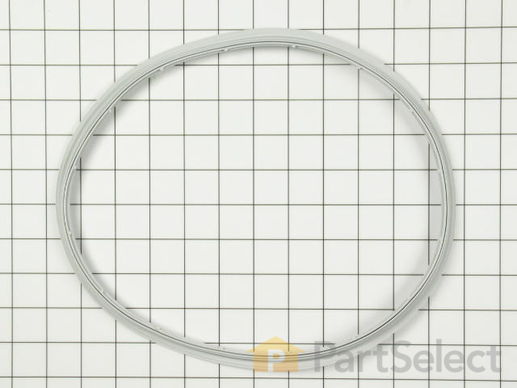
This pump housing filter is twenty-three inches long and a little over two inches wide. This filter wraps around a dishwasher's pump housing and clips in place. It is all white in color and is made of plastic with a mesh screen.

$ 45.52
  In Stock
PartSelect Number PS11747618
Manufacturer Part Number WP99001791

Replacing your Maytag Dishwasher Pump Housing Filter

Replacing your Pump Housing Filter

Customer Repair Stories

dishes didnt clean

my husband took the bottom rack out, unscrewed it where there were screws, lifted up the unscrewed part, took the filter out,cleaned out any gunk, replaced the filter put the part back on, rescrewed it, put the rack back in and it works much better.
  • Lois from Olathe, KS
  • Difficulty Level:
    Really Easy
  • Total Repair Time:
    15 - 30 mins
  • Tools:
    Screw drivers
2 of 3 people found this instruction helpful.
Was this instruction helpful to you?
Thank you for voting!

Wouldn't come clean.

New pump housing filter was needed as the old one was plugged and distorted.

I
  • Keith from Beaver Dam, WI
  • Difficulty Level:
    Easy
  • Total Repair Time:
    30 - 60 mins
  • Tools:
    Nutdriver
2 of 2 people found this instruction helpful.
Was this instruction helpful to you?
Thank you for voting!
Fixes Symptom 12% of time
★★★★★
★★★★★
2 Reviews

Rated by 25 customers 


Easy 

30 - 60 mins 

Ratings submitted by customers like you who bought this part.   

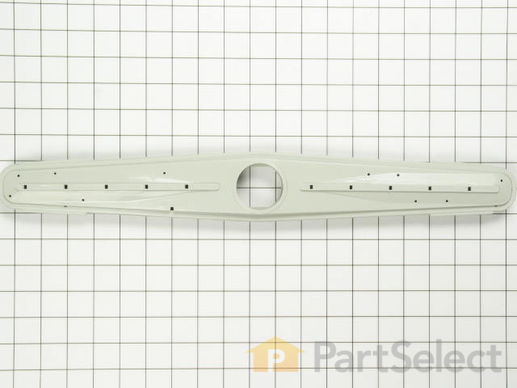
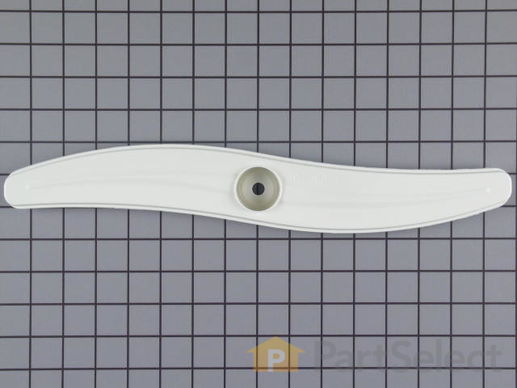
This lower dishwasher spray arm is just about twenty inches in length and three inches wide in the center. Also, this spray arm is gray in color.

$ 83.92
  In Stock
PartSelect Number PS11747617
Manufacturer Part Number WP99001788

Customer Repair Stories

Dishes not getting clean

I asked my husband if I ordered the parts would he change them for me, and when they arrived, it looked so simple I did it myself. I removed the washer arm by unscrewing the disk that holds it in place. I took the metal heat deflectors off the old arm (they just easily pried off) and put them on the new. I lifted off the large round "plate" that the arm rests on and cleaned the underside. Then put it back together in reverse order.
  • Bonnie from Kenner, LA
  • Difficulty Level:
    Really Easy
  • Total Repair Time:
    Less than 15 mins
1 person found this instruction helpful.
Was this instruction helpful to you?
Thank you for voting!

The dishwasher was not getting dishes clean

We had tried to use dish washer cleaners, and they would work for a time, but we started spending more money on cleaner than we wanted. I ordered and then I replaced the lower spray arm. It took a little effort to get the top screw off, due to hard water deposits. The new one went on very easily, just screwed right in like the old one. It's working great and I really don't mind not getting a new one or paying for a service call!!!
  • Vickie from Lincoln, NE
  • Difficulty Level:
    Really Easy
  • Total Repair Time:
    Less than 15 mins
  • Tools:
    Wrench (Adjustable)
3 of 4 people found this instruction helpful.
Was this instruction helpful to you?
Thank you for voting!
Fixes Symptom 8% of time

Rated by 41 customers 


Easy 

30 - 60 mins 

Ratings submitted by customers like you who bought this part.   

This part is located under lower spray arm.

  No Longer Available
PartSelect Number PS2340910
Manufacturer Part Number 6-917075

Customer Repair Stories

Noise when washing or draining

Remove bottom rack. Unscrew the retaining ring on the wash arm, remove along with wash nozzle. Unscrew the eight retaining screws on the filter cover and remove (be carefull not to lose the two plastic bushings). Pick off and set aside the wash fan. Remove the six retaining bolts on the discharge housing. Pull up and remove the discharge housing. Remove the gasket (buy a new one, cheap and easier) with small screwdriver. Push gasket into new assembly. Under plastic nut with pliers and take off the plastic bushing that the wash arm rides on. Install new housing assembly with the parts that was taken off in the reverse order. Be carfull when installing the filter cover to make sure the drain outlet is aligned or mated to drain. Gently push down until the filter in down and continue reassembly.


(PS: Never use Sears parts, they extrembly slow as well unable to deliver on time).
Wash your dishes
  • Daryl from Turlock, CA
  • Difficulty Level:
    Really Easy
  • Total Repair Time:
    15 - 30 mins
  • Tools:
    Nutdriver, Pliers
5 of 6 people found this instruction helpful.
Was this instruction helpful to you?
Thank you for voting!

Machine began making noise as if something had let go and was beating on the machine

I removed the plastic retainer that held the lower spray arm in place. After removing the lower spray arm I was able to remove the 6 hex screws that held the cover over the filter screen and the discharge housing assembly. I was then able to remove the bolts that held the upper part of the discharge housing assembly, and replaced it with the new part that I received. The rest of the job was simply putting it back together.

Note: While repairing the broken part, I noticed a small leak under the machine around the float assembly. This was simple to fix. Remove the small lock ring on the bottom of the float. Pull the float out and clean the grease and soap scum out of it. Put it back in and attach the lock ring. No more leak and the water gets turned off when the float activates the switch. Something that everyone should check periodically.
  • Michael from Lost Creek, WV
  • Difficulty Level:
    Easy
  • Total Repair Time:
    15 - 30 mins
  • Tools:
    Nutdriver, Pliers, Screw drivers
15 of 17 people found this instruction helpful.
Was this instruction helpful to you?
Thank you for voting!
Fixes Symptom 8% of time
★★★★★
★★★★★
1 Review

Rated by 25 customers 


Easy 

30 - 60 mins 

Ratings submitted by customers like you who bought this part.   

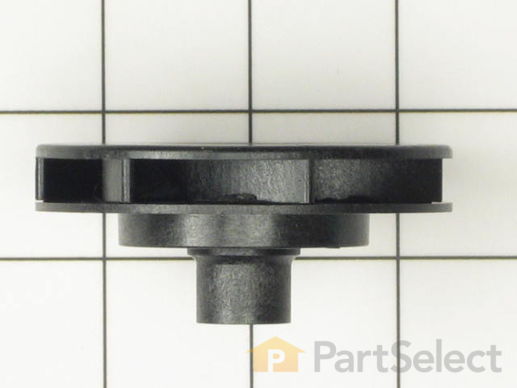
This impeller rotates and is used to force water up through to the spray arm.

$ 52.36
  In Stock
PartSelect Number PS11747641
Manufacturer Part Number WP99002069

Replacing your Maytag Dishwasher Impeller Assembly

Replacing your Impeller Assembly

Customer Repair Stories

Stinky dishwasher

When I tried to remove the hold down screw for the impellar, the impellar broke in half. I actually did npt need to go this far with disassembly as the problem was with water being retained in the rinse arm assembly and stagnating. This was due to calcium buildup clogging the drain holes. Clearing the holes resolved the problem.
  • Edward from Pompton Plains, NJ
  • Difficulty Level:
    Really Easy
  • Total Repair Time:
    15 - 30 mins
  • Tools:
    Nutdriver, Screw drivers
1 person found this instruction helpful.
Was this instruction helpful to you?
Thank you for voting!

No water pressure from lower wash arm

Never having repaired a dishwasher before, I disassembled everything I dared to until I found the root of the problem--part of the impeller had broken into several little bits. It wasn't apparent where the pieces came from, but the on-line diagrams and product photos helped. The broken impeller didn't want to come off the shaft, so I just crunched it up with a pair of vise grips. That seemed to be the gentlest solution for the pump bearings. The bits of impeller also took out the pump housing, which I could have ordered with the impeller had I been more observant. [insert four more days of washing by hand here] Inspect all parts for damage and clean out all stray chunks of food and plastic before reassembling!
  • Benjamin from New York, NY
  • Difficulty Level:
    A Bit Difficult
  • Total Repair Time:
    1- 2 hours
  • Tools:
    Nutdriver, Pliers
1 person found this instruction helpful.
Was this instruction helpful to you?
Thank you for voting!
Fixes Symptom 6% of time

Rated by 16 customers 


Really Easy 

Less than 15 mins 

Ratings submitted by customers like you who bought this part.   

Used with your upper spray arm.

  No Longer Available
PartSelect Number PS1957166
Manufacturer Part Number W10116811

Customer Repair Stories

Upper dishwasher arm fell off

I undid the four clips that attach the upper dish rack to the dishwasher. The upper arm simply unscrews from the top of the dishwasher. Unsnap clip that holds arm and remove arm. Installation is the reverse of removal.
  • Gregory from Eureka, UT
  • Difficulty Level:
    Really Easy
  • Total Repair Time:
    Less than 15 mins
3 of 3 people found this instruction helpful.
Was this instruction helpful to you?
Thank you for voting!

Upper washer arm holes plugged up

The upper washer arm can be removed by just snapping it out of place. Just take a screw driver and put in underneath the spray arm and pry it out of its socket. It will just snap out its place. Sometimes this retainer will break so make sure you have this retainer before trying to remove the upper spary arm. I removed the spray arm and back flushed it out with a garden hose to get the debri out of the washer arm. The holes are all clean now. Washes much better now. To put in back on just put the washer arm back where it goes and then just snap the clip back in its hole. Pretty easy fix.
  • STEVE from RAYTOWN, MO
  • Difficulty Level:
    Easy
  • Total Repair Time:
    15 - 30 mins
  • Tools:
    Screw drivers
15 of 18 people found this instruction helpful.
Was this instruction helpful to you?
Thank you for voting!
Fixes Symptom 6% of time
★★★★★
★★★★★
79 Reviews

Rated by 111 customers 


Really Easy 

Less than 15 mins 

Ratings submitted by customers like you who bought this part.   

This silverware basket is gray in color and measures 8 inches wide by 11-1/2 inches high by 12 inches deep. The silverware basket is used to hold small utensils such as forks, spoons, and knives during dishwashing. The manufacturer has redesigned this part to be a complete, full basket with a handle and covers. The basket comes apart in two pieces if you prefer to place them along the sides of your dishwasher instead of at the front section of your bottom dish rack. To prolong the life of this part, try to place utensils into the holders carefully instead of dropping them in.

$ 27.80
  In Stock
PartSelect Number PS11743069
Manufacturer Part Number WP6-918873

Replacing your Maytag Dishwasher Silverware Basket - Gray

Replacing your Silverware Basket - Gray

Customer Repair Stories

Maytag makes a really crappy silverware basket. The bottom of ours fell apart the first year.

There was no repair to be done. Just replaced the defective basket with the new one.
I got the part two days after ordering it. Great service.
  • Kenneth from Houston, TX
  • Difficulty Level:
    Really Easy
  • Total Repair Time:
    Less than 15 mins
160 of 230 people found this instruction helpful.
Was this instruction helpful to you?
Thank you for voting!

The utensil basket was old, bowed and the bottom was falling out.

I ordered a new replacement basket. The new one is a little different but it fits in the same place and takes up the same amount of room in the dishwasher. It looks very nice too.
  • Janet from Plano, TX
  • Difficulty Level:
    Really Easy
  • Total Repair Time:
    Less than 15 mins
476 of 489 people found this instruction helpful.
Was this instruction helpful to you?
Thank you for voting!
Fixes Symptom 4% of time

Rated by 19 customers 


Easy 

30 - 60 mins 

Ratings submitted by customers like you who bought this part.   

This upper discharge housing gasket is fifteen inches long.

  No Longer Available
PartSelect Number PS2098976
Manufacturer Part Number 99001326
Fixes Symptom 3% of time

Rated by 14 customers 


Easy 

30 - 60 mins 

Ratings submitted by customers like you who bought this part.   

  No Longer Available
PartSelect Number PS2097730
Manufacturer Part Number 912313

Replacing your Maytag Dishwasher Lower Spray Arm Seal

Replacing your Lower Spray Arm Seal

Customer Repair Stories

Dishes are not cleaned,ery good machine just when south over night

Removed lower spray arm and installed new seal under spray arm.Did not fix problem,I am guessing a low spray pressure.Everything checks out O.K.Anyone have some suggestions.How does the rinse aid get out of the holding tankr?
  • Larry from Ashtabula, OH
  • Difficulty Level:
    Really Easy
  • Total Repair Time:
    Less than 15 mins
1 of 2 people found this instruction helpful.
Was this instruction helpful to you?
Thank you for voting!
9 O-RING
Fixes Symptom 3% of time

Rated by 14 customers 


Easy 

1- 2 hours 

Ratings submitted by customers like you who bought this part.   

  No Longer Available
PartSelect Number PS2099290
Manufacturer Part Number 99001797
Fixes Symptom 3% of time
★★★★★
★★★★★
19 Reviews

Rated by 28 customers 


Really Easy 

Less than 15 mins 

Ratings submitted by customers like you who bought this part.   

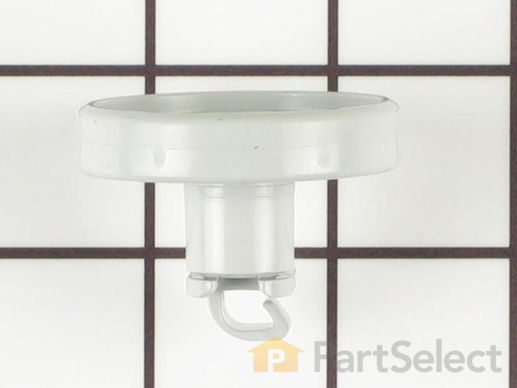
This lower dishrack roller is less than two inches in diameter. It is made entirely of white plastic. If you find that your dishwasher is making loud noises or the lower rack is getting stuck when you are moving it in or out, it could be that the lower wheel assembly needs to be replaced. The dishrack wheels allow for easy movement of the dishrack in and out of the dishwasher. These rollers tend to wear down at the same speed, so it is recommended to replace both pairs at the same time. Open your dishwasher and remove the bottom rack, locate the locking tab, and rotate until it easily slides out of place. Slide the new wheel over the shaft and locate the locking tab to snap back into place.

$ 12.48
  In Stock
PartSelect Number PS11747717
Manufacturer Part Number WP99002780

Replacing your Maytag Dishwasher Lower Wheel Assembly

Replacing your Lower Wheel Assembly

Customer Repair Stories

Broken Wheels

Snapped on new wheels
  • Mary J. from Westwood, MA
  • Difficulty Level:
    Really Easy
  • Total Repair Time:
    Less than 15 mins
67 of 67 people found this instruction helpful.
Was this instruction helpful to you?
Thank you for voting!

2 broken wheels on basket

unwrapped wheels ,pulled out drawer and easily put on new wheels...as we live way out in the boonies it was great to be able to order parts and have them delivered so fast...easy to fix....
  • jeanne from waynesboro, TN
  • Difficulty Level:
    Really Easy
  • Total Repair Time:
    Less than 15 mins
371 of 374 people found this instruction helpful.
Was this instruction helpful to you?
Thank you for voting!
Fixes Symptom 2% of time

Rated by 5 customers 


Easy 

30 - 60 mins 

Ratings submitted by customers like you who bought this part.   

This upper spray arm is all white in color and made of plastic.

  No Longer Available
PartSelect Number PS2099793
Manufacturer Part Number 99002418
Fixes Symptom 2% of time
★★★★★
★★★★★
1 Review

Rated by 3 customers 


Really Easy 

15 - 30 mins 

Ratings submitted by customers like you who bought this part.   

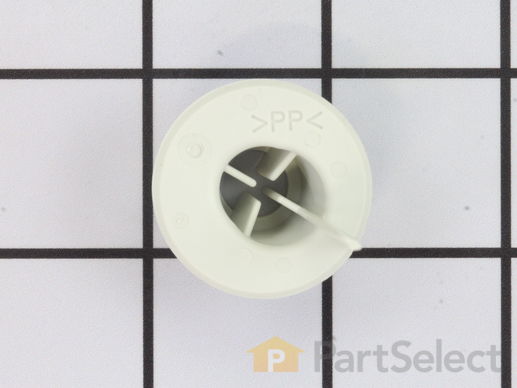
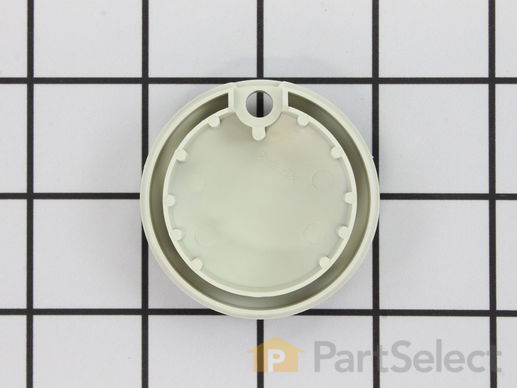
To remove this lower spray arm cap, turn counter clockwise.

$ 8.02
  In Stock
PartSelect Number PS11747605
Manufacturer Part Number WP99001428
Fixes Symptom 2% of time
★★★★★
★★★★★
1 Review

Rated by 4 customers 


Really Easy 

15 - 30 mins 

Ratings submitted by customers like you who bought this part.   

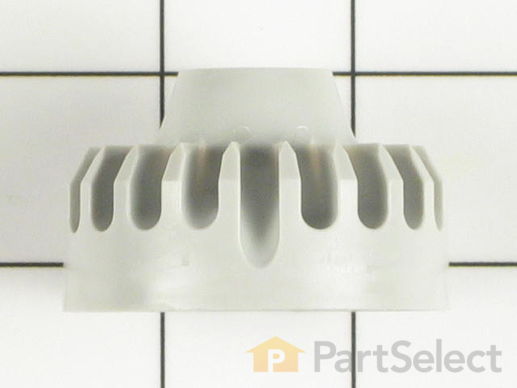
This jump up nozzle is a little over an inch long. It is gray in color and is made of plastic.

$ 11.16
  In Stock
PartSelect Number PS11747616
Manufacturer Part Number WP99001787
Fixes Symptom 2% of time

Rated by 10 customers 


Easy 

1- 2 hours 

Ratings submitted by customers like you who bought this part.   

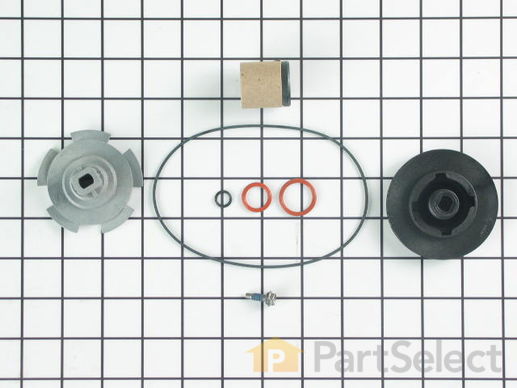
This kit includes 2 impellers, 1 suction plate, 4 seals and a screw.

  No Longer Available
PartSelect Number PS2340860
Manufacturer Part Number 6-915435

Customer Repair Stories

Dishwasher was leaking from motor shaft seal.

Repair was simple, and easy to install. Instructions were fairly straight forward. Only thing to be aware of is when you get to the last part, the cutter blade, it is difficult to remove, and you must pay attention to get it on the new impeller fully seated and make sure that the tabs clear the upper cover that goes on top of it. I had an issue with the tabs catching, causing a loud noise, I simply removed, rechecked, and cut the tabs down a little bit, and re-installed. Overall, took me an hour to complete and I have a quiet and functional dishwasher again!
  • David from West Bloomfield, MI
  • Difficulty Level:
    Easy
  • Total Repair Time:
    30 - 60 mins
  • Tools:
    Nutdriver, Pliers, Screw drivers
0 of 2 people found this instruction helpful.
Was this instruction helpful to you?
Thank you for voting!

Dishes Not Getting Clean

I followed the instructions that came with the parts kit. Everything went fine. When removing the old upper impeller, it came out in two pieces. I did have one o-ring leftover as the instructions did not say where it went. Anyway, the new parts are installed & dishes are getting clean again. I was very impressed with how fast the parts kit arrived at my house.
  • JOHN from SNOHOMISH, WA
  • Difficulty Level:
    Really Easy
  • Total Repair Time:
    30 - 60 mins
  • Tools:
    Pliers, Screw drivers, Socket set
1 of 3 people found this instruction helpful.
Was this instruction helpful to you?
Thank you for voting!
Fixes Symptom 2% of time
★★★★★
★★★★★
13 Reviews

Rated by 26 customers 


Easy 

30 - 60 mins 

Ratings submitted by customers like you who bought this part.   

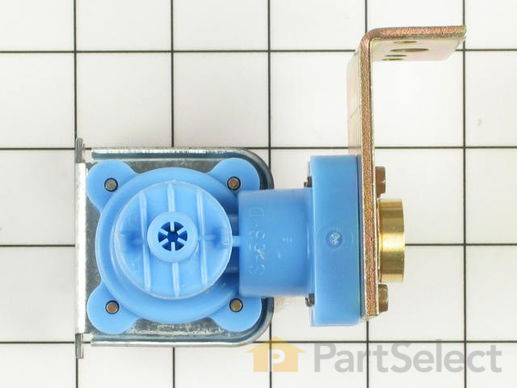
This water inlet valve is specially designed for those dishwashers of the vertical axis style and comes with a mounting bracket. The attaching solenoids on the valve open and close according to the desired amount of water needed.

$ 72.20
  In Stock
PartSelect Number PS11747602
Manufacturer Part Number WP99001359

Replacing your Maytag Dishwasher Water Inlet Valve - 120V

Replacing your Water Inlet Valve - 120V

Customer Repair Stories

No water in the washer barrel

Diagnosed potential problem from scematic diagram found at Parts Select .Com by entering model #. It was very likely the inlet water solenoid. Tear down was simple: Turn off water, disconnect water lines to and from solenoid, disconnect two electric terminals and remove part by removing two screws from dishwasher chasis. Before you buy the new solenoid, unscrew the water inlet elbow from solenoid and check the filter/screen inside the solenoid to make sure it isn't clogged. Assuming it's not, order the replacement part and reinstall in reverse order. Be sure to use plumber's tape on screw connections to make sure there are no leaks..... Also for ease of acces, you'll need to turn the dishwaher down on it's front. Put towels down to cushion the front and keep the controls from contact with the floor. Good luck!!
  • Terry from Great Falls, VA
  • Difficulty Level:
    Really Easy
  • Total Repair Time:
    15 - 30 mins
  • Tools:
    Pliers, Wrench set
12 of 14 people found this instruction helpful.
Was this instruction helpful to you?
Thank you for voting!

The dishwasher wouldn't fill with water.

I first turned off the water to the dishwasher, then the electricity to it, then took off the front bottom access panel, I then unbolted the inlet valve from the side of the machine, undid the electrical hookups remembering which one connected to which, then unclamped the two hoses, I then put the new one back in place, redoing the hoses and electrical and bolting it back to the side of the machine, then putting the front bottom access panel back on, then turning back on the water and electicity. The one thing that may make it easier if you can is to pull the dishwasher out from under the cabinets and lay it down so the bottom is exposed. This would make the process a little smoother.
  • Jared from Rutland, VT
  • Difficulty Level:
    Easy
  • Total Repair Time:
    15 - 30 mins
  • Tools:
    Wrench (Adjustable)
34 of 36 people found this instruction helpful.
Was this instruction helpful to you?
Thank you for voting!
Fixes Symptom 2% of time
★★★★★
★★★★★
22 Reviews

Rated by 52 customers 


Really Easy 

Less than 15 mins 

Ratings submitted by customers like you who bought this part.   

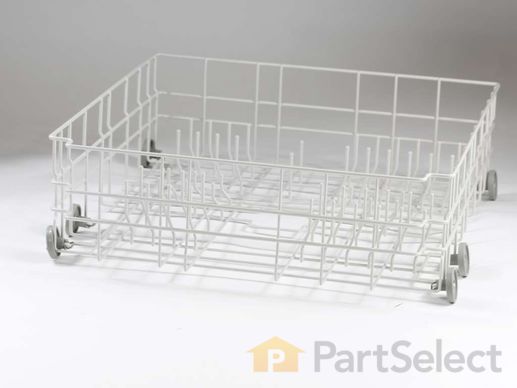
NOTE: Per factory, this substituted part only has 6 wheels instead of 8 and NO longer comes with shelf rack.

$ 380.38
  In Stock
PartSelect Number PS1960964
Manufacturer Part Number W10139223

Replacing your Maytag Dishwasher Lower Dishrack with Wheels

Replacing your Lower Dishrack with Wheels

Customer Repair Stories

lower rack had rusted and tines were breaking off

The lower rack of my dishwasher was falling apart right before my eyes. Tines were breaking off and there was so much rust that my dishes were beginning to become stained. After reading the comments posted at PartsSelect, I decided to try replacing the rack instead of buying a whole new dishwasher. From the posted comments I was able to figure out that the spray tower could be easily removed if I pressed down on it and turned it counterclockwise. After removing the old rack and sliding in the new one, I simply reversed the order, pressing the plastic tower down and turning it clockwise. It was SO simple I was embarassed that I had waited so long to attempt it, and that I had considered replacing a perfectly good dishwasher just because the lower rack was falling apart! I'd also like to add that the rack came in two days! Great service, great price, great web site. Thanks!
  • Antoinette from Long Beach, CA
  • Difficulty Level:
    Really Easy
  • Total Repair Time:
    1- 2 hours
87 of 94 people found this instruction helpful.
Was this instruction helpful to you?
Thank you for voting!

Pieces of the lower dishrack were loosing the plastic coating and snapping off.

First of all, I removed the existing lower dishrack. That was a piece of cake! The part that was tricky was getting the spray arm out of the center so that it could be placed into the new dishrack. I finally figured out that I simply had to twist this piece (I think to the right) to remove it. I reversed this step to place the spray arm assembly into the new dishrack. And then VOILA...I just slid the new dishrack in place!
  • Joy from Washington, VT
  • Difficulty Level:
    Easy
  • Total Repair Time:
    Less than 15 mins
144 of 166 people found this instruction helpful.
Was this instruction helpful to you?
Thank you for voting!
Fixes Symptom 2% of time

Rated by 12 customers 


Easy 

1- 2 hours 

Ratings submitted by customers like you who bought this part.   

Sold individually.

  No Longer Available
PartSelect Number PS11743046
Manufacturer Part Number WP6-914124

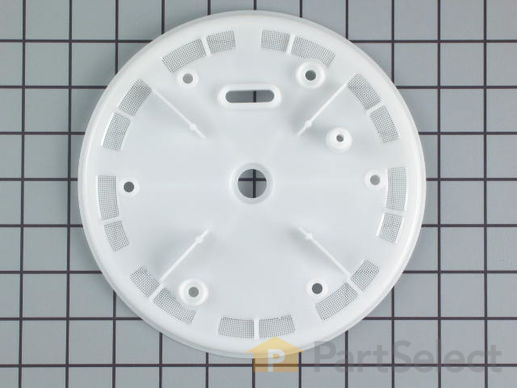
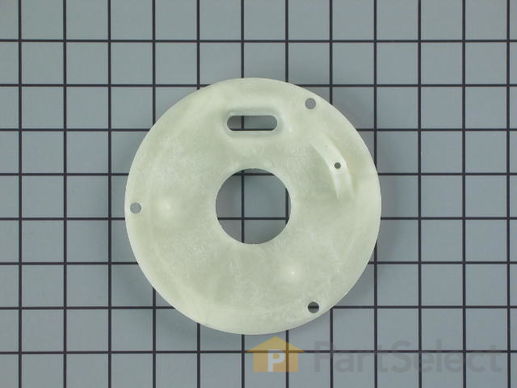
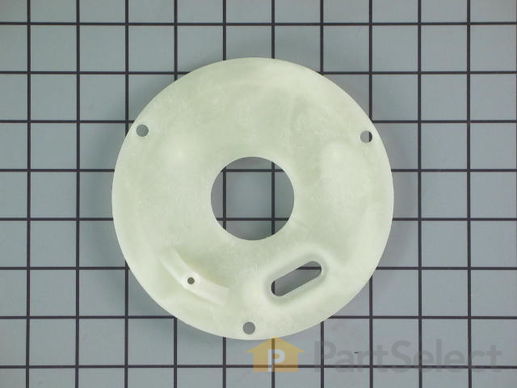
Replacing your Maytag Dishwasher Secondary Filter Plate

Replacing your Secondary Filter Plate

Customer Repair Stories

The machine would no longer clean dishes.

I discovered that, except for the central tower, all the spray holes were all plugged with I took to be calcium deposites . Using the parts diagram located on this web site, I removed parts. All parts can be removed either by hand, nutdriver or small wrench however you do need a star drive (simliar to an allen wrench) to remove the Pump Cover and Secondary Filter. The Lower Spray Arm unsnaps from the Pump Cover and Secondary Filter. I laboriously removed the deposits from each part down as far as the support filter. The upper spray arm can be removed by unsnapping the hub. the Pump Cover and Secondary Filter is a closed unit so. I purchased a new one. The process is very labor intensive. Next time I am going to consider purchasing all new parts or calling a repair man.
  • Richard from Los Gatos, CA
  • Difficulty Level:
    Difficult
  • Total Repair Time:
    More than 2 hours
  • Tools:
    Nutdriver, Screw drivers, Socket set, Wrench set
2 of 2 people found this instruction helpful.
Was this instruction helpful to you?
Thank you for voting!

The dishes weren't coming real clean too much lime deposit buildup from hard water.

Removed top retaining piece by turning clockwise to remove spinning spray arm from bottom assembly. Removed the 6 retaining screws from the primary screen pump cover and lifted up. Removed filter and the four pronged piece that spins with the filter. Removed the 3 hex head screws that held the secondary filter assembly & pump cover in place. Removed center screw that held the bottom black plastic piece just above the secondary filter bottom. Inspected the cutter, then started reassembly in reverse for the replacement of new parts and filters.
  • Delbert from Pembina, ND
  • Difficulty Level:
    Easy
  • Total Repair Time:
    1- 2 hours
  • Tools:
    Nutdriver, Screw drivers, Wrench (Adjustable)
2 of 2 people found this instruction helpful.
Was this instruction helpful to you?
Thank you for voting!
Fixes Symptom 2% of time

Rated by 7 customers 


Easy 

30 - 60 mins 

Ratings submitted by customers like you who bought this part.   

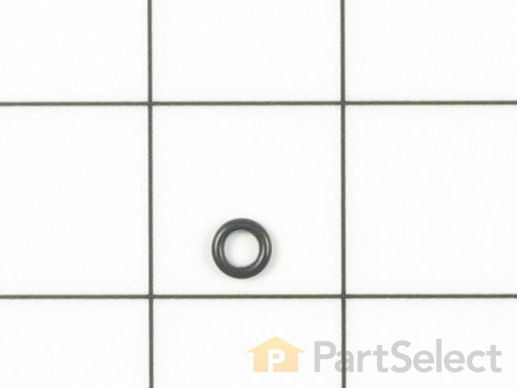
This o-ring seal is well under an inch in diameter. It is all black in color and it is made entirely of rubber.

$ 5.37
  Special Order
PartSelect Number PS11746845
Manufacturer Part Number WP910934
Fixes Symptom 1% of time

Rated by 6 customers 


Really Easy 

15 - 30 mins 

Ratings submitted by customers like you who bought this part.   

  No Longer Available
PartSelect Number PS2099029
Manufacturer Part Number 99001426
Fixes Symptom 1% of time

Rated by 2 customers 


Really Easy 

15 - 30 mins 

Ratings submitted by customers like you who bought this part.   

This is the lower wash arm support.

  No Longer Available
PartSelect Number PS2099459
Manufacturer Part Number 99002043

Customer Repair Stories

I accientally busted the old rinse arm, while I was trying to put in the filterguard with bottom spray arm jet

I took the bottom rack out of the dishwasher. I then took the filter guard and bottom spray arm out. Then I took the screws out of the filter guard to get to the rinse arm. I took the filter guard off, took the old rinse arm out and put in the new one. Have to make sure it is completely resting inside there. Then I put the filter guard back on. Put the screws back into the filter guard, put the two arm seals down around the rinse arm, put the bottom arm spray with guard back into the notches, put the screw top on so it can screw back in and the dishwasher is ready to go. Just make sure that you don't have a lot of soap built up, it will not clean the dishes right nor will the spray arms move. I had to call my appliance person out, and I have so much built up from soap, that I had to order a new filter guard and top and bottom spray jets. I now know to switch back to powder or liquid soap, because the tablets make a huge built up of soap... I have these parts on order now. In the meantime, I am cleaning out the jets with dishwasher magic and vinegar while I am waiting for my new parts. I now know how to put things back together so when I have this happen again I will know how to do it to save me the 63.00 office call and parts. I am happy that I know where to get my parts when I need them or break them by accident on trying to put my dishwasher back together again. Thanks.
  • mary from sturgis, MI
  • Difficulty Level:
    Really Easy
  • Total Repair Time:
    Less than 15 mins
  • Tools:
    Socket set
7 of 8 people found this instruction helpful.
Was this instruction helpful to you?
Thank you for voting!
Fixes Symptom 1% of time

Rated by 5 customers 


Easy 

30 - 60 mins 

Ratings submitted by customers like you who bought this part.   

This gray filter guard is eleven inches long.

$ 17.35
  On Order
PartSelect Number PS11747619
Manufacturer Part Number WP99001796
Fixes Symptom 1% of time

Rated by 1 customer 


A Bit Difficult 

15 - 30 mins 

Ratings submitted by customers like you who bought this part.   

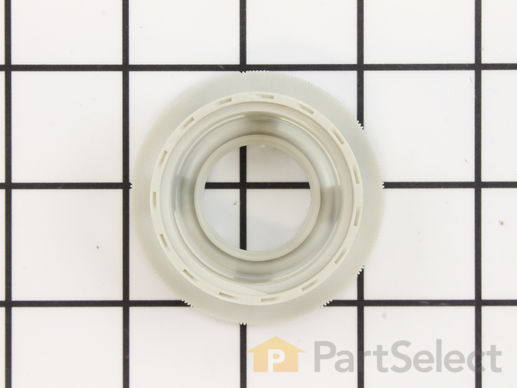
This upper spray arm snap outlet nut is all white in color. It is also a little over two inches in diameter and is made of plastic.

$ 37.63
  In Stock
PartSelect Number PS11746859
Manufacturer Part Number WP912680
Fixes Symptom 1% of time

Rated by 5 customers 


Really Easy 

Less than 15 mins 

Ratings submitted by customers like you who bought this part.   

This gray spray diverter cap is two inches in diameter.

$ 11.08
  In Stock
PartSelect Number PS11747608
Manufacturer Part Number WP99001443

Customer Repair Stories

The spray diverter assembly came off and was locater under the rack next to the heating element - heat melted the plastic diverter and lid

My nephew actually put the new part back on for me. The main problem I had was getting both parts of the diverter ordered at the same time. I had to order the lid after the diverter came in the mail! I did not realize it was a two-part replacement piece. I learned later that the lid was a separate part.
  • Doris from CONCORD, NC
  • Difficulty Level:
    Very Easy
  • Total Repair Time:
    Less than 15 mins
1 person found this instruction helpful.
Was this instruction helpful to you?
Thank you for voting!
Fixes Symptom 1% of time

Rated by 3 customers 


Really Easy 

Less than 15 mins 

Ratings submitted by customers like you who bought this part.   

  No Longer Available
PartSelect Number PS2099042
Manufacturer Part Number 99001442
Fixes Symptom 1% of time

Rated by 10 customers 


A Bit Difficult 

1- 2 hours 

Ratings submitted by customers like you who bought this part.   

This gasket seals the pump.

  No Longer Available
PartSelect Number PS2097779
Manufacturer Part Number 912529

Customer Repair Stories

Leaking at the gasket seal

There were no instructions with the rubber gasket seal . The gasket kept popping off. Finally got it to stay and it still leaked. We actually siliconed it in.
  • Shirley from New Berlin, WI
  • Difficulty Level:
    Very Difficult
  • Total Repair Time:
    More than 2 hours
  • Tools:
    Screw drivers, Wrench set
0 of 3 people found this instruction helpful.
Was this instruction helpful to you?
Thank you for voting!

Pump gasket had deteriorated with age and causing odors.

The dishwasher is well engineered to perform this work.

Remove the bottom two panels to provide access and visibility to base of pump motor.

Locate plastic pump locking lever and push toward rear of DW to unlock pump from DW.

Inside the DW remove basketsand spray arms. Revove screws holding cover over pump motor and remove cover.

From below raise pump motor and support with block (piece of 2x4 worked well).

insde DW, removre old gasket, clean well around pump and botom of DW, install new gasket.

From below remove block to drop pump motro back into place, and re-tighten locking lever by pull toward you.

re-assemble inside componets, run through a rinse cycle to test for leaks and replace bottom panels.


I
  • Kenneth from Brooks, GA
  • Difficulty Level:
    Easy
  • Total Repair Time:
    30 - 60 mins
  • Tools:
    Screw drivers, Socket set
17 of 17 people found this instruction helpful.
Was this instruction helpful to you?
Thank you for voting!
Fixes Symptom 1% of time

Rated by 4 customers 


Easy 

1- 2 hours 

Ratings submitted by customers like you who bought this part.   

  No Longer Available
PartSelect Number PS2099287
Manufacturer Part Number 99001794
Fixes Symptom 1% of time
★★★★★
★★★★★
10 Reviews

Rated by 39 customers 


Really Easy 

15 - 30 mins 

Ratings submitted by customers like you who bought this part.   

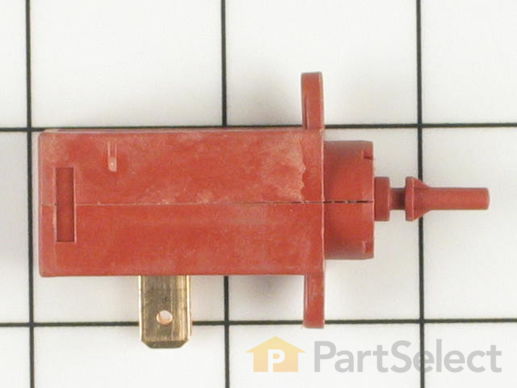
This is a dishwasher wax motor actuator that opens the dispenser cover to dispense dishwashing detergent and rinse aid during the wash cycle in your dishwasher. This is an authentic OEM part from the genuine manufacturer. It is a little over 2 inches long, and mostly red in colour. Disconnect power from your appliance because electrical wires will be exposed during repair. The wax motor is held in place by two tabs for easy release. Once you have gained access to the actuator, simply separate the two tabs and replace the part. This part is sold separately.

$ 56.46
  In Stock
PartSelect Number PS11746831
Manufacturer Part Number WP902899

Replacing your Maytag Dishwasher Wax Motor for Detergent Cup Actuation

Replacing your Wax Motor for Detergent Cup Actuation

Customer Repair Stories

The detergent cup cover would not open and the rinse aid was not dispensing properly

I removed the seven screws from the back panel of the door (special tool) and seperated the back panel from the front. My wife held the back up and I removed the two wax motors (detergent cup and rinse aid), which were clipped in place. I had turned off power to the dishwasher, so I simply unplugged each wax motor from the wiring harness, plugged the wax motors in and clipped them in place, making sure that the wiring harness was put back in the same place. Then I put the back panel back on the door, turned the power on and tested the repair. The dishwasher worked perfectly. Thanks to PartSelect for helping me solve the problem. The parts arrived in two days!
  • Timothy from Northville, MI
  • Difficulty Level:
    Really Easy
  • Total Repair Time:
    15 - 30 mins
12 of 13 people found this instruction helpful.
Was this instruction helpful to you?
Thank you for voting!

The Soap Dispenser would not open duirng wash cycle

I suspected that the wax motor had gone bad based on reviews I had read. The repair requires a TORX bit to remove seven screws holding the plastic cover on the inside of the door. I sat in a chair with the door resting on my knees and took the screws out. Once open, the two wax motors are under the cover and easily accessible. You simply pull the wax motors out and detach two wire plugs. You should note how the wires are attached. The wire plugs were a little difficult to pull off but with a little effort they came straight off. Once new wax motors were installed, the soap dispenser opened.

I was also using a gel dishwasher detergent and was told that, for some reason, it might have begun to act like glue and this might also have prevented the soap dispenser from opening. I switched to powder and that did not solve the problem leading me to replace the wax motors. The soap dispenser spring seems a little weak so I have continued using powder.
  • Roger from Silver Spring, MD
  • Difficulty Level:
    Easy
  • Total Repair Time:
    30 - 60 mins
  • Tools:
    Screw drivers
67 of 69 people found this instruction helpful.
Was this instruction helpful to you?
Thank you for voting!
28 O-RING
Fixes Symptom 1% of time

Rated by 6 customers 


Easy 

1- 2 hours 

Ratings submitted by customers like you who bought this part.   

$ 1.55
  Special Order
PartSelect Number PS11746849
Manufacturer Part Number WP912510
Fixes Symptom 1% of time
★★★★★
★★★★★
1 Review

Rated by 3 customers 


Really Easy 

30 - 60 mins 

Ratings submitted by customers like you who bought this part.   

This part holds the rinse aid liquid in the dispenser until the timer activates the rinse cycle.

$ 55.60
  Special Order
PartSelect Number PS11743034
Manufacturer Part Number WP6-903123

Customer Repair Stories

cover for jet dry

good just screwed in
  • elaine from Virginia, MN
  • Difficulty Level:
    Really Easy
  • Total Repair Time:
    Less than 15 mins
Was this instruction helpful to you?
Thank you for voting!

rinse aid plastic burned and curdled

order replace part easy to use
  • Elinor from VLY COTTAGE, NY
  • Difficulty Level:
    Very Easy
  • Total Repair Time:
    Less than 15 mins
1 person found this instruction helpful.
Was this instruction helpful to you?
Thank you for voting!
Fixes Symptom 1% of time
★★★★★
★★★★★
5 Reviews

Rated by 38 customers 


Really Easy 

15 - 30 mins 

Ratings submitted by customers like you who bought this part.   

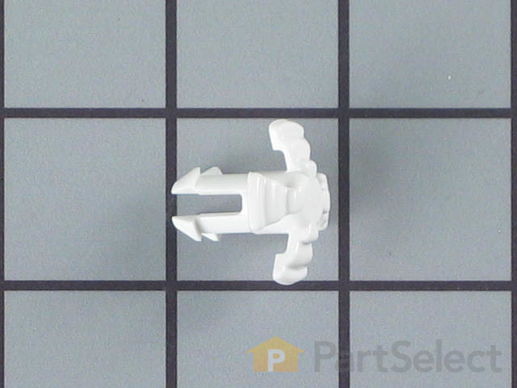
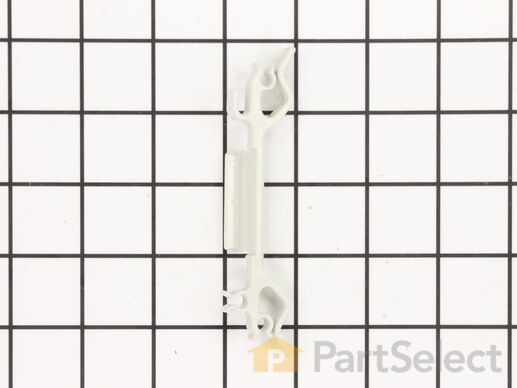
This dishrack clip is intended for use with dishwasher dishracks that have adjustable pegs. This clip is only about four inches long.

$ 11.16
  In Stock
PartSelect Number PS11757601
Manufacturer Part Number WPY912709

Replacing your Maytag Dishwasher Adjustable Peg Clip

Replacing your Adjustable Peg Clip

Customer Repair Stories

broken part

clipped in the replacements and installed the assembly. Easy and thanks, PartSelect.
  • roger from guilford, VT
  • Difficulty Level:
    Really Easy
  • Total Repair Time:
    Less than 15 mins
65 of 126 people found this instruction helpful.
Was this instruction helpful to you?
Thank you for voting!

The dish rack had two sets of adjustable tines that had never worked.

I ordered two clips just in case. Turns out I needed both of them. Since I hadn't seen the adjustable tines installed, it took some time to figure out how to put the assembly together.

For some reason I had the dishwasher for 7 years before it occurred to me to order the replacement parts. It's much more efficient to use with the adjustable tines properly installed as I can load approximately 25% more plates than before.
  • frank from kenmore, WA
  • Difficulty Level:
    Difficult
  • Total Repair Time:
    30 - 60 mins
483 of 491 people found this instruction helpful.
Was this instruction helpful to you?
Thank you for voting!
Fixes Symptom 1% of time

  No Longer Available
PartSelect Number PS2099669
Manufacturer Part Number 99002279
Fixes Symptom 1% of time
★★★★★
★★★★★
6 Reviews

Rated by 23 customers 


Really Easy 

15 - 30 mins 

Ratings submitted by customers like you who bought this part.   

This upper dishwasher dishrack roller, also known as a dishrack wheel, allows you to roll the dishwasher rack easily on the support rails. If your dishwasher rack is disconnected or the rack is broken, then replacing this part might be the solution. The first step in this repair is to remove the upper dishrack from the track, the next step is to remove the defective rack roller and replace it with the new one by sliding it onto the shaft and locking it in. No tools are required for this replacement and customers rate this project as easy. The roller is entirely made from plastic and is just over an inch in diameter.

$ 17.22
  In Stock
PartSelect Number PS11746834
Manufacturer Part Number WP903093

Replacing your Maytag Dishwasher White Dishrack Roller

Replacing your White Dishrack Roller

Customer Repair Stories

The dishwasher roller axle needed to be repaired

I watched the installlation video found on the wedsite and followed his directions.
  • Rosemary from Toms River, NJ
  • Difficulty Level:
    Really Easy
  • Total Repair Time:
    Less than 15 mins
  • Tools:
    Screw drivers
374 of 378 people found this instruction helpful.
Was this instruction helpful to you?
Thank you for voting!

Rack roller broke

I opened the end stop of the rack, replaced the roller, and put the end stop back on. I can't believe I paid the repairman the last time $125????? An he put in a regular screw that rusted and broke the roller. Took me 3 minutes! Thanks
  • Kathy from Lombard, IL
  • Difficulty Level:
    Really Easy
  • Total Repair Time:
    Less than 15 mins
  • Tools:
    Pliers
497 of 502 people found this instruction helpful.
Was this instruction helpful to you?
Thank you for voting!
Fixes Symptom 1% of time

Sold individually.

  No Longer Available
PartSelect Number PS11747666
Manufacturer Part Number WP99002281
Fixes Symptom less than 1% of time

Rated by 2 customers 


Easy 

1- 2 hours 

Ratings submitted by customers like you who bought this part.   

  No Longer Available
PartSelect Number PS2099286
Manufacturer Part Number 99001793
Fixes Symptom less than 1% of time

Rated by 3 customers 


Easy 

1- 2 hours 

Ratings submitted by customers like you who bought this part.   

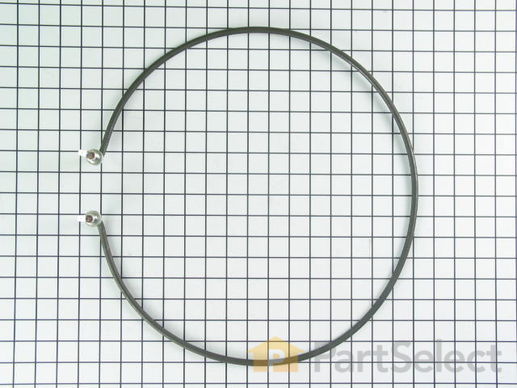
This is just the heating element - The o-rings, sleeves and nuts are sold separately.

  No Longer Available
PartSelect Number PS2099428
Manufacturer Part Number 99001995

Customer Repair Stories

dishes werew not drying anymore

follow the instruction on the web site that you listed.
  • Dan from Bensalem, PA
  • Difficulty Level:
    Easy
  • Total Repair Time:
    Less than 15 mins
  • Tools:
    Nutdriver, Screw drivers, Wrench set
5 of 8 people found this instruction helpful.
Was this instruction helpful to you?
Thank you for voting!

heating element split open

I took the bottom cover off and pulled off 2 wires and removed 2 plastic nuts. I removed the old part and removed the O rings from the old part and installed the new heating element. Replaced the plastic nuts and the two wires. It was very simple. The hardest part was lying on my back to get to the wires and nuts.
  • Hadley from De Leon, TX
  • Difficulty Level:
    Really Easy
  • Total Repair Time:
    Less than 15 mins
  • Tools:
    Nutdriver
14 of 15 people found this instruction helpful.
Was this instruction helpful to you?
Thank you for voting!
Fixes Symptom less than 1% of time

Rated by 10 customers 


Easy 

30 - 60 mins 

Ratings submitted by customers like you who bought this part.   

  No Longer Available
PartSelect Number PS2099734
Manufacturer Part Number 99002354

Customer Repair Stories

Detergent cup was leaking and the detergent just dripped down the side of the door.

Took out the pins that hold the detergent cup on, beginning with the side without the spring. Make sure you check how the side with the spring is installed before you take it out. If it's not done right when you put the new one on the lid won't spring open. Then installed the new detergent cup lid. Easy as pie and it would have cost $50 to just have someone come out to look at it and this cost $12. Can't beat that!
  • Susan from Sidney, OH
  • Difficulty Level:
    Easy
  • Total Repair Time:
    Less than 15 mins
  • Tools:
    Pliers
5 of 6 people found this instruction helpful.
Was this instruction helpful to you?
Thank you for voting!

We had to replace the soap dispenser door because it wouldn't open during the wash cycle.

Open the soap dispenser door. On the top right side, there is a round pin holder. Take a small brad or nail and knock the pin out from right to left. Hold the door in place and after the right side pin is out, carefully slide the door up and to the right in order to remove the pin and spring from the left side slot. Notice how the spring is inserted in the slot as it has to go back in exactly as it came out. (short end first. Long end last.)

Put the spring on the left side pin and reinsert the door into place and then tap in he right side pin.

You're done but you won't know that until you run the dishwasher and if the dispenser door is open
at the end of the wash cycle, you did good. If not you have to reinsert the spring properly or buy a new spring if you've damaged the old one.

Good luck.,

RBM
  • Robert from Hamlet, NC
  • Difficulty Level:
    Easy
  • Total Repair Time:
    30 - 60 mins
  • Tools:
    Pliers
5 of 6 people found this instruction helpful.
Was this instruction helpful to you?
Thank you for voting!
Fixes Symptom less than 1% of time
★★★★★
★★★★★
16 Reviews

Rated by 41 customers 


Really Easy 

15 - 30 mins 

Ratings submitted by customers like you who bought this part.   

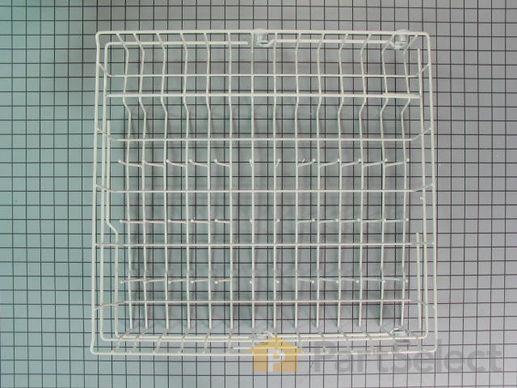
This rack comes complete with four attached wheels and the rack may differ in appearance, but will function same as original part.

  No Longer Available
PartSelect Number PS2099053
Manufacturer Part Number 99001454

Replacing your Maytag Dishwasher Upper Dishrack with Wheels

Replacing your Upper Dishrack with Wheels

Customer Repair Stories

worn out top dishwasher rack

watched the video instructions and followed them. ;Very easy.
  • Mary from SPENCER, IA
  • Difficulty Level:
    Really Easy
  • Total Repair Time:
    Less than 15 mins
1 person found this instruction helpful.
Was this instruction helpful to you?
Thank you for voting!

Our 16 year old dishwasher's top rack lost most of the coated metal 'prongs' that separated/supported items on the upper rack.

With a straight edge screwdriver I carefully removed the plastic end caps on the rack support glider-shelves, replaced the old rack with the new rack, and then reattached the end caps.

I felt better about ordering the part Online after having talked to a sales person since there were several racks from which to choose. She reassured me that I was ordering the correct part number. I am a woman and 62 years of age, and I was pretty sure this installation would be a no-brainer. I just wanted to make sure I had the right part for the job.
  • Cheryl from White Lake, MI
  • Difficulty Level:
    Really Easy
  • Total Repair Time:
    30 - 60 mins
  • Tools:
    Screw drivers
10 of 10 people found this instruction helpful.
Was this instruction helpful to you?
Thank you for voting!
Fixes Symptom less than 1% of time

  No Longer Available
PartSelect Number PS2097729
Manufacturer Part Number 912310