Jenn-Air Washer Dryer Combo Hardware

Jenn-Air Appliance Parts

Popular Jenn-Air Washer Dryer Combo Hardware

Your Price
$7.89
  In Stock
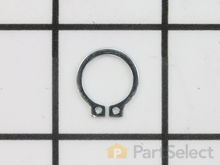
Jenn-Air Washer Dryer Combo Retaining Ring
★★★★★
★★★★★
3 Reviews
PartSelect Number PS11746909
Manufacturer Part Number WP9703438
This part is a retaining ring, sometimes called a retaining clip, that holds the drum support roller onto the shaft of a dryer. It is made entirely of metal and measures less than an inch in diameter. The retaining ring is a genuine OEM part sourced directly from the manufacturer. The ring may vary in appearance due to manufacturer substitution, but the function is the same. You may need to replace this part if the dryer is noisy during tumbling, will not tumble, or takes too long to dry. Be sure to check drum support roller kit and shaft before ordering parts.
Fixes these symptoms
Installation Instructions
gerald from park city, MT
dryer squeeking
removed front panel,lifted top, removed drum and drive belt,remove old rollers and acc and instlled new and reinstalled dryer parts. Read more...
Your Price
$13.48
  In Stock
Jenn-Air Washer Dryer Combo Idler Pulley Shaft Washer
PartSelect Number PS11757538
Manufacturer Part Number WPY312527
This idler pulley shaft washer is used with many clothes dryers. It is less than an inch long, and it is black in color.
Fixes these symptoms
Installation Instructions
Frederick W. from Austin, TX
Motor buzzed and dryer drum would not spin when pressing start
From the first time the motor buzzed (but dryer tumbler then started to turn), 2 weeks elapsed for the dryer drum to stop turning altogether. If this occurs, DO NOT continue to push the start button because the motor armature wiring will heat up and the insulation will begin to melt and smell - a SAFETY HAZARD. Unplug dryer and lockout/tagout as appropriate.

Through basic troubleshooting, discovered the motor had seized up. Since the unit was about 10 years old and it had to be disassembled for replacement, the decision was made to replace "likely to fail mechanical components including motor, belt, both rear drum rollers/shafts, idler arm pulley/assembly/wheel, associated washers, snap rings and both front glides. Reviewed the PartSelect website and drawings, ordered the parts and they delivered on time. Buy the correct sized snap rings at a local hardware, they're much less expensive. Also once inside your dryer, you'll likely find alot of lint to vacuum out...have fun.

I went online and Googled several resources that showed how to remove the front dryer panels, as well as PartSelect repair stories. From that point on, I took photos as I was disassembling so I would know how to put it back together. Utilize pictures or whatever system you prefer to keep track of taking something apart and putting it back together.

Remove the dryer door, then the front panel Disconnect wires to the light, dryness sensor and door switch. Note belt and pulley configuration that is near the motor-this will help you later when reinstalling the belt. Also note if the ribbed side or the flat side of the belt is against the outer drum wall. Remove the door shroud.

Slip the belt off the idler pulley wheel. Remove front drum support, then dryer drum Note which end of the dryer drum is the front and the orientation of the glides on the drum support. Discard old belt. Drill out and remove the old front glide supports, then install/rivet the new glides.

Remove both old rear drum rollers/shafts, washers, etc. The rear drum roller shafts are secured to a back bracket by a hex nut....feel around you'll figure it out. Replace new roller shafts. Lightly grease using a high quality silicon grease, then replace new washers, roller, snap ring, etc

Carefully unplug wiring harness on motor, there are fragile clips on each end. Don't forget a separate ground wire from the harness is attached to the motor mount bracket. Carefully release tension on the idler arm spring. Using the correct size nut driver, remove three screws (on this model) then take out the motor/idler arm assembly. Remove the old idler arm/pulley assembly. Remove the motor mount clips on each end of the mount (I used a wide blade screwdriver). Remove and replace the motor. Motor configurations changed after Whirlpool bought Maytag, so orient it correctly insuring mounting gasket "nubs" on each end of the motor correspond to the cutouts on the motor mount. Reinstall the motor mount clips. Replace the new idler arm assembly/pulley wheel; grease moving parts with high quality wheel bearing grease. Replace motor/mount bracket assembly back into the dryer. Replace ground wire to motor mount bracket and plug wiring harness back in. Reinstall idler arm spring.

Place belt back on the dryer drum and move into place on rear rollers. Reinstall front drum support. Dryer drum should turn relatively easy. Insure belt is oriented on the drum correctly before connecting belt to motor shaft end and idler arm wheel pulley (the picture you took comes in handy here).

Reinstall the rest of the parts in reverse.
Read more...
Your Price
$13.82
  In Stock
Jenn-Air Washer Dryer Combo Drum Roller Shaft Washer
★★★★★
★★★★★
1 Review
PartSelect Number PS11740748
Manufacturer Part Number WP312535
If you notice that your dryer is noisy or will not tumble, then you may need to replace the drum roller shaft washer. This drum roller shaft washer is just under an inch in diameter and is sold individually. It is located on the shaft of the drum roller, in the interior of your dryer. To access the drum roller shaft, you will need to remove the front panel of your dryer, and then remove the drum. Before completing this repair, be sure to disconnect the power source from the dryer. Tools required for this repair include a 5/16 nut driver, a stubby Phillips screwdriver, and a pair of snap ring pliers.
Fixes these symptoms
Installation Instructions
gerald from park city, MT
dryer squeeking
removed front panel,lifted top, removed drum and drive belt,remove old rollers and acc and instlled new and reinstalled dryer parts. Read more...
Your Price
$5.43
  In Stock
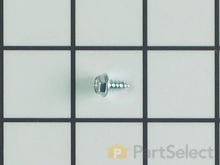
Jenn-Air Washer Dryer Combo Screw, 8/18 x 3/8
★★★★★
★★★★★
2 Reviews
PartSelect Number PS11746840
Manufacturer Part Number WP90767
This screw is sold individually.
Installation Instructions
Alexander from Lakeland, FL
Broken Dryer Knob
First let me just say that Partselect.com is now one my stored favorites in my web browser. I came home from a business trip and saw a pair of pliers on the dryer. I thought that was odd until my wife informed me that the knob on the dryer had broken. So she was using the pliers to select the cycle. Somehow she knew where the missing pointer was actually pointing. Since the dryer was over 5 years old I saw this as an opportunity to upgrade both appliances. Not with my frugal wife. A search of the Internet popped up partselect. I ordered Wednesday morning and the parts where on my doorstep late Thursday. Trust me I was very surprised. Everything worked perfectly. Two thumbs up!!! Read more...
Your Price
$11.80
  In Stock
Jenn-Air Washer Dryer Combo Hose Clamp
★★★★★
★★★★★
1 Review
PartSelect Number PS11743008
Manufacturer Part Number WP596669
This hose clamp is used in a wide variety of household appliances. Most often it is found in washers, dishwashers, refrigerators, freezers, dehumidifiers, garbage disposals, or air conditioners. This clamp is used to securely attach a hose to another part of your appliance, which helps prevent leaks from those connections. Depending on the appliance, it can attach hoses to drain pumps, water inlet valves, pressure switches, and injector nozzles. We recommend you refer to model-specific diagrams for appropriate uses and exact placement. This hose clamp is made of metal, and is sold individually. To access and replace this part you will need a nut driver, pliers, and screwdrivers. Before you begin any repair work, make sure you have unplugged your appliance, and shut off the water supply if applicable.
Fixes these symptoms
Installation Instructions
jeff from lindenhurst, IL
Washing Machine was leaking water
Loosened the hose clamp, removed the injector valve and injector nozzle assembly, replaced both and tightened with new hose clamp. Fixed the problem for less than $20!! Washing machine is 20 years old and this was the first problem--hopefully it is now good for another 20 years! Read more...
Your Price
$5.37
  In Stock
Jenn-Air Washer Dryer Combo Roller Shaft Hex Nut
PartSelect Number PS11741054
Manufacturer Part Number WP33001443
This roller shaft hex nut measures well under an inch long. It is made of metal and is used for Maytag brand clothes dryers.
Installation Instructions
gerald from park city, MT
dryer squeeking
removed front panel,lifted top, removed drum and drive belt,remove old rollers and acc and instlled new and reinstalled dryer parts. Read more...
Your Price
$13.64
  In Stock
Jenn-Air Washer Dryer Combo Blower Wheel Clamp
★★★★★
★★★★★
3 Reviews
PartSelect Number PS11740752
Manufacturer Part Number WP312967
This blower wheel clamp, used in a clothes dryer, is a clamp that holds the blower wheel to the motor shaft. This part helps hold the blower wheel in place to function easily and properly. If your clothes dryer has any of the following symptoms then replacing the clamp can be a solution: making loud noises, not producing enough heat or no heat at all, and/or clothes are taking too long to dry. Make sure to unplug thedryer from power source before installing this part and refer to the installation instructions provided by the manufacturer for further guidance.
Fixes these symptoms
Installation Instructions
Tim from Jacobus, PA
Dryer was making horrible noise,
First I removed the 2 screws behind the door just below the slot for the lint trap(t-15 torx screws). I then popped the top of the dryer off using a flat tipped screw driver and using a 8mm. socket and extension I removed the 2 sheet metal screws from inside of the top corners of the front panel which attach it to the side panels. After that I could lean the front panel away from the unit and unplug the door switch being careful to mark the wires so I wouldn't have to take it apart again in the instance that I hooked them up wrong. I then leaned the front panel out a little more and lifted it off of the pins that lock the bottom of the front panel in. After that, I removed the sheet metal screws(8 mm.) that secure the fan housing cover and removed the old fan which was easy as it had spun the center out of itself and basically fell off, this is what was making all the racket. I removed the c-clip which rides in the groove at the end of the shaft with a flat tip and a pair of pliers, slid the new fan blade over the shaft, gave it a few light taps with the end of a hammer handle to seat it properly and installed the tension clamp with some pliers and popped the c-clip back on. I reversed the tear down procedures and reassembled the drier. Thanks to a little no-how, mechanical inclination, and the right parts, I was able to restore my drier to like new, virtually silent operation for about $40 as opposed to buying a new unit or paying a repairman $80 to $100 per hour plus parts to do the job. PartSelect.com made specifying and ordering the correct parts the first time a breeze and their prices are a bargain to boot.
Thanks,
Read more...
Your Price
$14.40
  In Stock
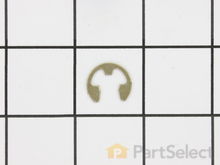
Jenn-Air Washer Dryer Combo Idler Shaft Retaining Ring
PartSelect Number PS11741848
Manufacturer Part Number WP354987
This idler shaft retaining ring is well under an inch long and is made of metal.
Fixes these symptoms
Installation Instructions
Scott from Davie, FL
Squeaking noise when dryer was on! Very annoying!
If your dryer is squeaking it is most likely either the idler pulley or drum rollers. First I took apart the dryer to see which parts I would need. I checked the drum rollers by spinning them with my hand to see if they spun freely and also checked them to see if they were loose, they were okay. Then I checked the idler pulley and found my problem, it was hard to spin it so I figured the bearing was shot. I sprayed some lubricant on the bearing to help with the squeaking while I waited for my parts. It took about 30 minutes to diagnose my problem and put the dryer back together.
I took some advise from another story saying to get the whole idler arm, shaft and pulley assembly. It might have cost me a few bucks more, but I did not want to run into the same problem he did (the pulley bearing was fused to the shaft). It took me about 20 minutes to take apart the dryer, install the part, and put it back together. If you are pretty good with fixing things, you should have no problem doing this repair.
Read more...
Your Price
$58.09
  In Stock
Jenn-Air Washer Dryer Combo Glide and Spring Kit
★★★★★
★★★★★
6 Reviews
PartSelect Number PS2017149
Manufacturer Part Number 205000
This glide and spring kit contains two three inch springs, four one inch square glides, and two tubes springs. This kit replaces older style round roller glides.
Fixes these symptoms
  • Burning smell
  • Spins slowly
  • Will not agitate
  • See more...
Installation Instructions
dominic from weirton, WV
The belts were not staying tight enough to agitate properly.
Firstly, remove ac power from washer!
After removing the front panel of the washer (two philips screws), I loosened and removed the plastic motor cover and removed three hex head screws holding the motor. Have someone help you tilt the washer so you can remove the belts by "rolling" them off of the pullies (pump pully and motor pully). What I did was use a chemical degreaser to clean the motor base metal channel where the nylon sliders reside. After doing that and letting it dry, I removed the two old
springs. I ended up reinstalling the old springs because they were not stretched and I installed a new spring (total three) on the right side of the mount. A stiff metal rod with a hook on the end will help you install the springs. Squirt some of the included silicone lubricant on both sides of the motor mount channel and exercise the lube. Reinstall the motor and plastic cover over top of motor. Clean hands and clean belts while you have them out, reinstall belts and front cover and you're finished. My wife said it never ran better!
Read more...
Your Price
$11.12
  In Stock
Jenn-Air Washer Dryer Combo Hose Clamp
★★★★★
★★★★★
2 Reviews
PartSelect Number PS11740613
Manufacturer Part Number WP285655
The hose clamp is used to hold the water hose in place which will prevent the hose from leaking water. Sometimes the clamp may lose its ability to latch on, causing a leaking washer. For the installation, you will need a flat head screw driver to replace the clamp and a drill to access the screws to remove the front of the washer. Be careful if you do not have specific clamp pliers as the clamp could fly off. Once the front of the washer has been removed, take a quick look for water damage or any obvious signs of where the leak is coming from. If it is not obvious, run water to test.
Fixes these symptoms
Installation Instructions
Stephen from Laveen, AZ
Drive Pump Leaked
It took some trial and error but overall not a difficult project. 1. Take the front covers off. 2. Undo the pully spring to loosen belt 3. Remove belt off idler pulley wheel and free up belt from the large wheel. 4. Disconect the wiring harness and the hoses. 5. Undo the motor mounting bolts (4) 6. Take motor out of washer and remove the 3 screws holding the pump to the motor. 7. The pump had melted to the shaft and required I chisel the pump off of the shaft. 8. Attach new pump paying attention to where the belt is positioned. 9. Reattach the motor bolts, hoses, and wiring harnes. 10. Attach the belt and test the pump. 11. Put the front back on. Read more...

Related Jenn-Air Washer Dryer Combo Parts