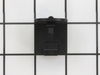
This surface burner element switch is for an 8-inch surface burner on an oven, stove, or range. The element switch controls the heat of the surface burner. Disconnect power to your range before comple...
$95.44
In Stock
Order within the next 5 hrs and your part ships today!
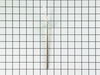
This oven temperature sensor, for ranges, works together with the oven control board to measure and regulate the oven temperature. The sensor detects the temperature in the oven cavity. If the followi...
$94.68
In Stock
Order within the next 5 hrs and your part ships today!
This is a multi-use and multi-appliance screw. It can be used on a microwave, refrigerator, range/oven, air conditioner, dehumidifier, washer, or dryer. The measurements of this screw are 8 x 1/2 inch...
$20.79
In Stock
Order within the next 5 hrs and your part ships today!
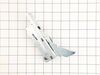
This part is for oven ranges, it connects individual wires and protects the device from electrical surges, voltages, and current. With this part, the house power is connected to the range wire harness...
$34.09
In Stock
Order within the next 5 hrs and your part ships today!
This touch-up paint can be used on a wide variety of household appliances. It is most often used on washers, dryer, refrigerators, dishwashers, ranges, freezers, trash compactors, or microwaves. It is...
$8.00
In Stock
Order within the next 5 hrs and your part ships today!
This is cookware designed for use in your range or oven. It is a two-piece dish that is used to grill or cook food while the broil function is on, meaning it can withstand high temperatures. This set ...
$37.51
In Stock
Order within the next 5 hrs and your part ships today!
The light socket on your electric range connects the power source to the light bulb. If your oven light is malfunctioning, you may need to replace the light socket. The light socket is located in the ...
$59.64
In Stock
Order within the next 5 hrs and your part ships today!
This part is used as a safety feature. If your range overheats this part will shut the range down.
$40.28
In Stock
Order within the next 5 hrs and your part ships today!
Questions And Answers for WFE320M0ES2
We're sorry, but our Q&A experts are temporarily unavailable.
Please check back later if you still haven't found the answer you need.
13 questions answered by our experts.
Sort by:
< Prev
1
2
3
Next >
Search filter:
Clear Filter
Your search term must have 3 or more characters.
Keep searches simple. Use keywords, e.g. "leaking", "pump", "broken" or "fit".
Sorry, we couldn't find any existing answers that matched.Try using some different or simpler keywords, or submit your new question by using the "Ask a Question" button above!
Marty
October 28, 2021
Both the oven and broiler elements will not function when they are programmed to do so. Are the elements likely out?
For model number WFE320M0ES2
Hello Marty, thank you for writing. Most times the Bake Element PartSelect Number PS12348633 and the Broil Element PartSelect Number PS11756537 do not go out at the same time. It is most likely the Range Oven Control Board PartSelect Number PS12114373 as it controls both elements.
Thank you for your prompt and helpful replay. I communicated with you incorrectly as the time the elements went out. The bake element was the first to go followed by the broiler element. Not sure if this changes anything. The unit was less than a year old! Please advise.
For model number WFE320M0ES2
Hi Marty,
Thank you for providing us with this information. If the elements in the oven are no longer working, the issue may be with the oven sensor. The oven temperature sensor is the part that monitors the oven temperature and signals the electronic control board to turn the elements on and off. Before removing this part from the oven and testing it with a multimeter for continuity, unplug the oven from the electrical outlet. To test the sensor, you will need to reference your owner’s manual to determine what the correct reading should be for your model, as this varies from model to model. To test it for continuity, use a multimeter on the Rx1 setting and touch the terminals with the probes. This test needs to be done with the sensor at room temperature to produce accurate results. If your test results do not meet the manufacturer’s guidelines, you need a replacement temperature sensor. If the sensor is fine, you will need to check the elements, the electronic control board and the wiring between the parts to see which one is causing the issue. You will find the information on how to test these parts under Free Repair Help and Instant Repairman on our website. We hope this helps! Good luck with the repair!
My oven does not heat up nor do the surface burners. My stove/oven is less than 1 year old. The panel on the stove reads f9. What can i do to solve this problem?
For model number WFE320M0ES2
Hello Patrick, thank you for your question. F9 could indicate that the appliance is wired incorrectly, that the control detected an incorrect voltage amount, or that keys were pressed before the 10-second delay on power-up. We suggest powering the unit down by turning off the circuit breaker(s) for one (1) minute. If this does not work, you may need to contact a qualified electrician to verify the electrical supply. I hope this helps!
Was this helpful?
Thank you for voting!
Cory
June 27, 2021
Oven will not heat up. Cook top works fine. What part do I need?
For model number WFE320M0ES2
Hello Cory, Thank you for the question. If both the bake and broil elements are not working, this is normally an indication the Range Oven Control Board is defective and will need to be replaced. We hope this helps!
Hi! Our oven works fine but the indicator for the cooktop light is on, all the time. The cooktop and everything else is off but the light won't turn off- we tried unplugging it, plugging it back in, etc. Could this be a sensor issue?
For model number WFE320M0ES2
Hello Bridget, Thank you for the question. Normally this is an indication the switch that was in use at the time the light became "stuck" on is faulty and may need to be replaced. The Switch also controls when the light turns off. Thank you for your inquiry, good luck with this repair!
Opened up the back of the stove. Unpluged the sensor. Replaced the sensor. Replace the back of the stove.
The sensor that has been replaced is not what is expected. After reading all of the instructions for adjusting the temperatures, the only temp that stays steady is when we first turn on the oven to 350 degrees. That stays s
... Read moreteady but when I turn it to 400 it slowly goes up to 425 degrees.
I numbered every part. ex: 1 L., for first part removed left side. I used a magic marker to circle the holes and wrote the number of screws used on the part, set the srews in a separete place, so that I new where these screws went to. The cleanup was pretty time consuming, but I was able to keep my stove, when every repairman I called to
... Read more fix my stove told me I was better off buying a new stove. ($600.00 stove 2 years old)Please Note: The insulation blanket needed for the entire stove is two pieces, the sides and top are one part # and the bottom and back, are another part #. I did not know this. I just purchased the top and sides. I got lucky, the back and bottom were still in good shape. So I guess I should have read the description of the part more carefully to see what it covers, before I ordered it. It took two people two hours to do the work, it was really nice to have an extra set of eyes, to remember what direction pieces of metal from the stove went. I would do it all over in a heart beat instead of buying a new stove.
removed the screws holding the back metal panel, this exposed the wires to the switch. tested the wires to find that they were live when the switch was in the off position. ordered a new switch. UNPLUGED THE STOVE. removed the knob on the front of the stove. this exposed 2 screws, removed screws and the switch came away from the stove. re
... Read moremoved each wire from the old switch and replaced them in the same position on the new switch. inserted new switch into the stove and attached the 2 screws. replaced back panel and pluged in stove. all tested well


")


