Models > MAV7600AWW > Symptoms > Will not drain

Parts That Fix Maytag Washer MAV7600AWW Will not drain

Will not drain is a commonly reported symptom for the MAV7600AWW Maytag Washer, and we have put together a full guide on how to fix this. This advice is based on feedback from people who own this exact appliance. We have listed the most common parts for your MAV7600AWW Maytag Washer that will fix Will not drain. We have included repair instructions, and helpful step-by-step video tutorials. If you are experiencing this issue, not to worry, DIYers just like you have fixed this, and shared their experience to help you!

Fixes Symptom 42% of time
★★★★★
★★★★★
24 Reviews

Rated by 84 customers 


Easy 

30 - 60 mins 

Ratings submitted by customers like you who bought this part.   

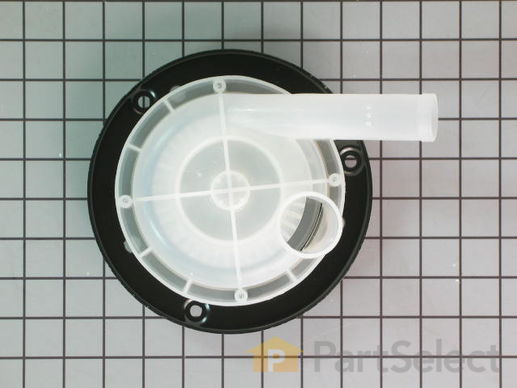
This drain pump with pulley, also known as the washing machine drain pump assembly, is a pump with two ports. The function of this pump is to help expel water from your washing machine. The pump is activated after the spin speed has been maintained for a specific period of time and is driven by the same drive belt that also runs the transmission pulley. If your washer is not draining properly the pump could be clogged by a small object or could be broken and in need of replacing. Tools you will need for this repair include a 5/16 nut driver, a putty knife, a 3/8 socket with a ratchet, and a pair of slip joint pliers.

$ 84.79
  In Stock
PartSelect Number PS11741799
Manufacturer Part Number WP35-6465

Replacing your Norge Washer Drain Pump with Pulley

Replacing your Drain Pump with Pulley

Customer Repair Stories

Load Grinding/Rubbing Noise in Rinse and Spin Cycles

First unplug the washer for the electrical outlet. You will need to tip the washer back to get to the bottom of the machine. There you will see the belt that drives the transmission and the water pump from the motor. Remove the belt and set it to the side. Then you will need to gain access to the top side of the machine by gently using a screwdriver to pry the front of the top up off the front panel on both sides then hinge it back out of the way. Use a nut driver to remove the two screws on the inside edge of the front panel and remove the front panel. Once the front panel is off you will see the water pump on the right hand side as you face the front of the machine. Remove the hose clamp on the water pump with the flat head screw driver or nut driver and use a pair of pliers to remove the compression clip on the water pump. Remove the 4 bolts holding the water pump in place. Reverse the entire process to put it back together. This job was very easy and I was only without a washer for 2 days because of partselect.com.
  • Doug from Port Richey, FL
  • Difficulty Level:
    Really Easy
  • Total Repair Time:
    Less than 15 mins
  • Tools:
    Pliers, Screw drivers
139 of 151 people found this instruction helpful.
Was this instruction helpful to you?
Thank you for voting!

washing machine was making alot of noise

I found the water pump bearings were going bad from humidity. I replaced the pump with a new one and it runs quiet again.
  • David from Boca Raton, FL
  • Difficulty Level:
    Easy
  • Total Repair Time:
    Less than 15 mins
  • Tools:
    Screw drivers, Wrench set
561 of 571 people found this instruction helpful.
Was this instruction helpful to you?
Thank you for voting!
Fixes Symptom 36% of time
★★★★★
★★★★★
28 Reviews

Rated by 49 customers 


Easy 

30 - 60 mins 

Ratings submitted by customers like you who bought this part.   

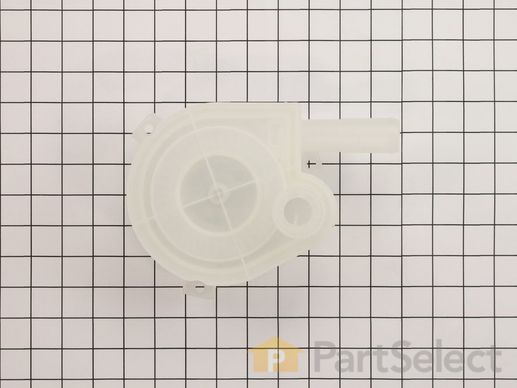
This pump helps expel water from the washing machine and is activated after the spin speed is maintained for a specific period of time. If your machine is not draining properly or if it is noisy and shakes during operation, you may need to replace the drain pump. This is a redesigned part. The pump now mounts on to the base of the washer. This product is made of white plastic and has a metal center. Before you can replace the drain pump, you will have to disengage the drive belt under the machine. To reach the drain pump you will need to remove the access panel on the backside of the washing machine.

$ 120.36
  In Stock
PartSelect Number PS11741803
Manufacturer Part Number WP35-6780

Replacing your Maytag Washer Washer Drain Pump

Replacing your Washer Drain Pump

Customer Repair Stories

Skreeching noise during spin cycle

Pulled out washer, laid on front, removed access panel and the pump was right there. Three screws with 5/16" nut driver, pliers to release hose clamps, remove hoses, remove belt from pully, remove old pump. Install new pump with three screws, two hoses and clamps, finally put belt on new pulley and other small pulley and used screw driver shaft to pull belt on to large pulley. replace access panel, put washer back in place. It literally took me more time to clean the floor under where the washer was than to change the part. Piece-o'-cake.
  • Robert from Mesa, AZ
  • Difficulty Level:
    Really Easy
  • Total Repair Time:
    15 - 30 mins
  • Tools:
    Nutdriver, Pliers, Screw drivers
64 of 65 people found this instruction helpful.
Was this instruction helpful to you?
Thank you for voting!

bearing on water pump siezed

back panel,belt two hoses,three screws, $100 dollars for the part!! pump is a molded part with a bearing insertion, is made in USA ! I'm guessing around 7 to 10 dollar manufacturing cost. I'm thinking that kind of mark-up is only exceded by the pharmacutical industry. I'm looking to buy a used machine for parts!!
  • kevin from rochester, NY
  • Difficulty Level:
    Really Easy
  • Total Repair Time:
    Less than 15 mins
  • Tools:
    Nutdriver, Pliers
119 of 133 people found this instruction helpful.
Was this instruction helpful to you?
Thank you for voting!
Fixes Symptom 8% of time
★★★★★
★★★★★
15 Reviews

Rated by 34 customers 


Easy 

30 - 60 mins 

Ratings submitted by customers like you who bought this part.   

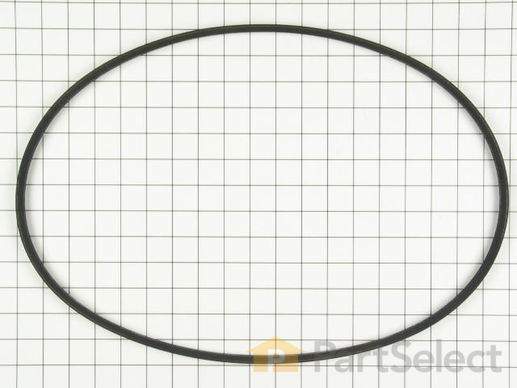
This washing machine drive belt is used with some clothes washers. This belt is all black in color and is made entirely of rubber.

$ 37.84
  In Stock
PartSelect Number PS11739438
Manufacturer Part Number WP22003483

Replacing your Maytag Washer Drive Belt - 52 inches long

Replacing your Drive Belt - 52 inches long

Customer Repair Stories

Belt was slipping, belt particles on the floor

I removed the screws to loosen the belt, took off the old belt and put on the new belt. Tightened it up and has been working ever since.

Thank you, Lester

you guys ship faster than anyone else. One day I order the part and a day or two later there it is. :)
  • Lester from Elk Grove, CA
  • Difficulty Level:
    Really Easy
  • Total Repair Time:
    Less than 15 mins
  • Tools:
    Pliers
5 of 6 people found this instruction helpful.
Was this instruction helpful to you?
Thank you for voting!

Wife complained the spin dry not so good

First tip front of washer up about six inches and block. Removed belt by holding the old belt to the side of the big pulley and turn big pulley on opposite side with the other hand. Old belt was dirty, black and some carbon on floor. Cleaned up. Put belt around motor pulley and water pump pulley. Hold belt in track of big pulley. Turn big pulley with opposite hand until belt goes around the big pulley. The motor has a spring that maintains the tension.

Wife thinks everything is back to normal. Get a cool drink out of refrigerator while she carries on and thinks you are a hero.

Special note: Be sure water is out of washing machine. There are instructions on the internet but I have owned Maytags for over forty years and know belt replacements are occassionally replaced.
  • Stephen from Tehachapi, CA
  • Difficulty Level:
    Really Easy
  • Total Repair Time:
    15 - 30 mins
21 of 22 people found this instruction helpful.
Was this instruction helpful to you?
Thank you for voting!
Fixes Symptom 5% of time
★★★★★
★★★★★
16 Reviews

Rated by 25 customers 


Easy 

1- 2 hours 

Ratings submitted by customers like you who bought this part.   

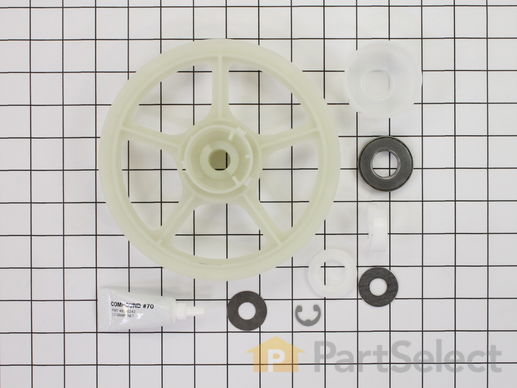
This transmission pulley and bearing kit, also known as thrust bearing kit or washer pulley and bearing kit, includes the pulley, washer, thrust bearing, two upper race washers, and one lower race washer. These genuine Whirlpool parts are plastic and are not sold individually. The kit is used to help the washer drain, and may need to be replaced if the washer is experiencing slow or no spin, will not drain, or has no agitation. The washer will need to be tilted on its back or side to access the bottom. The tools needed to complete this repair are a small flat blade screw driver and a pair of slip joint pliers.

$ 69.96
  In Stock
PartSelect Number PS2003651
Manufacturer Part Number 12002213

Replacing your Maytag Washer Transmission Pulley and Bearing Kit

Replacing your Transmission Pulley and Bearing Kit

Customer Repair Stories

washer would not spin water out in heavy loads

You do not have to remove any water lines to do this repair. Just unplug the machine from the electric outlet and tip it up on its back to make the repair. I removed the old belt and parts per the instructions. The new kit does not look like the old one. Make sure you mark the minimum and maximum marks with a sharpie on the plastic pulley before intalling it. This will help line up the cam bearing to test the spin cycle. The repair kit says to use the thickest washer but mine would not fit on so I used the thinner washer. Keep the other washer so that in the future if the plastic part wears down and you have spinning problems again you can replace it with the thicker washer. Also make sure you buy a new belt and replace the belt. I loaded it up with a full load of jeans and it works great.
  • marcus from mansfield, TX
  • Difficulty Level:
    A Bit Difficult
  • Total Repair Time:
    30 - 60 mins
  • Tools:
    Pliers, Screw drivers
41 of 46 people found this instruction helpful.
Was this instruction helpful to you?
Thank you for voting!

washer would agitate, drain, but would not spin

I put the washer on the spin cycle and could see that the tub wanted to move. While it was trying to spin I leaned the washer forward and saw that the motor was spinning and the belt was turning, but the tub wasn't. Did some reading and it was the thrust bearing. I ordered the part and replaced them (very easy, follow the directions that come with the set). After install, the tub would spin.
  • michael from mountain home, ID
  • Difficulty Level:
    Really Easy
  • Total Repair Time:
    15 - 30 mins
  • Tools:
    Screw drivers, Wrench (Adjustable)
42 of 47 people found this instruction helpful.
Was this instruction helpful to you?
Thank you for voting!
5 Timer
Fixes Symptom 4% of time
★★★★★
★★★★★
1 Review

Rated by 13 customers 


Easy 

15 - 30 mins 

Ratings submitted by customers like you who bought this part.   

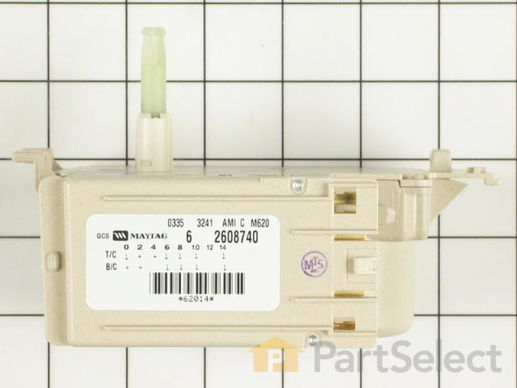
The timer controls most of the operations of the washer: water level, tub filling and emptying, length of cycles, and cycle setting sequences.

$ 288.96
  In Stock
PartSelect Number PS11739439
Manufacturer Part Number WP22003499

Customer Repair Stories

Washer was not running thru rinse cycle

Removed upper back cover to expose the timer, the whole panel could then be tipped foward which made it easy to work on.
Removed the dial knob on front by popping off the cover then pryed up a smaller plastic button used to hold the knob in place.......knob slid off.
Disconnected wire harness from the switch.......had to pry up the snap tab that holds it in place.
Had to remove a small electrical board attached to the back of the timer......used screwdriver to pop it up and out (gently).
Removed one hold-down screw, lifted a little lock-tab and slid the unit to the left and lifted out and replaced.
I'm sure I forgot something.........but the whole thing was pretty easy to figure out .
  • Gary from Temple City, CA
  • Difficulty Level:
    Easy
  • Total Repair Time:
    30 - 60 mins
  • Tools:
    Nutdriver, Screw drivers
13 of 16 people found this instruction helpful.
Was this instruction helpful to you?
Thank you for voting!

Washer would skip the rinse and spin cycle and just keep on washing

1. Removed 3 phillips head screws and 2 hex head screws from upper back cover to expose the timer.
2. Removed the dial knob on front by popping off the cover with a screw driver then pryed up a smaller plastic button used to hold the knob in place.......knob slid off.
3. I then was able to tilt the whole panel forward to gain total access.to the wiring and timer
4. Disconnected wire harness from the switch.......had to pry up the snap tab that holds it in place.
5. Had to remove a small electrical board attached to the back of the timer......used screwdriver to pop it up and out (gently).
6. Removed one hold-down screw, lifted a little lock-tab and slid the unit to the left and lifted out and replaced.
7 . Reversed the above steps to install. This is not hard at all .>>.very easy to replace.
Machine works perfectly and I saved a couple hundred dollars for an appliance technician.
Thanks to the previous poster . I copied some of their comments and added some other comments..

The service and prompness from Parts Select was excellant and quick delivery.
  • Thomas from Vineland, NJ
  • Difficulty Level:
    Easy
  • Total Repair Time:
    15 - 30 mins
  • Tools:
    Nutdriver, Screw drivers
29 of 31 people found this instruction helpful.
Was this instruction helpful to you?
Thank you for voting!
Fixes Symptom 2% of time
★★★★★
★★★★★
6 Reviews

Rated by 13 customers 


Easy 

30 - 60 mins 

Ratings submitted by customers like you who bought this part.   

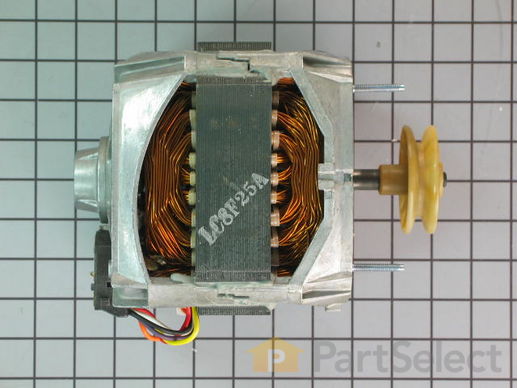
This motor is a 2 speed, 1/2 HP, 120V, 60Hz.

$ 163.71
  In Stock
PartSelect Number PS11738839
Manufacturer Part Number WP21001950

Replacing your Maytag Washer Motor with Pulley

Replacing your Motor with Pulley

Customer Repair Stories

broken motor pulley

i removed the plastic cover.then i disconnected the harnest.i then removed the 2 screws and took the motor out. i took a hack saw blade and made a mark in the old pulley. i then took a screw driver and put it in the crack and tapped on it and the old pulley fell apart. i then put on the new pulley and reconnect the motor. i then reconnect the belt.my washer is working great.it was so easy and i save myself some money in the process.
  • leighton from staten island, NY
  • Difficulty Level:
    A Bit Difficult
  • Total Repair Time:
    30 - 60 mins
  • Tools:
    Screw drivers, Socket set, Wrench (Adjustable)
62 of 76 people found this instruction helpful.
Was this instruction helpful to you?
Thank you for voting!

The belt and pulley on the drive motor broke

unplug the washer. Removed the top of the washer by removing the hold scews and tabs on the upper back. Place a scew drive under the front and pry up to release the snap tabs. Then the front panel by removing the two screws on top and lift the panel up to expose the motor at bottom front. Remove the motor cover (plastic)and motor from the base, replace the pulley on the shaft (you may need to break or pry the old pulley off) install the new pulley making sure it is all the way up the shaft locking the tabs into the shat groove. Reinstallmotor to the base. To replace the belt, tilted the unit backwards to access the pulleys from the bottom and installed.
Note: it ios easier to install the belt fully on the two smaller puleys attcahed to the drive motor and pump and then wrap as much as you can around the larger drum pulley. Hold the belt in one hand and turn the drum pulley clockwise with the other and the belt will follow and install. reverse steps to reassemble.
  • Michael from Warminster, PA
  • Difficulty Level:
    Really Easy
  • Total Repair Time:
    30 - 60 mins
  • Tools:
    Screw drivers, Wrench (Adjustable)
152 of 190 people found this instruction helpful.
Was this instruction helpful to you?
Thank you for voting!
Fixes Symptom 2% of time
★★★★★
★★★★★
4 Reviews

Rated by 3 customers 


Really Easy 

Less than 15 mins 

Ratings submitted by customers like you who bought this part.   

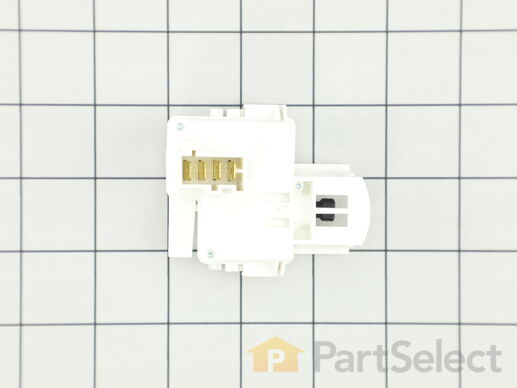
The pin on the lid pushes on the lever of the lid switch to tell the machine that the lid is closed.

$ 56.56
  In Stock
PartSelect Number PS11739463
Manufacturer Part Number WP22003804

Replacing your Maytag Washer Lid Switch

Replacing your Lid Switch

Customer Repair Stories

Had placed clothes, water and detergent in machine but it did not start the cycle.

I am a woman (small) very low on funds and could not see myself spending $140 plus parts. I found your website and was able to determine the cause of the problem, since it did not appear the solution would be too difficult to accomplish I ordered the two parts that could be causing the problem. The parts were delivered in 2 days and I was able to do the repair in less than 15 mins I only used the lid switch. The old parts do just snap out and you snap the new one in. Thank you so much for your site. In these economic times you are a godsend.
Keep up the great work and again thank you!
  • Ines from West Babylon, NY
  • Difficulty Level:
    Really Easy
  • Total Repair Time:
    Less than 15 mins
  • Tools:
    Screw drivers, Socket set
43 of 55 people found this instruction helpful.
Was this instruction helpful to you?
Thank you for voting!

Washing machine shut off at begining of cycle

The washing machine was full of clothes, water, and detergent when it decided to stop working. I pulled the washer away from the wall (I recommend using two people for this), and removed the back access panel (two screws at the top and bottom). With the washer plugged into the wall outlet I used a multimeter to test electrical distribution through the system. Power goes directly to the Lid Switch from the outlet and is disrtibuted to the washer from this point. When I physically engaged the Lid Switch power was not distributed to the system. This told me that the switch was bad. I unplugged the washer from the wall outlet, then removed the Lid Switch.

To remove the Lid Switch, disconnect the wire connection by pulling straight up, pull back then up on the Lid Switch and it should slide out.

Keep in mind when this happened it was 8 or 9 pm, no supply depots open. I don't recommend an amateur performing this, but in order for me to get the clothes washed I made a jumper wire, composed of two wires twisted together at one end, (wires need to be of equal or greater gauge). I inserted the twisted end of the jumper wire into the black wire port of the Lid Switch wiring connector, then inserted one of the wires into the red wire port and one into the yellow wire port of the connector. Making sure the jumper wire did not make contact between the red and yellow, I plugged in the washer. The washer completed the cycle.

Installing the Lid Switch, reverse removal.
  • Jason from Aberdeen, MD
  • Difficulty Level:
    Easy
  • Total Repair Time:
    Less than 15 mins
  • Tools:
    Screw drivers, Socket set
97 of 117 people found this instruction helpful.
Was this instruction helpful to you?
Thank you for voting!
Fixes Symptom 1% of time

Rated by 5 customers 


Easy 

30 - 60 mins 

Ratings submitted by customers like you who bought this part.   

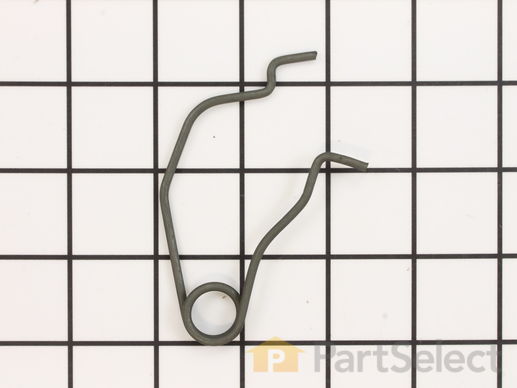
This part is the replacement motor pivot spring for your washer. It is made of metal and is approximately 3 inches long and 2 inches wide. The motor pivot spring helps hold the drive motor in the correct position on the motor plate. If your drive motor shakes during use, if the pumps will not operate, or if your washer is excessively loud during operation, you may need to replace the motor pivot spring. Be sure to disconnect the washer from the power source before you begin this repair. This part is sold individually and is an OEM part sourced directly from the manufacturer.

$ 9.78
  In Stock
PartSelect Number PS11739525
Manufacturer Part Number WP22004376

Replacing your Maytag Washer Motor Pivot Spring

Replacing your Motor Pivot Spring