This microwave door switch provides power to the various components in the microwave when the door is in a closed position, and interrupts power when the door is open. This door switch is approximatel...
This is a light bulb and it is a part for your microwave. This bulb uses 30 watts, operates on 125 volts, and is an incandescent lamp. The function of this bulb is to illuminate the surface underneath...
This micro-switch is designed for use in your microwave. The function of this part is to monitor the door latch position and communicate to the electronic control board whether the latch is open or cl...
The range thermostat is also commonly known as a stove, oven, cooktop, or range thermal fuse. This thermostat protects your oven from excessive heating, and will shut the oven heat off if excessive he...
This bracket holds the metal or plastic flapper that closes off the exhaust duct when the fan is not running and opens when the fan turns on. If the exhaust fan on your microwave does not appear to be...
This metal vent damper door closes off the exhaust duct when the fan is not running to stop outside air from entering the microwave unit, and opens when the fan turns on to allow air to vent away from...
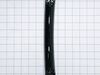
This is the replacement door handle for your microwave. It is made of black plastic and is approximately 11 inches long and 1.5 inches wide. The door handle connects to your microwave door and allows ...
The fuse-time delay may also be known as a line fuse or a microwave fuse, and it is a piece for your microwave. The function of this part is to shut off the microwave if there is a power surge, in ord...
This genuine OEM light socket provides power to the light bulb in your microwave while holding it in place. This light socket is two pronged and the bulb should screw easily into it. If your light bul...
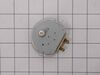
This stirrer fan cover is a genuine replacement part. This piece of plastic covers the stirrer fan and motor. It prevents dirt and grease from getting into the wave guide and damaging your appliance....
No Longer Available
Questions And Answers for LMV1813SB
We're sorry, but our Q&A experts are temporarily unavailable.
Please check back later if you still haven't found the answer you need.
Unplug the unit before servicing. Need phillips screwdriver. Open door. Use step ladder to access and remove 2 small screws from top of the room air diffuser at top of unit. Slide diffuser slightly to the left to align the diffuser's plastic tab on the left side to rotate toward you. (The wires for the front control panel are at the far l
... Read moreeft side of this difuser, but difuser is slotted for easy removal). Once the difuser is removed you will see 1 screw at the top that secures the pannel cover on the left side of the unit. Remove screw and slide this panel slightly up and out. This exposes the plastic frame that holds the upper and lower door switches. To locate the door switches and observe how they work, close and open the door and watch the door (bayonets) open and close the micro switches. Do the (red) buttons on top of the switches move up and down when the door bayonets push and release? If the buttons do not "pop" up when opened the switch is defective. The switch frame is secured with 2 screws. Remove screws and rotate the unit out for easy access to the micro switch(s). The internal (spring?) on my unit that is suposed to allow the red (visible) button on top of the switch to "pop" up when the door is opened was broken. Carefully pry the switch outward while being careful to lift the plastic holder-piece that holds the switch in place. Be careful, there is a small pin on the frame, so rotate the switch OUT toward you while lifting (carefully) the plastic holder-piece (you will see it on top of the switch). You can use an ohm meter to test the continuity of the switches. But if the buttons don't "pop" they are defective. Replace switch and reassemble.
I replaced the whole component with all three switches in it even though only one switch was bad . Taking out one switch out of the holder unit would probably have damaged the unit that was holding the switches. Easy install and it works great again .


 LG Microwave Oven Combo")
 LG Microwave Oven Combo")
 LG Microwave Oven Combo")
 LG Microwave Oven Combo")
 LG Microwave Oven Combo")
 LG Microwave Oven Combo")
 LG Microwave Oven Combo")