Models > GY397LXUS03 > Symptoms > Little to no heat when baking

Parts That Fix Whirlpool Range GY397LXUS03 Little to no heat when baking

Little to no heat when baking is a commonly reported symptom for the GY397LXUS03 Whirlpool Range, and we have put together a full guide on how to fix this. This advice is based on feedback from people who own this exact appliance. We have listed the most common parts for your GY397LXUS03 Whirlpool Range that will fix Little to no heat when baking. We have included repair instructions, and helpful step-by-step video tutorials. If you are experiencing this issue, not to worry, DIYers just like you have fixed this, and shared their experience to help you!

Fixes Symptom 77% of time
★★★★★
★★★★★
33 Reviews

Rated by 53 customers 


Easy 

30 - 60 mins 

Ratings submitted by customers like you who bought this part.   

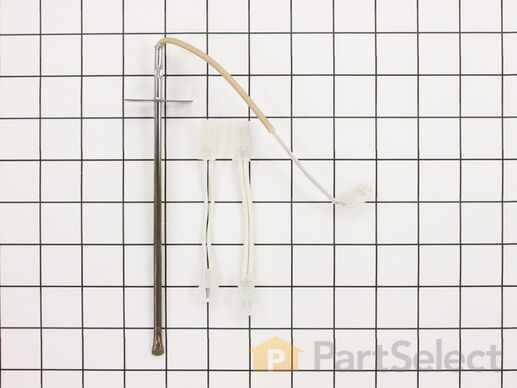
This long oven sensor is also commonly known as a temperature sensor. It is designed for use with ovens and ranges. It is similar to a thermostat; it measures and regulates the internal temperature of your oven cavity. There is an adapter at one end, a probe at the other, and they are connected by an insulated wire. The probe is approximately 7 inches long. You can test the sensor with a multi-meter for functionality. You need to check the model-specific manual to determine what the proper resistance is for your specific appliance. This oven sensor comes with two wire harness adapters and a set of instructions.

$ 34.82
  In Stock
PartSelect Number PS1570174
Manufacturer Part Number 12001656

Replacing your Maytag Range Long Oven Sensor

Replacing your Long Oven Sensor

Customer Repair Stories

F1-1 code

First I removed the two screws that hold the element in place. I then pulled the sensor out about 3 inches and disconnected the two wires. Next, I connected new sensor and screwed the new sensor back in place. One area for caution. Make sure that the electrical connection is pushed in past the insulation on the back side of the oven. Failure to do so will cause the plastic plug connector to melt from oven heat.
  • charles from marstons mills, MA
  • Difficulty Level:
    Really Easy
  • Total Repair Time:
    Less than 15 mins
  • Tools:
    Screw drivers
75 of 100 people found this instruction helpful.
Was this instruction helpful to you?
Thank you for voting!

Oven not holding 350 F, when cooling the coils did not reheat

Removed the oven door by opening slightly, then pic door up to remove. Remove 2 screws holding oven sensor in place, gently pull on sensor to remove, had to remove about 8 inches to get at plastic connector. Unplug connector, had to use an adapter cable supplied with the PartSelect kit to install new sensor, push cable back into opening, reinstall 2 screws. The oven works fine! Note that due to thermal lag the temperature overshoots to 370 degrees and undershoots to 340 degrees, this appears to be normal oven operation. Putting door back in place was easy.
  • David from Westford, MA
  • Difficulty Level:
    Really Easy
  • Total Repair Time:
    15 - 30 mins
  • Tools:
    Screw drivers
157 of 198 people found this instruction helpful.
Was this instruction helpful to you?
Thank you for voting!
Fixes Symptom 21% of time
★★★★★
★★★★★
43 Reviews

Rated by 11 customers 


Really Easy 

Less than 15 mins 

Ratings submitted by customers like you who bought this part.   

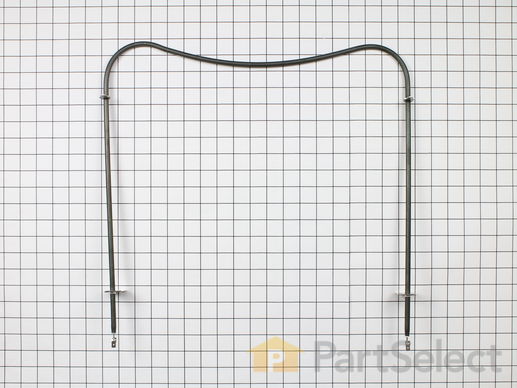
This bake element is found on the bottom of the oven. his bake element is for ranges. The bake element is at the bottom of the oven and supplies the heat for baking. Unplug the range or shut off the house circuit breaker for the range before installing this part. Wear work gloves to protect your hands.

$ 102.53
  In Stock
PartSelect Number PS11752540
Manufacturer Part Number WPW10310274

Customer Repair Stories

Bake element failed

Removed 2 screws holding element to stove then gently pulled element forward to exposed lead connections and disconnected leads to element then reconnected leads to new element and gently pushed element ends back into the openings in the back of the stove and replaced screws to hold element to stove
  • Christopher from Daphne, AL
  • Difficulty Level:
    Really Easy
  • Total Repair Time:
    Less than 15 mins
  • Tools:
    Nutdriver
18 of 21 people found this instruction helpful.
Was this instruction helpful to you?
Thank you for voting!

needed new element. Old one burnt in two

unscrewed and unplugged the old one and plugged in and screwed in the new one. EASY!
  • Elaine from Orfordville, WI
  • Difficulty Level:
    Really Easy
  • Total Repair Time:
    Less than 15 mins
  • Tools:
    Pliers
26 of 35 people found this instruction helpful.
Was this instruction helpful to you?
Thank you for voting!
Fixes Symptom 2% of time
★★★★★
★★★★★
15 Reviews

Rated by 16 customers 


Really Easy 

15 - 30 mins 

Ratings submitted by customers like you who bought this part.   

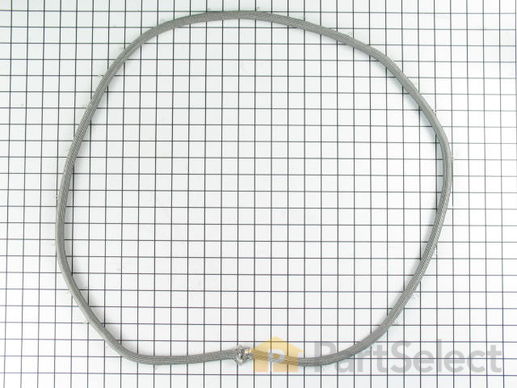
The oven door gasket on your range functions as a seal between the warm interior of your oven, and the outside. It prevents heat from fleeing your oven when the door is closed. Before making any repairs to your oven you should make sure to wear work gloves to protect your hands, and give your oven time to cool. The only tool you will need to make this repair is a pair of needle nose pliers. This oven door gasket comes with built in retaining clips; if any retaining clips from your old gasket are left in the oven make sure to remove them before installing your new gasket.

$ 87.39
  In Stock
PartSelect Number PS11749287
Manufacturer Part Number WPW10162384

Replacing your Maytag Range Door Gasket

Replacing your Door Gasket

Customer Repair Stories

My wife destroyed the oven door seal with oven cleaner...

I ordered the part one afternoon. It arrived before noon the next day. Then I simply removed the old seal (with about 2 dozen spring clips). Inserted the new part by carefully inserting the new seal into its corresponding hole at each end and then worked my way around the seal while inserting each attached spring clip into its corresponding hole.
  • David from Bexley, OH
  • Difficulty Level:
    Really Easy
  • Total Repair Time:
    Less than 15 mins
14 of 16 people found this instruction helpful.
Was this instruction helpful to you?
Thank you for voting!

Needed to replace oven door gasket.

First removed the old gasket using a needle-nose pliers. Then placed new gasket by inserting the little clips on the gasket. Took 5 minutes. Great instructions from Repair Forum.
  • Lori from Scottsdale, AZ
  • Difficulty Level:
    Really Easy
  • Total Repair Time:
    Less than 15 mins
  • Tools:
    Pliers
58 of 69 people found this instruction helpful.
Was this instruction helpful to you?
Thank you for voting!